How To Draw A Go-Kart | A Step-by-step Tutorial
Are you ready to embark on an exciting racing journey? Buckle up; we’ll dive deep into drawing an amazing go-kart.
Before we begin drawing a go-kart, let us tell you something interesting about it. Do you know that the first go-kart was made by using a lawnmower engine? The creativity of people led us to modern go-karts. It is almost similar in shape to a racing car.
Why wait? Begin your magic and make a modern go-kart.
What you will need
- A pencil
- An eraser
- A sheet of paper
- Coloring kit
- Ruler
- 30 minutes
How TO Draw a Go-Kart
Today, we’ll learn how to draw a go-kart. This guide will provide you with all the steps required to make a fantastic go-kart.
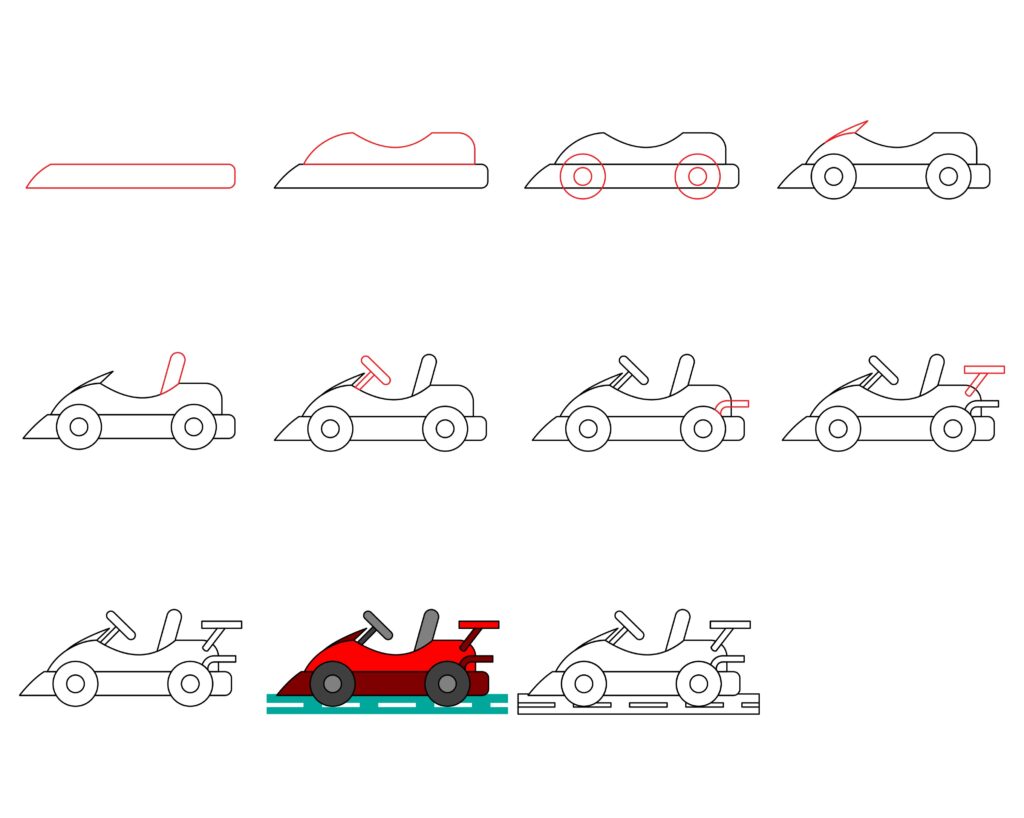
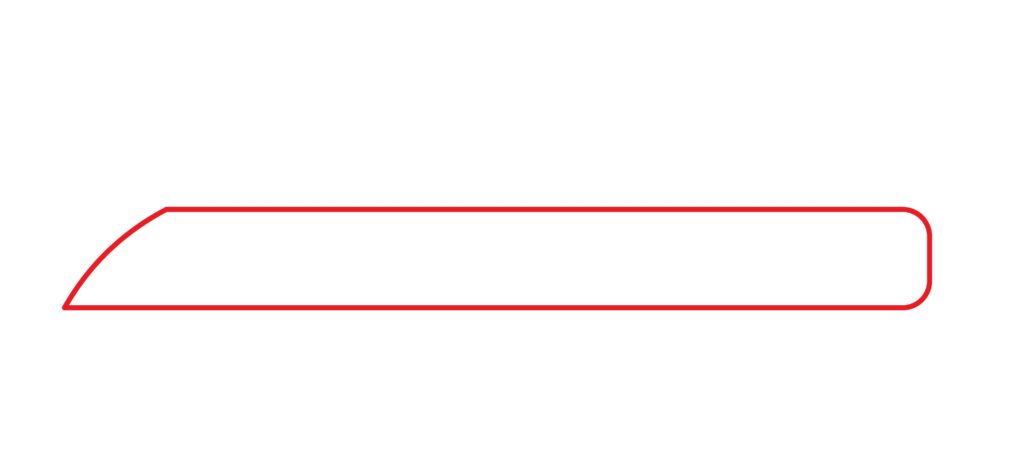
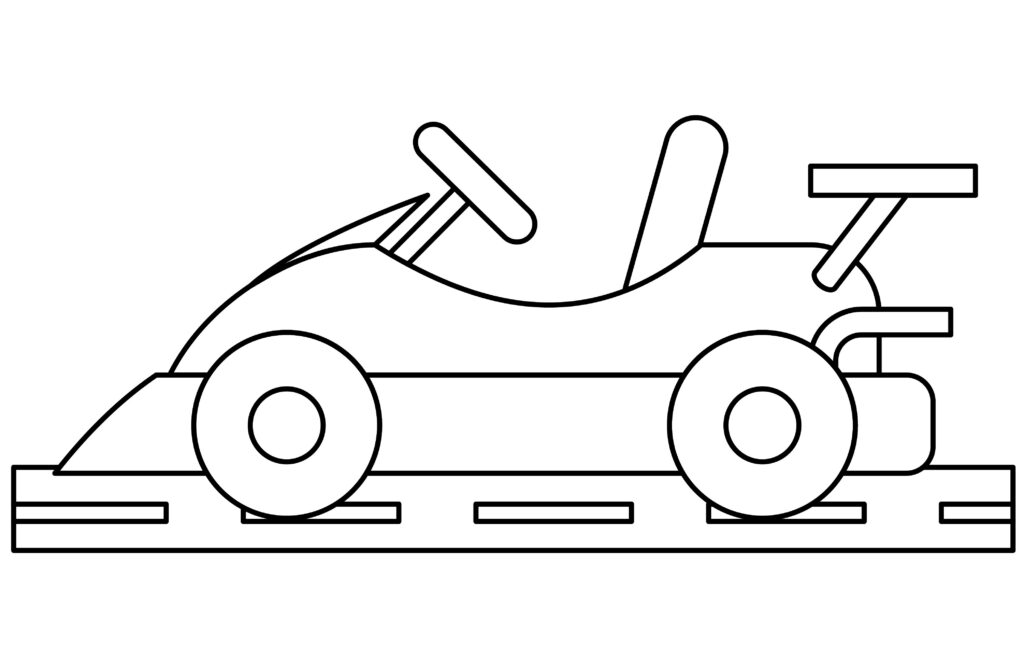
Step 1: Draw the base
The base holds the frame of the go-kart. To draw the base, we’ll draw a horizontal rectangle in the middle of the page. The left side of the rectangle should be streamlined. We’ll draw a slanted vertical line on the left side. We’ll draw the corners on the right side in such a way that they appear curved.
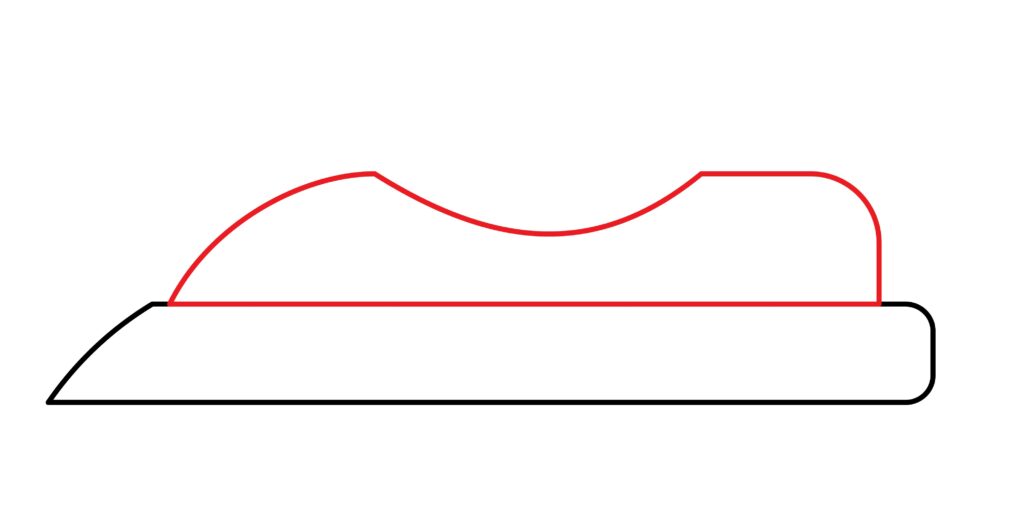
Step 2: Draw the go-kart body
The body of a go-kart is smaller in size as compared to cars like a police car or a vintage car. The body, like the base, is also streamlined. To draw the body, we will draw a rectangle on top of the base in such a way that the left side of the rectangle has a curved line, as shown in the image.
Now, erase some parts from the upper horizontal line of the rectangle. In this erased area, we will draw a curved line facing inside of the rectangle. The top right corner of the body should be curved. This completes the body of our go-kart.
Step 3: Draw the wheels
We need a round lid to draw the wheels perfectly. If we don’t have it, no worries at all!
On the left side of the base, we will mark a point inside the base using our pencil. This will be the center of our circle. Now, we’ll use a ruler and mark four more points (top, bottom, right, and left) at the same distance from the center. We’ll connect these points gently by making curved lines. This way, we’ll have almost a perfect circle. Inside this circle, we’ll draw a small circle. This is the left wheel.
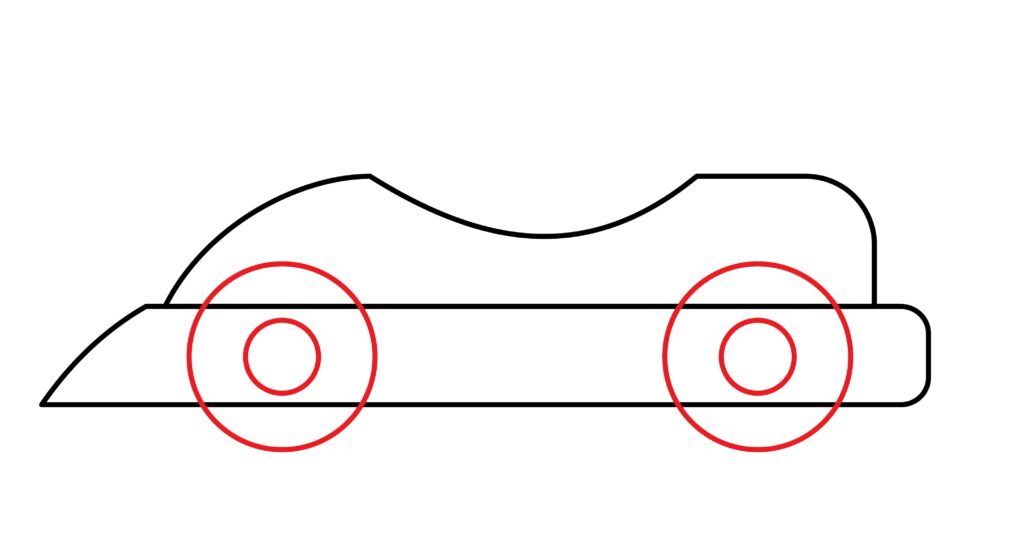
We’ll repeat the same procedure for the right wheel. Remember, it’s fine if the circle isn’t up to the mark. Just try again, and eventually, you’ll have the perfect outcome.
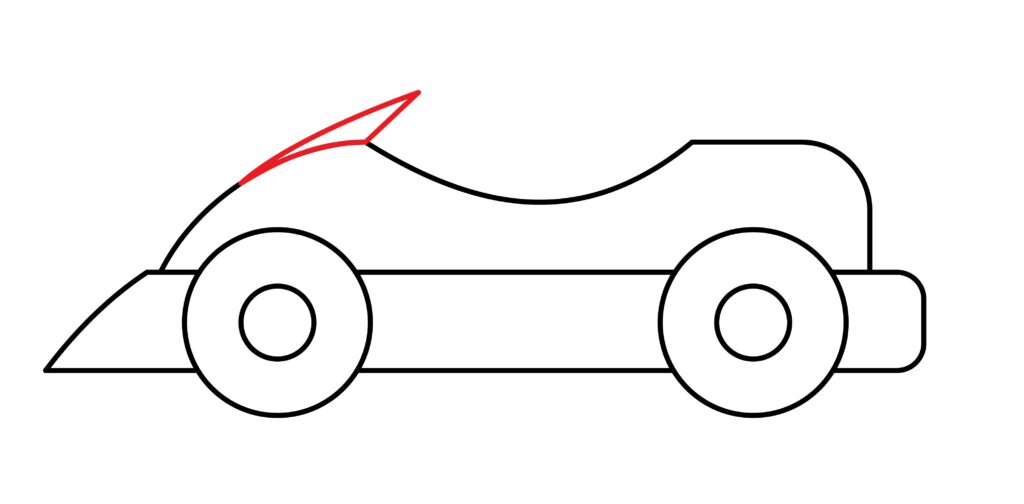
Step 4: Draw the mini windshield
The mini windshield is like a mini triangle on the body. It provides protection against the wind and the debris.
To draw the windshield, we’ll draw a rectangle on the top left side of the body. All three corners of this rectangle should be pointy. The height of the rectangle shouldn’t be too big. Keep it short, as shown in the image.
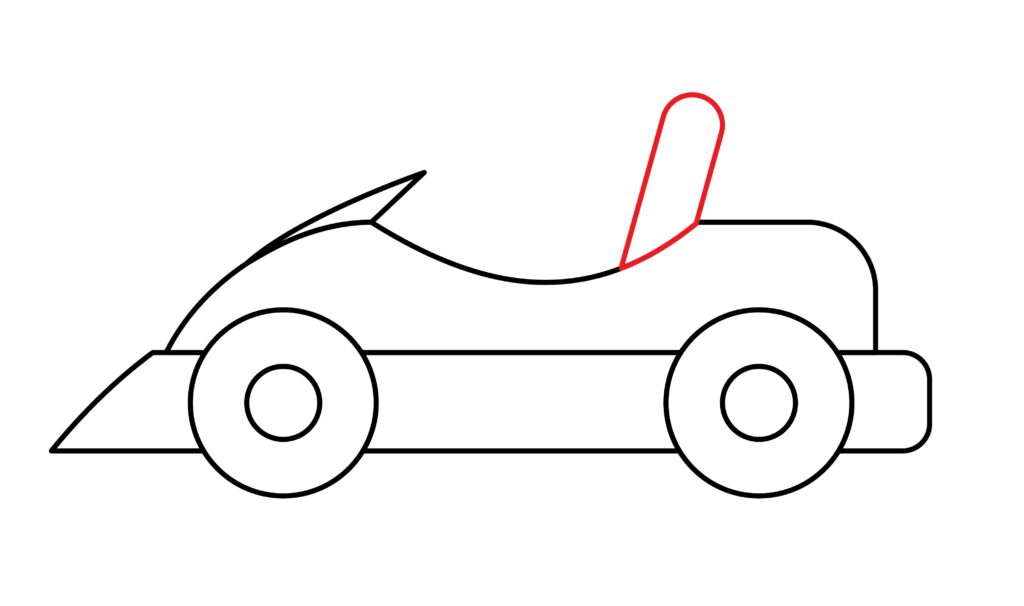
Step 5: Draw the seat
The seat is the comfy and cozy component for the racer. In step 2, we drew the body of the kart. The body had a curved line facing inside of the rectangle.
On this line, we’ll draw two parallel vertical lines slanting towards the right. We will draw a curved line to connect these lines. This structure represents the seat.
Step 6: Draw the steering
The steering is an important component as it can lead our kart in any direction. First, we’ll draw the steering bar that will hold the steering wheel.
Right after the windshield, we’ll draw two small vertical lines slanting toward the right, as shown in the image.

These lines represent the steering bar. At the end of the steering bar, we’ll draw two lines perpendicular to the bar. Now, connect both ends of these lines by drawing curved lines. The steering wheel is ready.
Step 7: Draw the silencer
The silencer of the go-kart is also known as the muffler. The silencer lowers the sound of the gases when they’re exiting the engine.
The silencer of the go-kart is a “j” shaped structure. To draw the silencer, we’ll draw a curved line at the end of the right wheel. After drawing the curve line, stretch it by making a horizontal straight line. By following the same procedure, we’ll draw the same line beneath the first line. We’ll draw a straight line to connect both these lines.
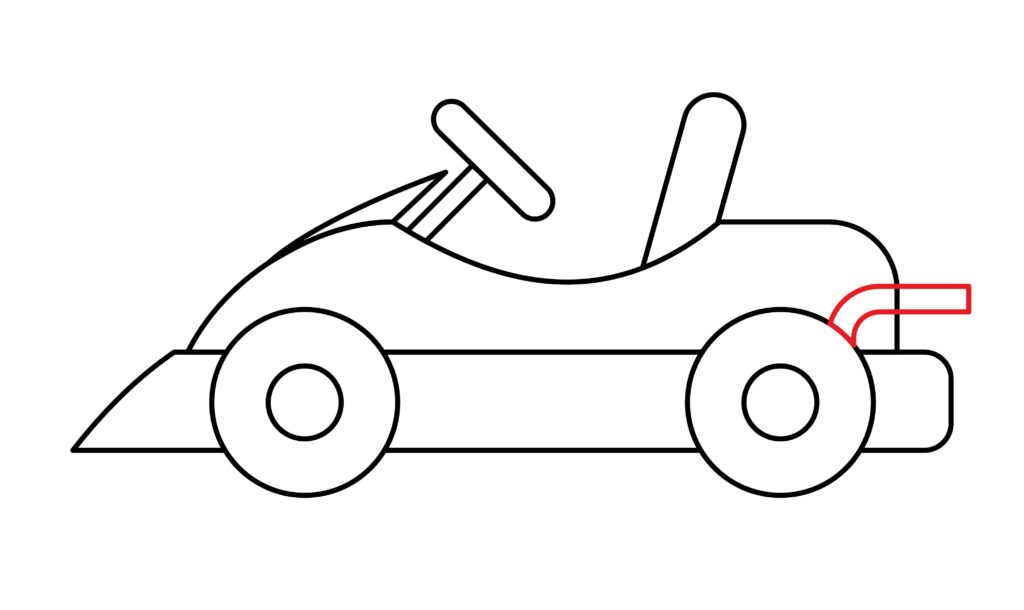
We’ll make sure the silencer is outside the body of the go-kart.
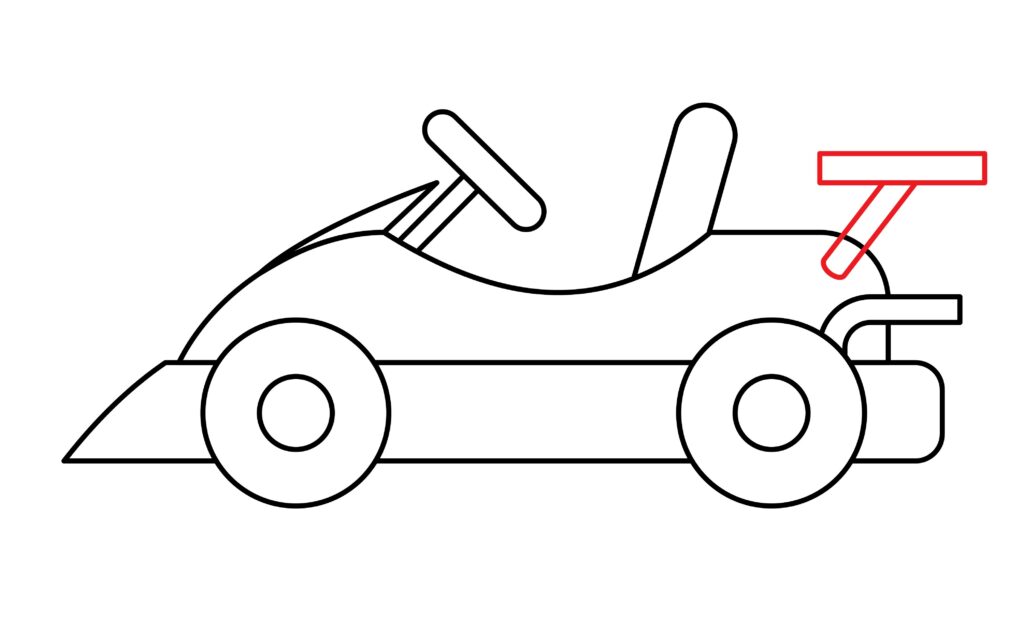
Step 8: Draw the wind cutter
The wind cutter is directly related to the performance of the go-kart. It improves the speed of the go-kart through its aerodynamic feature. A wind cutter is present at the back of the go-kart.
To draw the wind cutter, we’ll draw a narrow rectangle slanting towards the right at the top right corner of the go-kart body. At the end of this rectangle, we’ll draw another rectangle that is completely horizontal and parallel to the base of the go-kart. The wind cutter is ready to cleave through the air with precision.
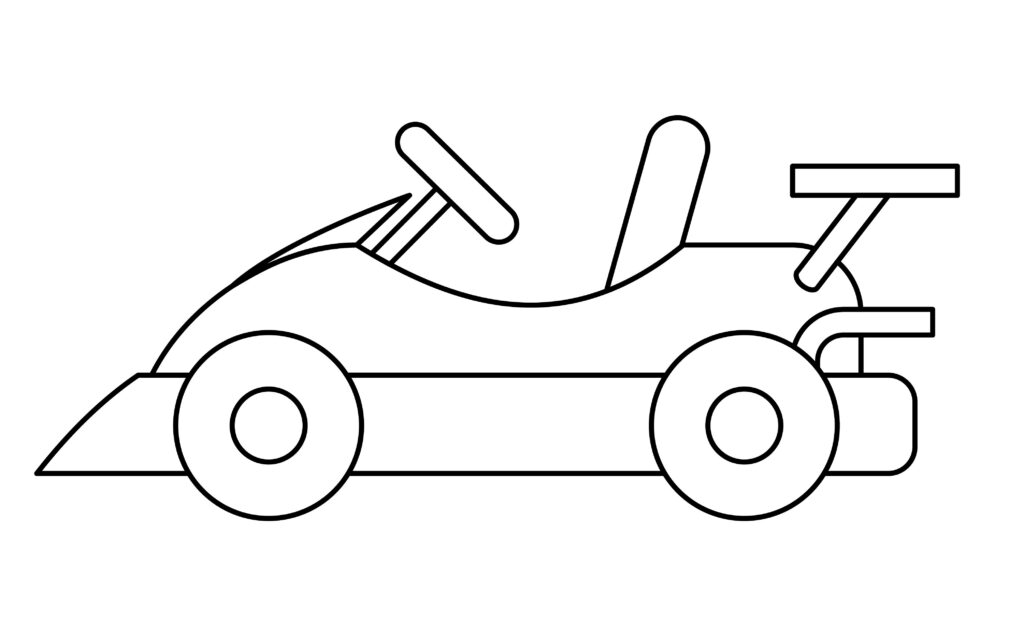
Step 9: The Go-kart is ready
Congratulations! You’ve done it. We are confident that your drawing will look so cool.
The fun doesn’t end here. Our drawing is ready, but we can customize it according to our taste. That way, our drawing will look so much better.
Taking your Go-Kart drawing to the next level
Having detailed art is always an excellent idea. It provides a complete story and reflects the artistic skills of the artist. For now, we have only drawn the outline of the go-kart. It needs more details to look professional. But how to add details?
Don’t worry! We’ll provide all the steps required to upgrade your drawing. Just follow these steps and customize your drawing. Keep in mind that this section is purely based on creativity and imagination. Creativity is limitless. Just experiment with your drawing with your creativity; you’ll be amazed by the results.
Adding background to your drawing
Having a background in the drawing completes the story and idea of the drawing. One can picture the image well if it has a clear background. We can make any type of background. It all depends on our imaginations.
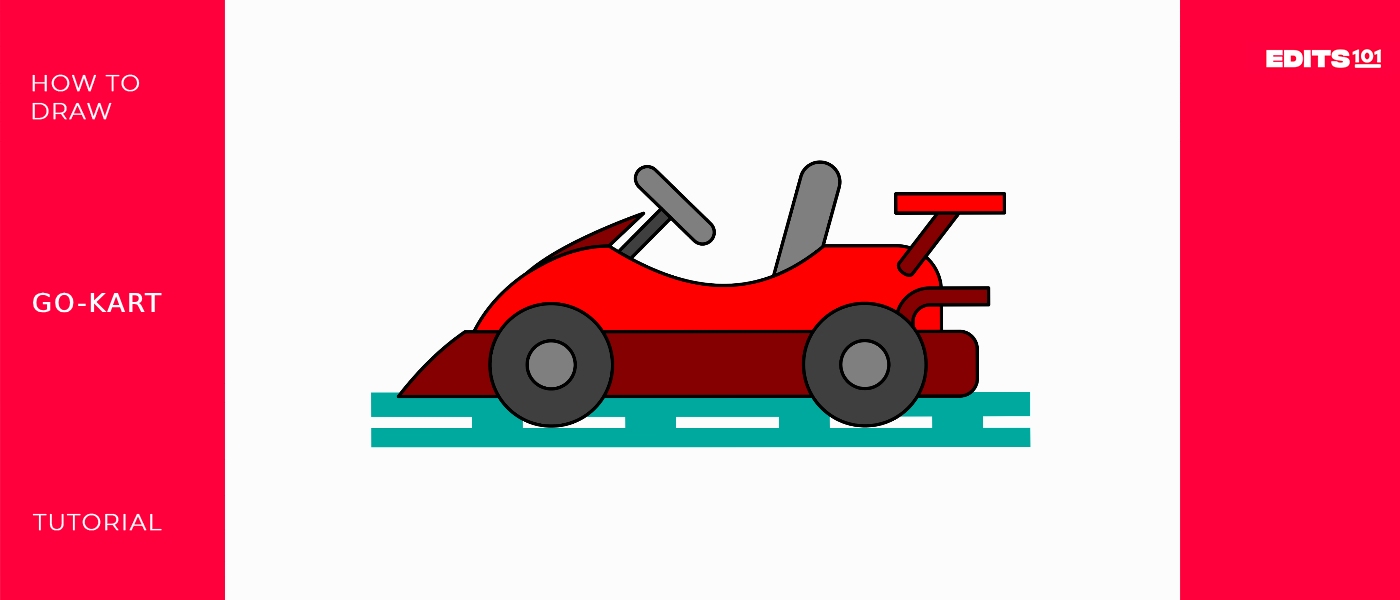
In our case, we have drawn a racing track as our background. Of course, our go-kart is competing and racing. Now, our drawing makes more sense as the idea and scenery are obvious.
To draw the track, we will draw a long horizontal rectangle beneath the go-kart. Inside this rectangle, we’ll draw several horizontal lines.
Adding colors to your drawing
Filling colors in a drawing is a fun way to unleash our inner artist. The colors give any drawing an aesthetically pleasing look. It gives a new life to the drawing.
You can color your go-kart the way you love. But make sure to choose multiple and popping colors. Do not color the entire go-kart with the same color. Rather, use different colors and enjoy the process.
In our case, we have used a greyish-black color for the wheels, seat, and steering wheel. The body of the go-kart is red, and the base is maroon in color.
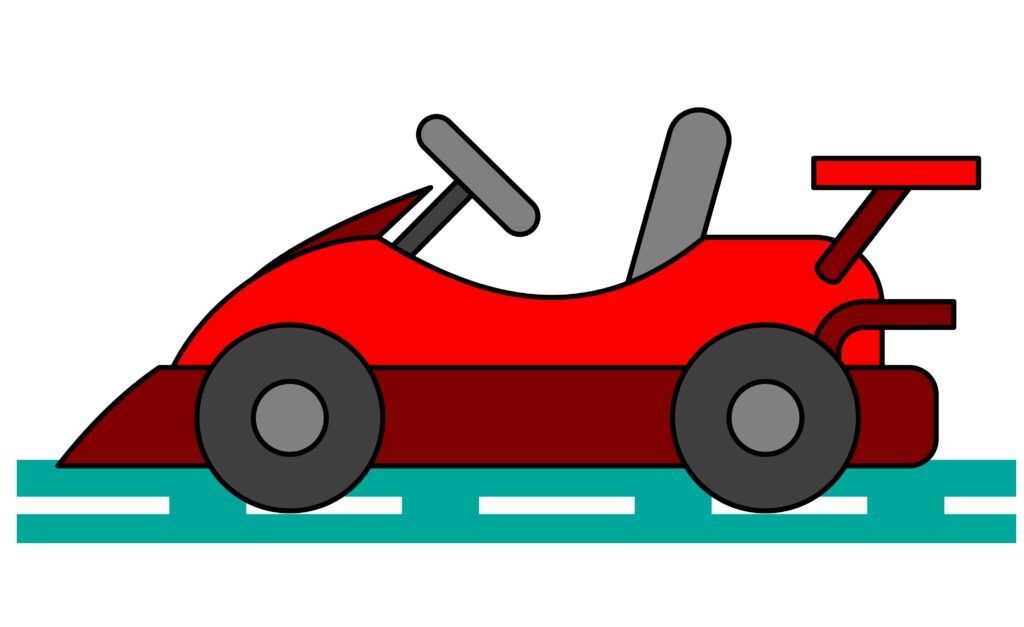
Isn’t our go-kart looking more attractive now? That’s because we’ve added charisma to it. We’re confident that you’ll color your drawing nicely and tidily, as it’s the key to a better drawing.
P.S. Bonus Tips
Do not limit yourself to the background and colors only. Imagination is like a garden. The more you put effort into it, the greener it gets. Likewise, your drawing can be upgraded in many more ways. Develop more ideas and have fun with your drawing.
We will give you a few ideas that you can try. We can draw several wavy lines around the front corner of the go-kart. These lines represent rushing air as the go-kart cruises at high speed. These lines will develop the idea that our go-kart is cruising at a really high speed. Isn’t that what we want?
We can also draw a sun at the top corner of the page. It would be great if our go-kart were running wild on a clear sunny day.
Who owns the go-kart? It’s you who owns it. But how to display your ownership of it? For that purpose, you can write a name on the body of the go-kart.
The ideas are limitless. Just try your drawing with different ideas and see how great it looks.
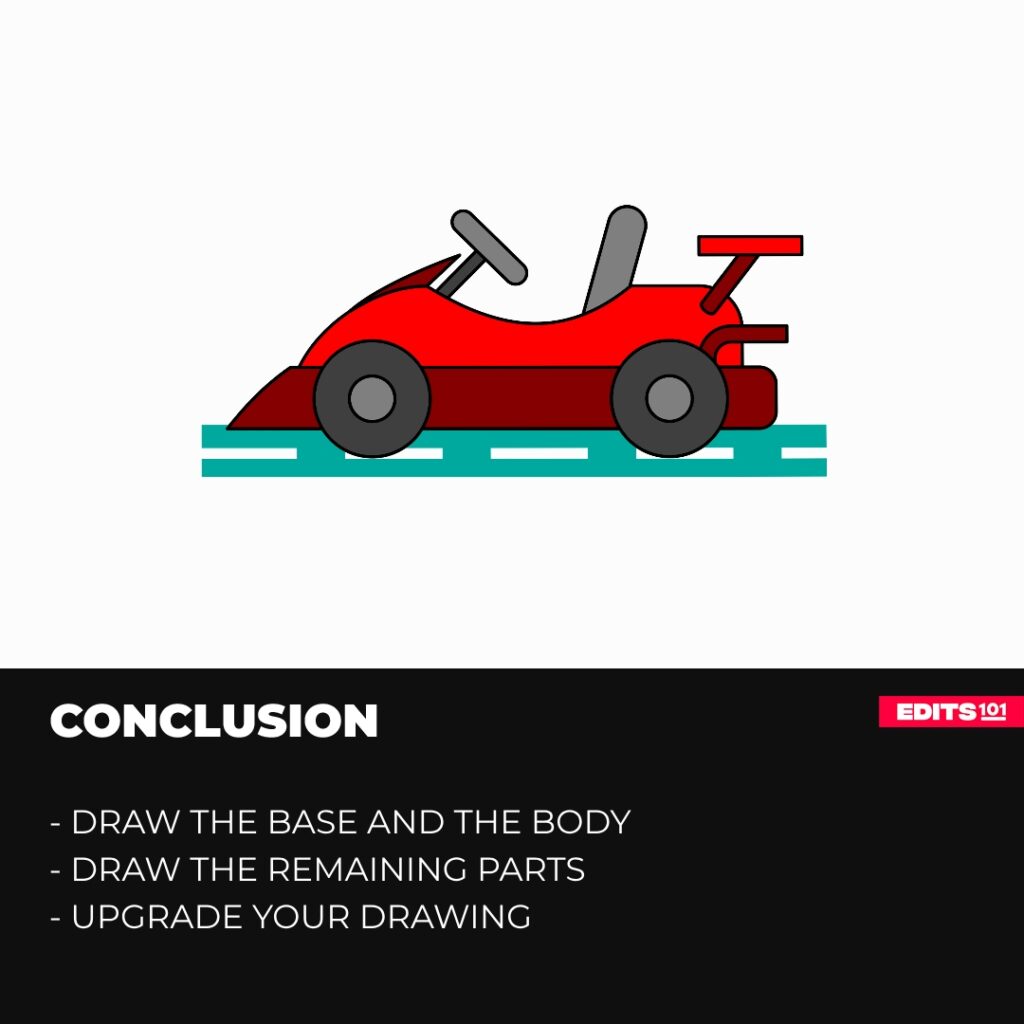
Conclusion
Drawing is a fun activity and should be enjoyed thoroughly. We hope that this guide has entertained you and helped you in making an amazing go-kart. We explained each step in detail. Let’s recap the entire process.
We started by making the base of the go-kart. Then, we made the body on the base. We drew the wheels and the windshield. After that, we made the seat and the steering wheel. Following the steering wheel, we made the silencer and the wind cutter. After these basic steps, we upgraded our drawing.
Thanks for reading & feel free to check out more of our articles!
Author Rating
Overall Rating
Summary
This guide explains how to draw a go-kart in a simple and effective way.