How to Draw a Jet Ski | Kid’s Tutorial
A jet ski is a small jet-propelled watercraft that skims across the water’s surface. It is usually ridden like a motorcycle. You may also hear people refer to this watercraft as a water scooter.
An interesting fact worth noting is that the term Jet Ski is a trademarked name of personal watercraft produced by Kawasaki Motor Company. However, thanks to these watercraft’s popularity, the term Jet Ski is used widely as the generic name for all personal watercraft.
Do you want to learn how to draw a jet ski? Today is your lucky day. By the end of this tutorial, you will have drawn an impressive jet ski you can show off to your friends.
What You Will Need
- Pencil
- Eraser
- Drawing paper
- Coloring supplies
- 30 minutes
- A little patience
How to Draw a Jet Ski
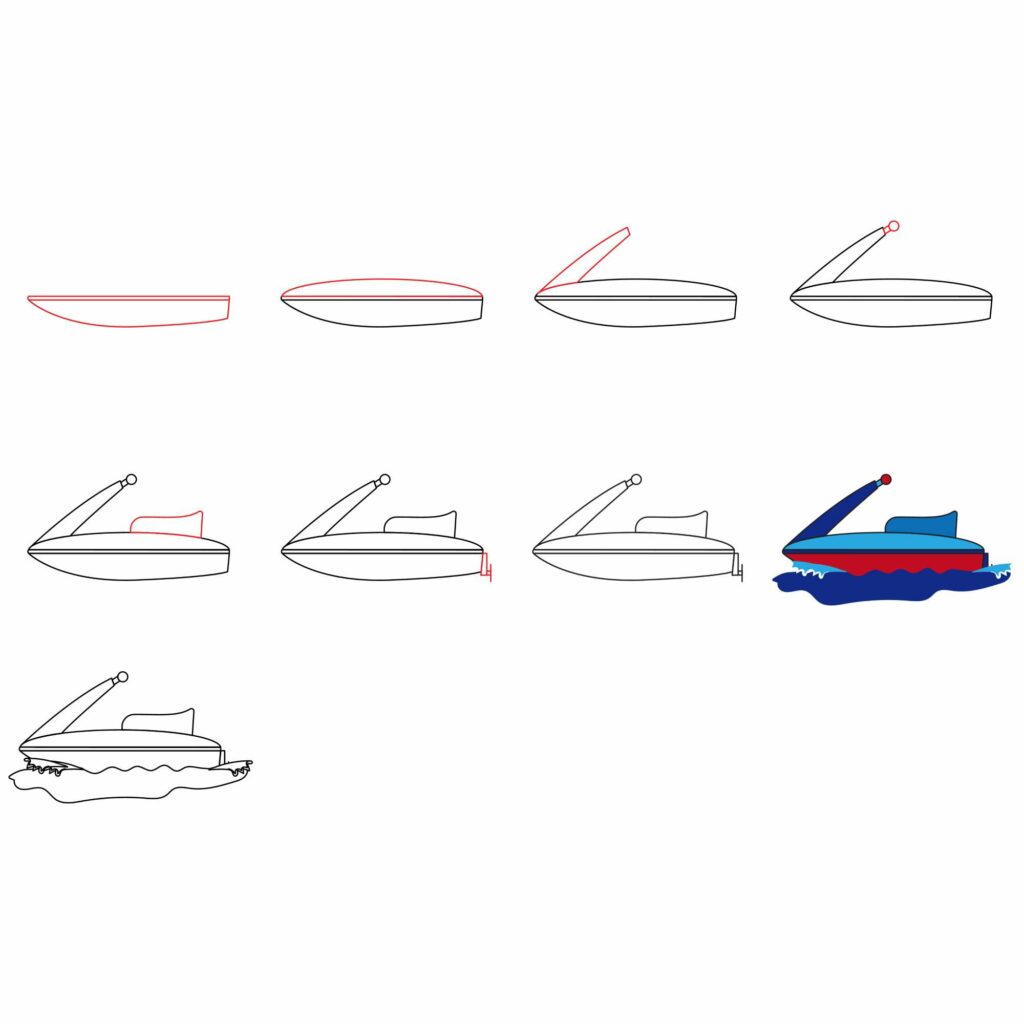
By following these steps carefully, you will not only be able to draw a beautiful jet ski but you will also learn the different parts of the watercraft. Here is an overview of the steps we will follow.
Step 1: Draw the Base
The base of the jet ski is also referred to as the hull. This is the body of the watercraft and it is what sits in the water. The hull is what supports all the other parts of the jet ski.
To draw the hull, draw two parallel lines that run from left to right and close to the margins of your drawing paper. These will serve as the upper part of the hull.
Do not make the lines too long because we need some space on either side of the hull for the background later on.
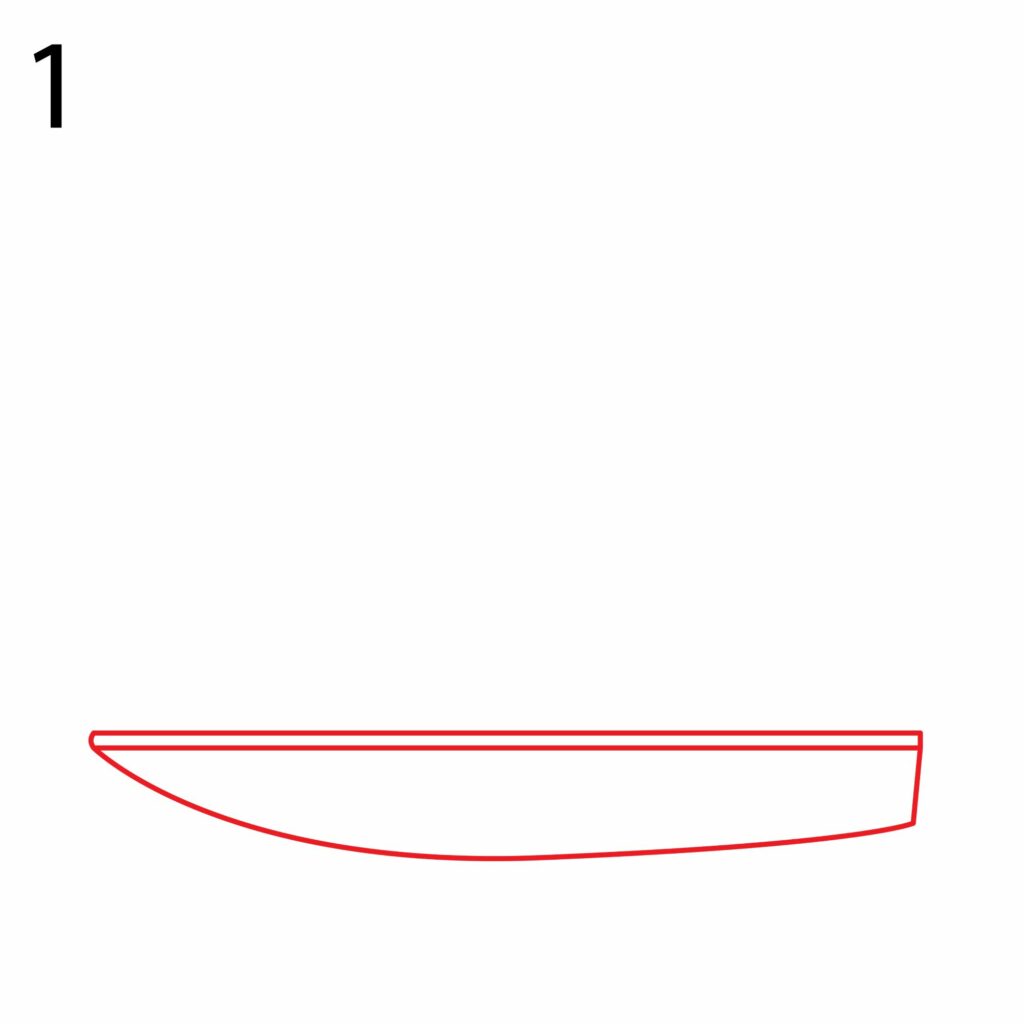
Next, we need to add the bottom part of the hull. For this, we need an oval shape like the one shown in the above image. It should start from the left end of the parallel lines, move down slightly then end at the right side of the parallel lines.
To help our jet ski move easily on the water, the front end of the hull needs to be more curved as shown in our image.
Erase the oval shape at the rear end and connect the curved line to the parallel lines with a straight line as shown. The straight line will serve as the mounting area for the impeller.
Step 2: Draw the Upper Base
Immediately above the hull is the top deck. The top deck is the most prominent part of a jet ski. It is what is visible when the jet ski is on water.
Adding the top deck is very easy. Simply draw a slightly curved line, starting from the left side of the parallel lines we drew earlier and ending at the right side of the parallel lines as shown in the image below.
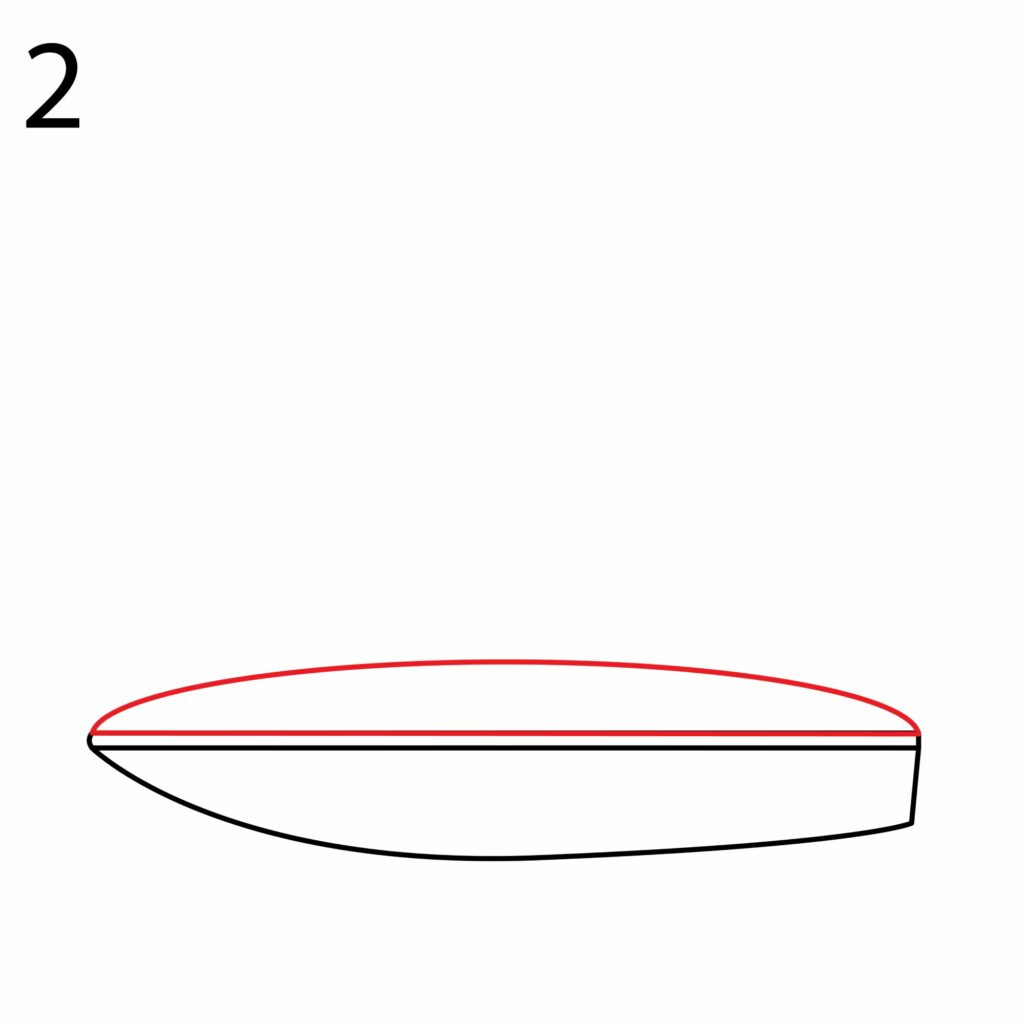
As you can see, the top deck is the shell that covers the top of the hull. Contrary to popular belief, the top deck is not part of the hull. The top deck and the hull are different units. They are more like the two halves of a walnut.
Step 3: Draw the Handlebars
The next step is to add the handlebars. The handlebars are the parts of a jet ski that help with steering. When the handlebars are turned, the jet nozzle that powers the jet ski turns thus causing the watercraft to change direction.
Just like with a bike, the handlebars need to be turned in the same direction you want to go. When they are turned to the right, the jet ski will move to the right.
To add the handlebars, we need to start by drawing a slightly curved line starting from the front end of the jet ski and rising diagonally towards the top deck as shown in the image below. Do not make the line too long or too bent.
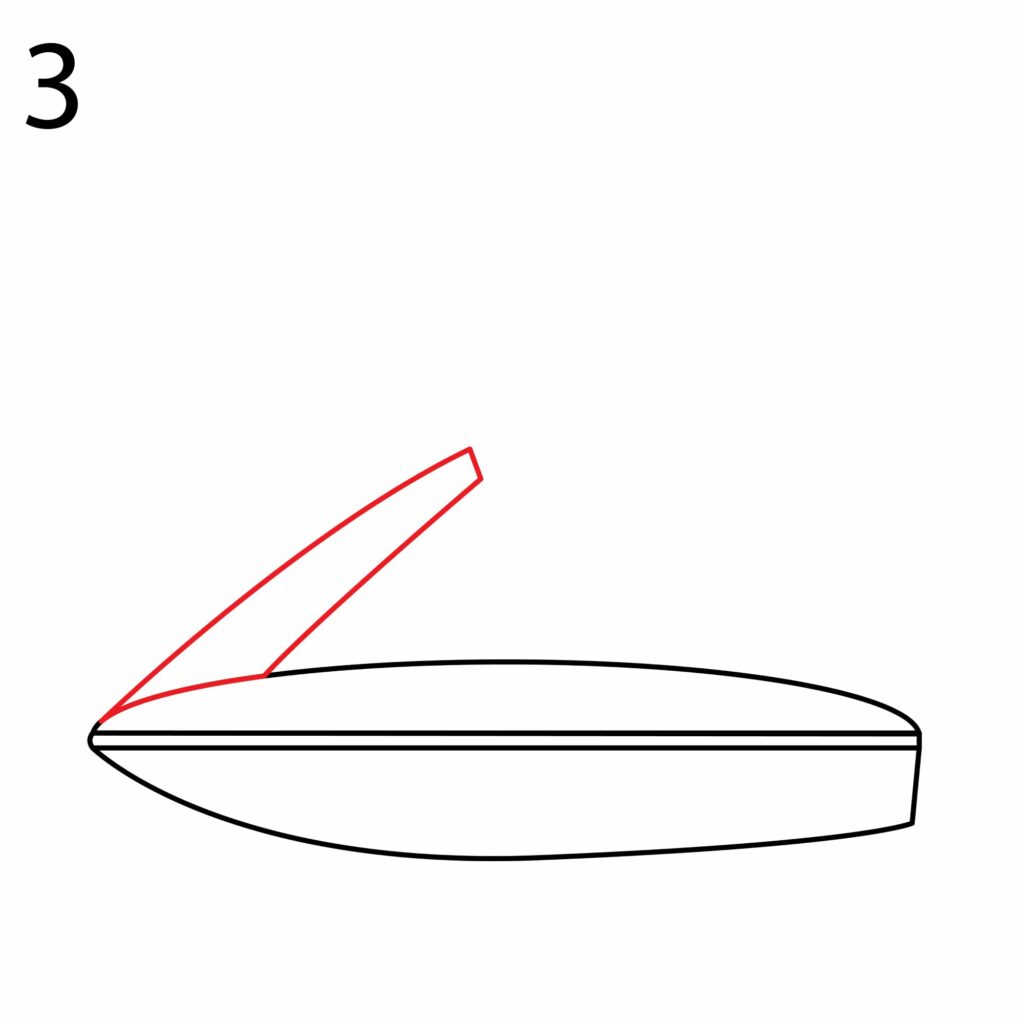
Next, draw another diagonal line starting a small distance from the front end of the top deck. The line should rise diagonally but at an angle that moves it closer to the first line. Once it gets to the same height as the first line, connect the two with a line as shown in the above image.
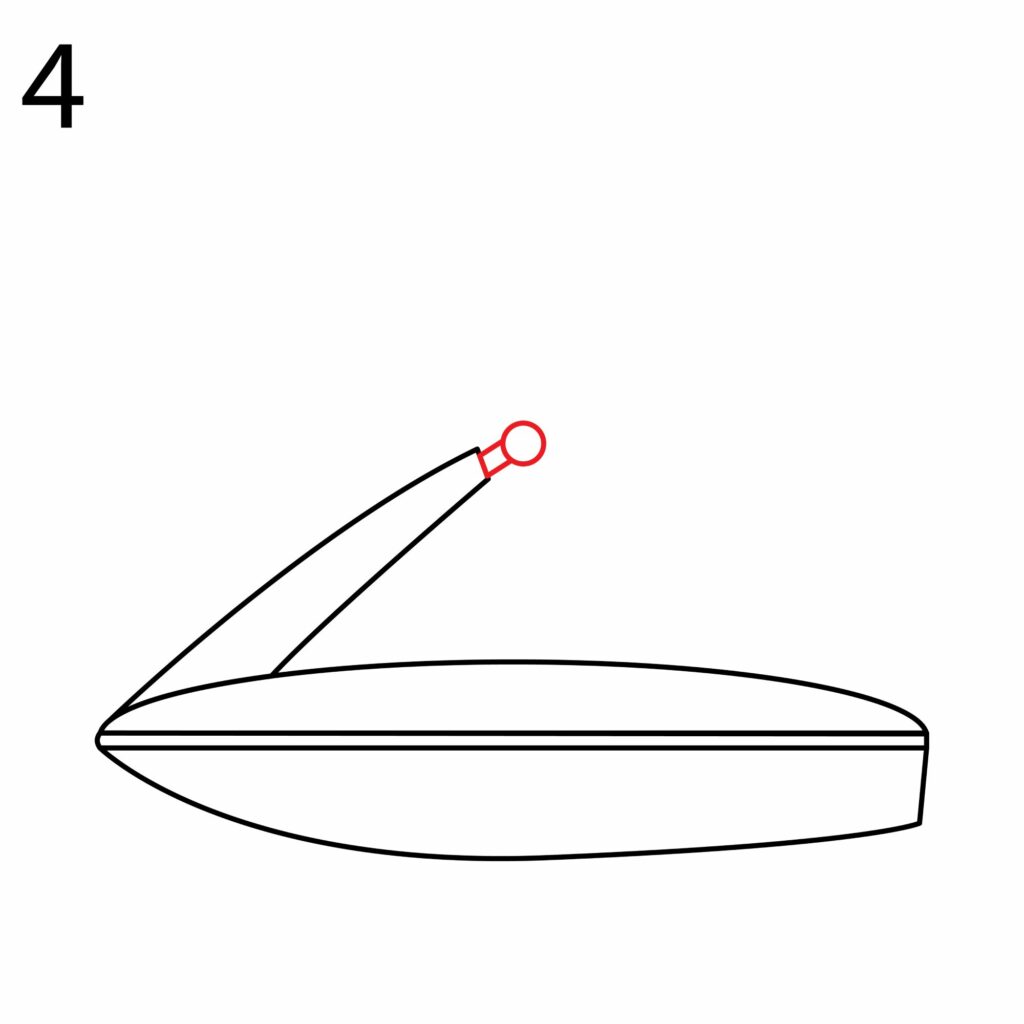
Step 4: Draw the Handles
The handles are where the rider holds on to. The right handle has a throttle lever which when twisted increases speed. There is a small lever in the left grip which serves as the brake lever, similar to the one on your bike. The left handle has the reverse lever too.
Due to the perspective of our jet ski and to make it easy for you to draw, we will not add all the details on a jet ski handle. We will simply add the handles.
To add the handles, draw a small rectangle rising from the handlebars as shown in the below image.
At the end of the rectangle, add a small circle. The circle will represent the handles.
Step 5: Draw the Seat
The design of the seat varies depending on the make and model of a jet ski. Some jet skis have seats that can accommodate up to three riders while smaller ones can only sit one rider. The seats are well-padded for comfort and covered in a waterproof material to prevent water damage.
To add a seat to our jet ski, we need first to draw a rectangle starting at the middle of the top deck and ending close to the rear of the deck. Next, use your eraser to remove the top part of the rectangle and replace it with a curved line as shown in the below image.
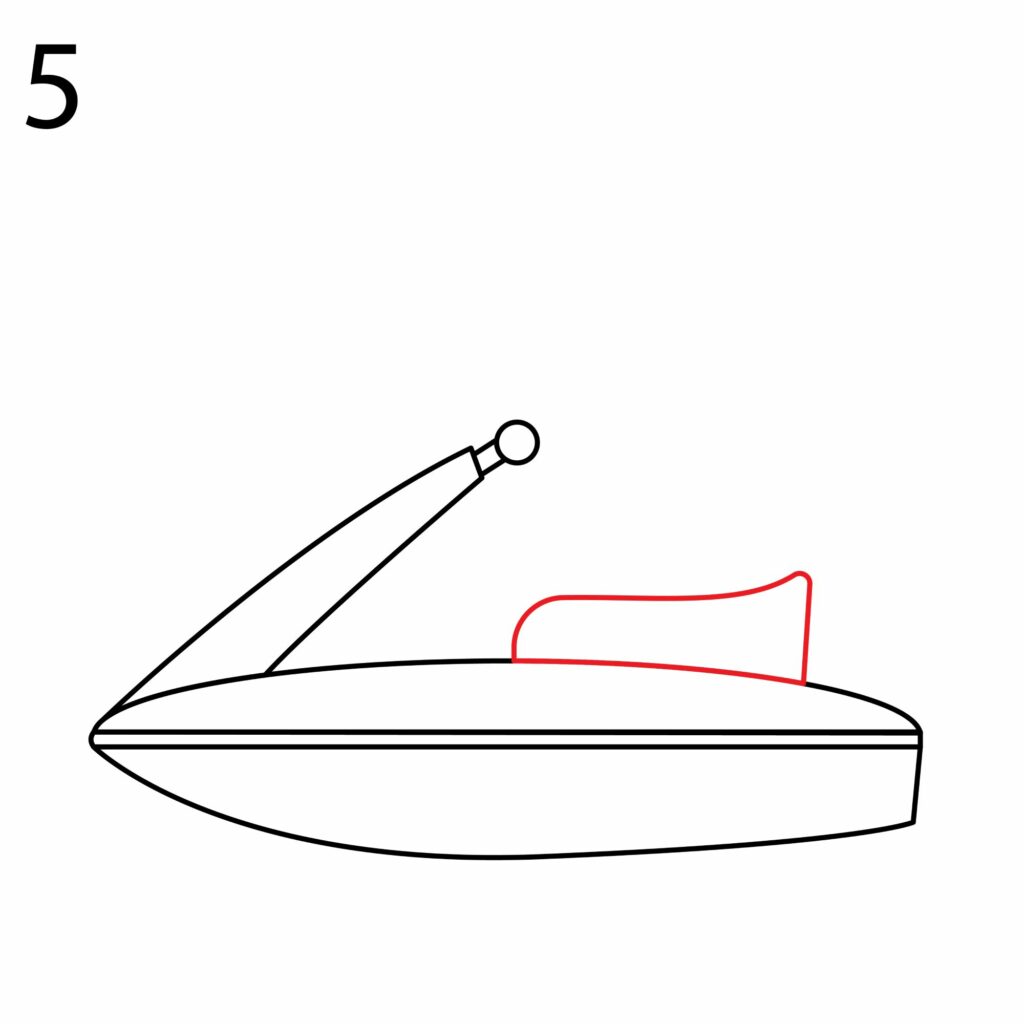
The seat can be in any shape you want but it shouldn’t be like the one you have at home. You can change up the design but for now, let’s go with the design we used in ours. You can change things up in your next jet ski drawing.
Step 6: Draw the Impeller
A jet ski has an engine which is what enables it to move at incredible speeds. We will not be able to draw the engine because it is housed inside the hull. We will, however, be adding the impeller.
A boat has a propeller that turns to propel the boat forward. A jet ski, on the other hand, has an impeller. Also referred to as an impellor, the impeller is a rotor that is used to increase pressure in the flow of a fluid.
A jet ski is propelled by a strong jet of water that comes out of the rear. The impeller is what increases the speed of the water that squirts out. The stronger the water jet is the faster the jet ski moves.
To add an impeller, we first need to add a rectangle shape at the rear end of the jet ski as shown in the below image.
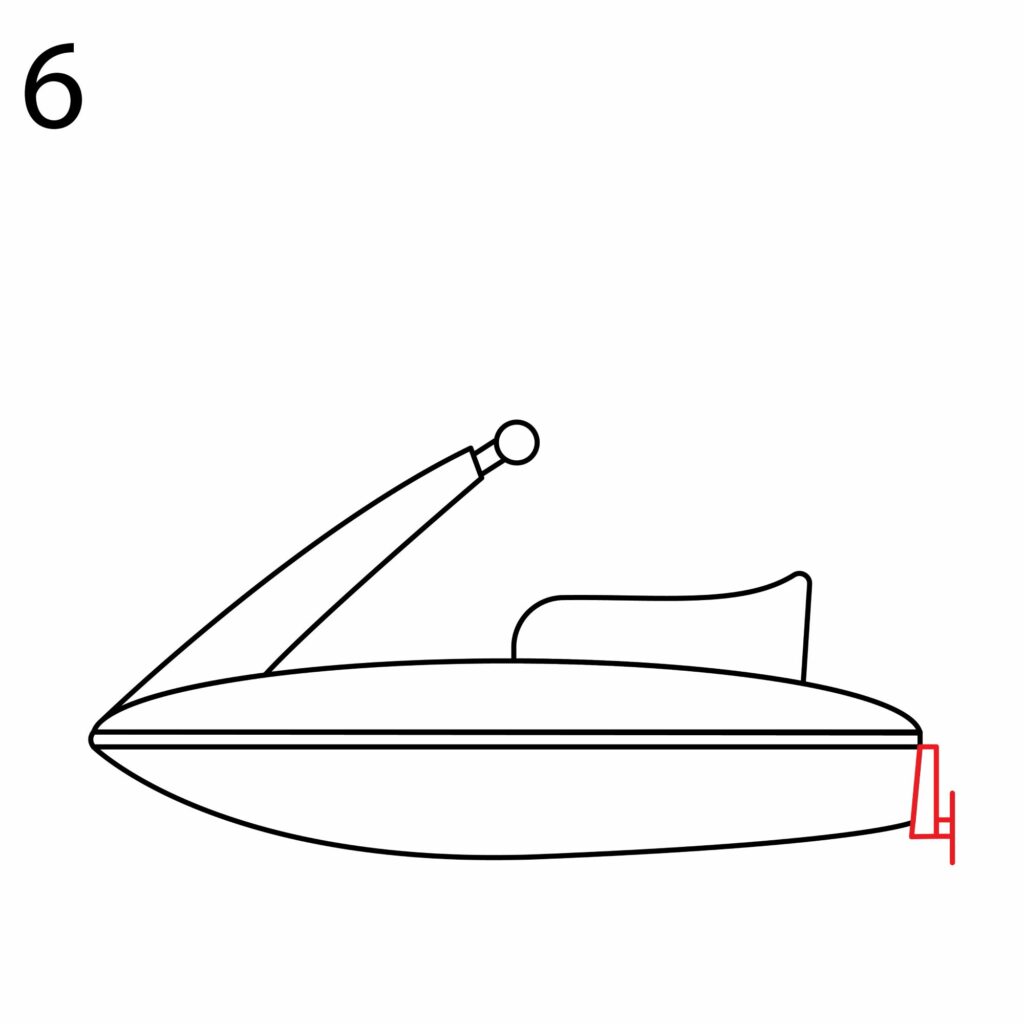
Next, add a tiny square at the bottom of the rectangle we just drew then a vertical line at the end as shown above. This will serve as the impeller.
Step 7: The Jet Ski is Done
If you followed each of the steps carefully, you should have a drawing that looks like ours.

If yours is not exactly like ours, do not be discouraged. Drawing a beautiful jet ski takes time. Use your eraser to redo the areas that are way off. Your drawing doesn’t need to be perfect the first time.
Add More Details to Your Jet Ski
It is always easy to be tempted to leave the jet ski as it is in fear of ruining your drawing. While that is okay, failing to add more details will make your drawing unimpressive.
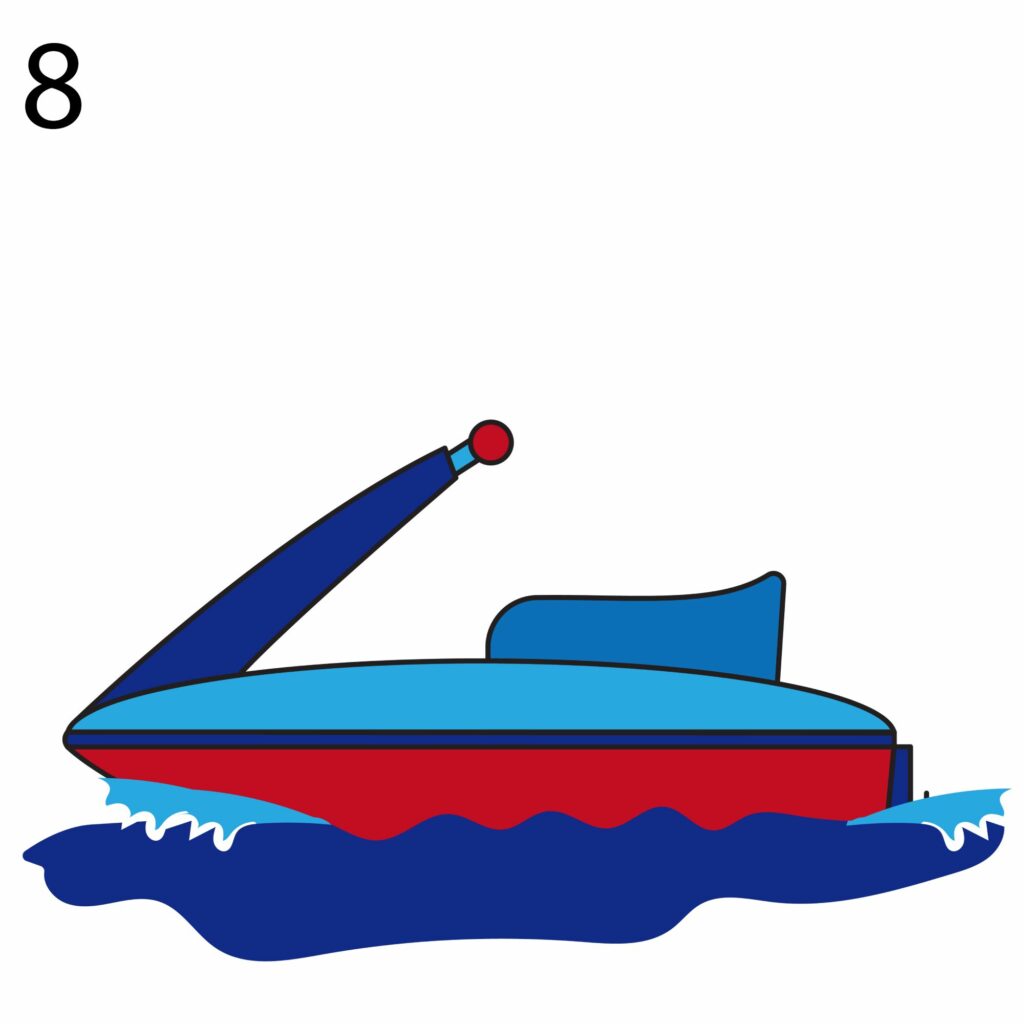
Step 8: Add a Background
The best way of making your jet ski drawing stand out is by adding water beneath it to indicate that it is moving. To do so, simply add some wavy lines below your jet ski. Below is what we did with our drawing.

Step 9: Color Your Image
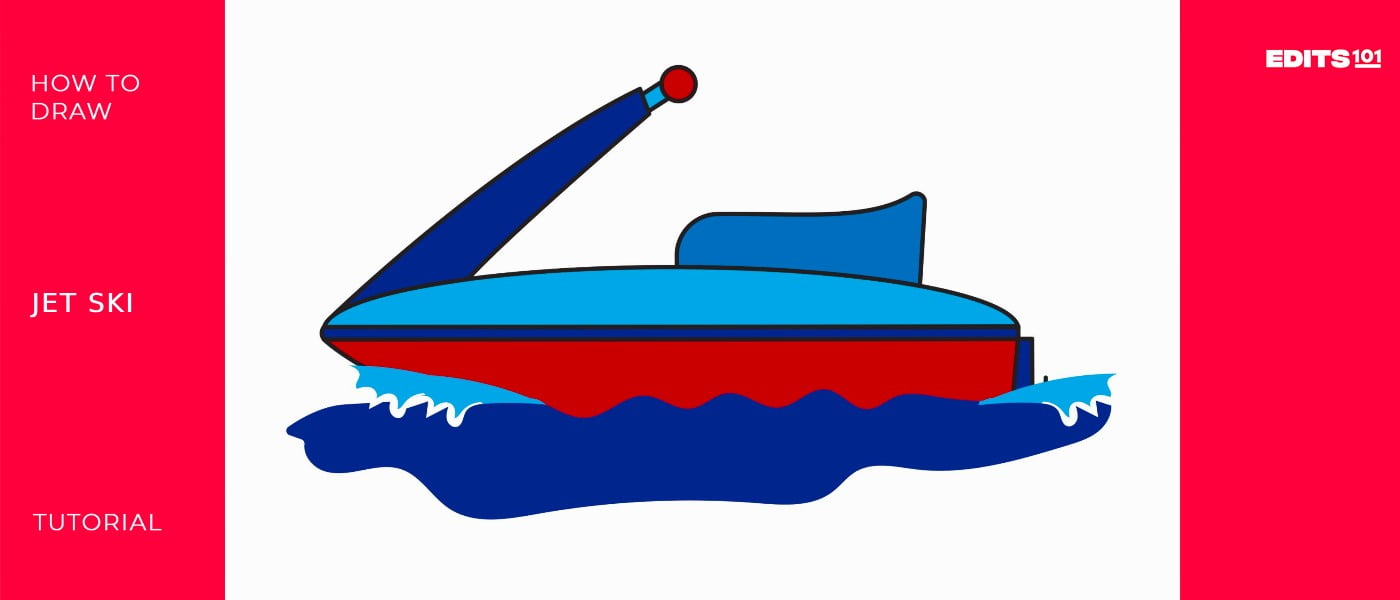
Now to the fun step, use your coloring supplies to color your jet ski. You can go as wild with the colors as you want. Here is our final drawing.
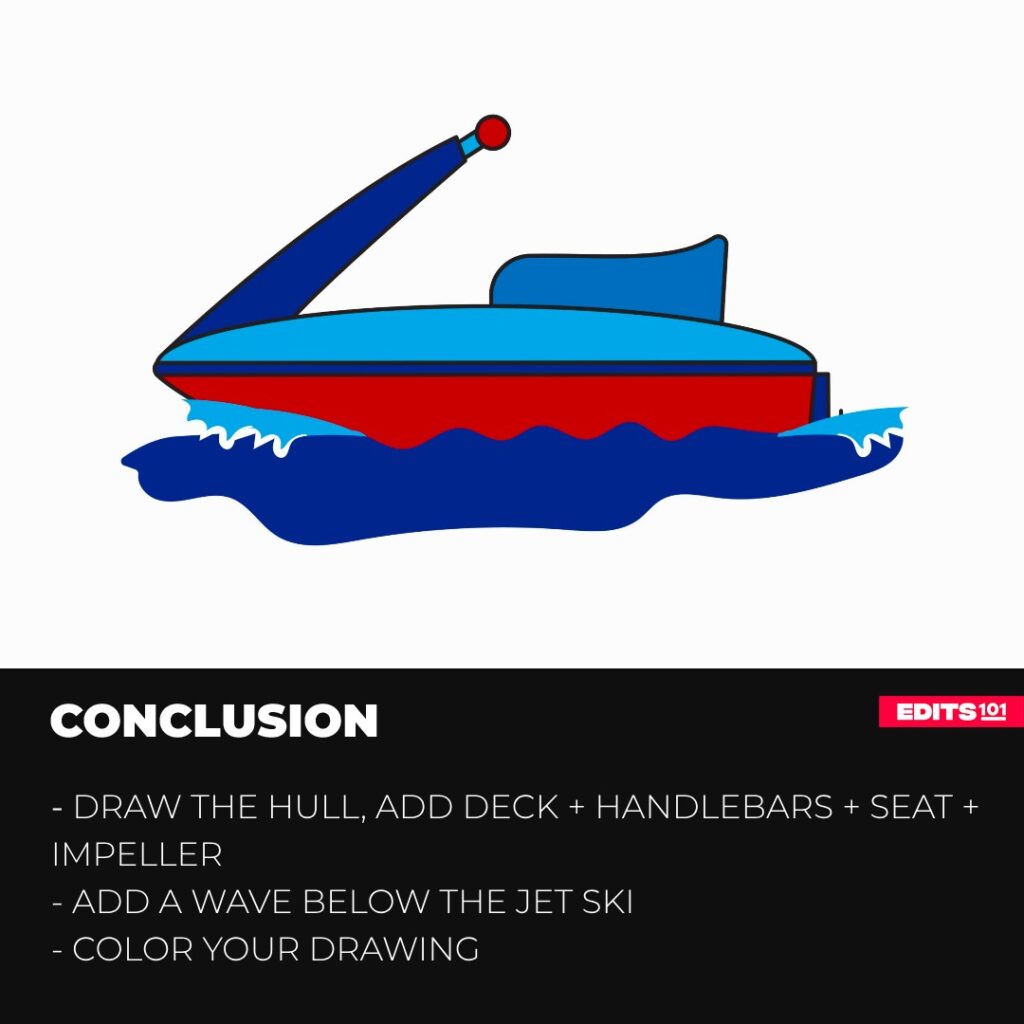
Conclusion
Drawing a jet ski is not as complicated as most people think. To draw our jet ski, we started by adding the hull, which is the base of the jet ski followed by the top deck, handlebars, seat, and impeller.
We wanted our drawing to stand out so we added a wave beneath our jet ski to show that our jet ski was on the water. We then used our coloring supplies to add color to our image.
At first, you may not get the best results. Do not be frustrated. You only need practice and you will be an impressive artist in no time. Have fun!
Thanks for reading & feel free to check out more of our articles!