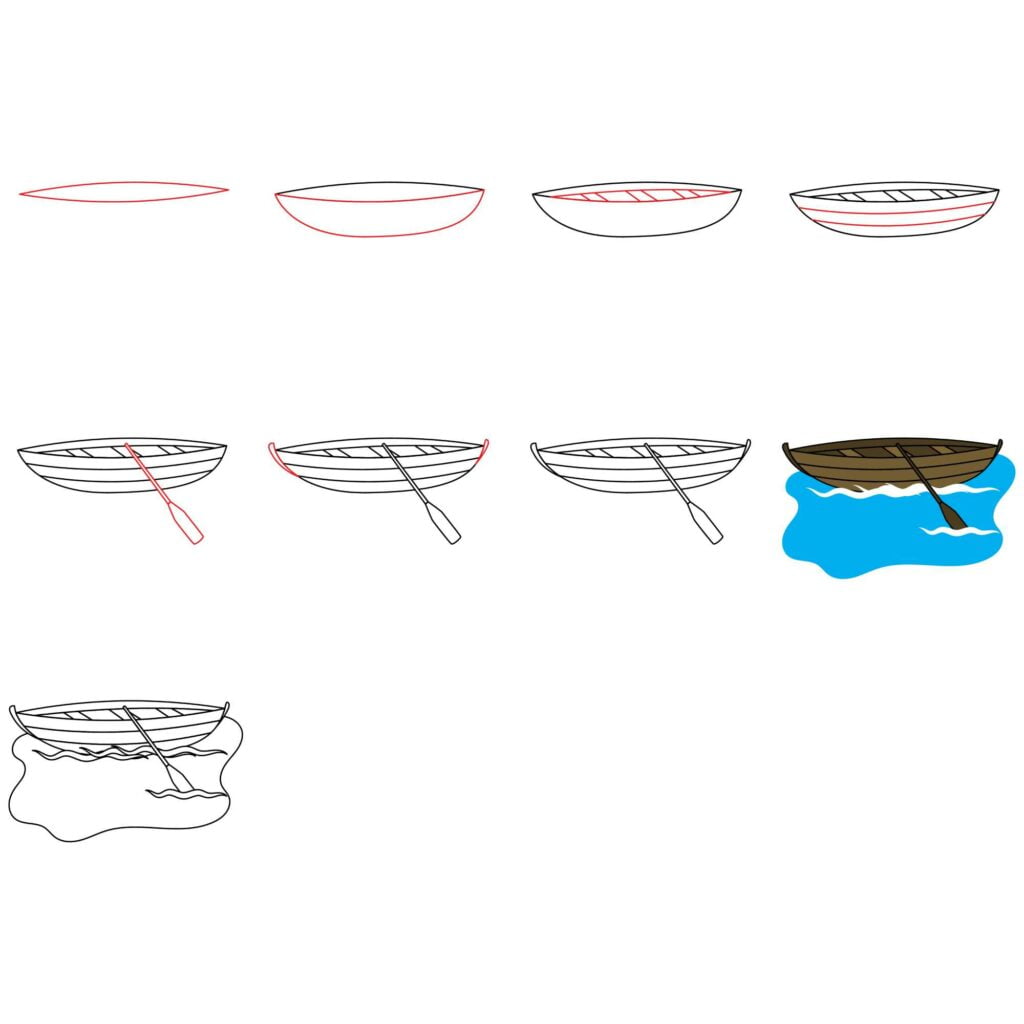
How to Draw a Rowboat | 9 Simple Steps
Learning how to draw helps develop visual awareness and put your abstract ideas onto paper. Drawing improves comprehension and helps you communicate better with other people using more than words. In today’s exercise, you will learn how to draw a rowboat.
A rowboat is, probably the most common type of boat. You may have seen one in the waterpark, fishing camps, or someone rowing it on a river or lake. Just as the name depicts, unlike a sailboat, a rowboat is a boat that is propelled by oars.

What You will Need
- A sheet of paper to draw on
- Pencil
- Eraser
- Colored pencils or crayons
- 25 minutes of your time
Drawing the Basic Shape
By the end of this tutorial, you will have learned how to draw a rowboat like a pro and all you have to do is follow our steps carefully. You will also learn the different parts of a boat and a few interesting facts.
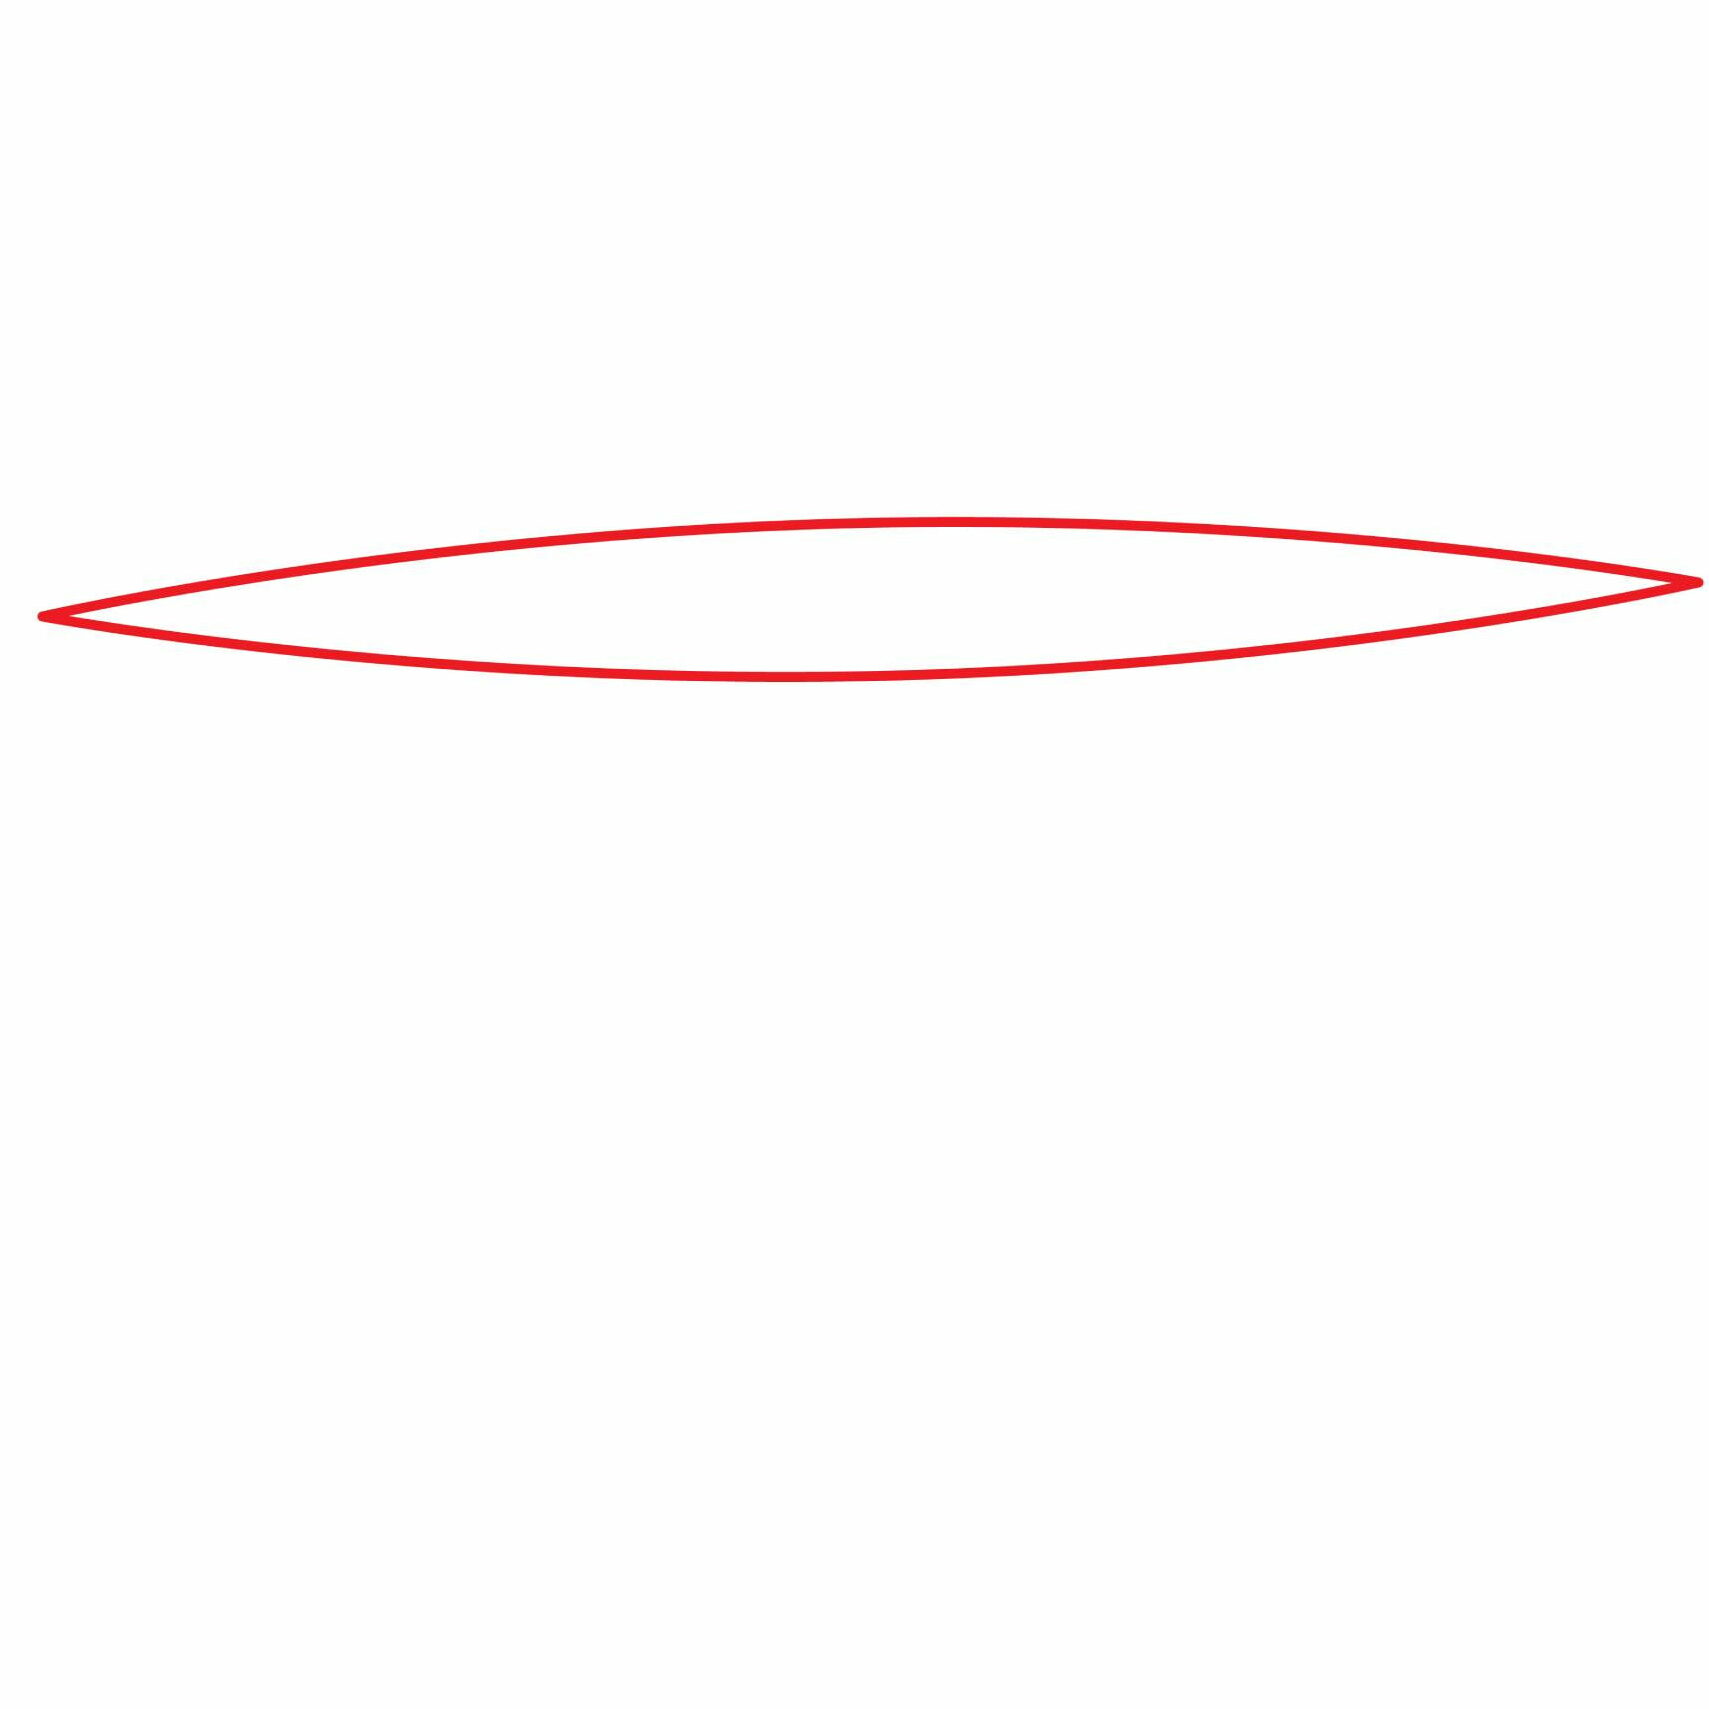
Step 1: Draw the Frame
The first thing we will draw is the top part of a rowboat. This is where the sailors/people will sit in. The top part is the largest part of the rowboat so you need to make it bigger.
Draw one curved line bending upwards and another curved line bending downwards to create a somewhat elongated oval shape with sharp edges. The oval should cover most of the width of your drawing paper as shown in our illustration below.
- Draw an oval for the top part
Here are some interesting facts. The front end of a rowboat is known as the bow whereas the back end is called the stern. In true rowboats, the bow is identified by a rubber ball attached to its tip. The stern, on the other hand, has a fin on the underside of the hull.
For easy understanding, we will be drawing a simple boat without the intricate details.
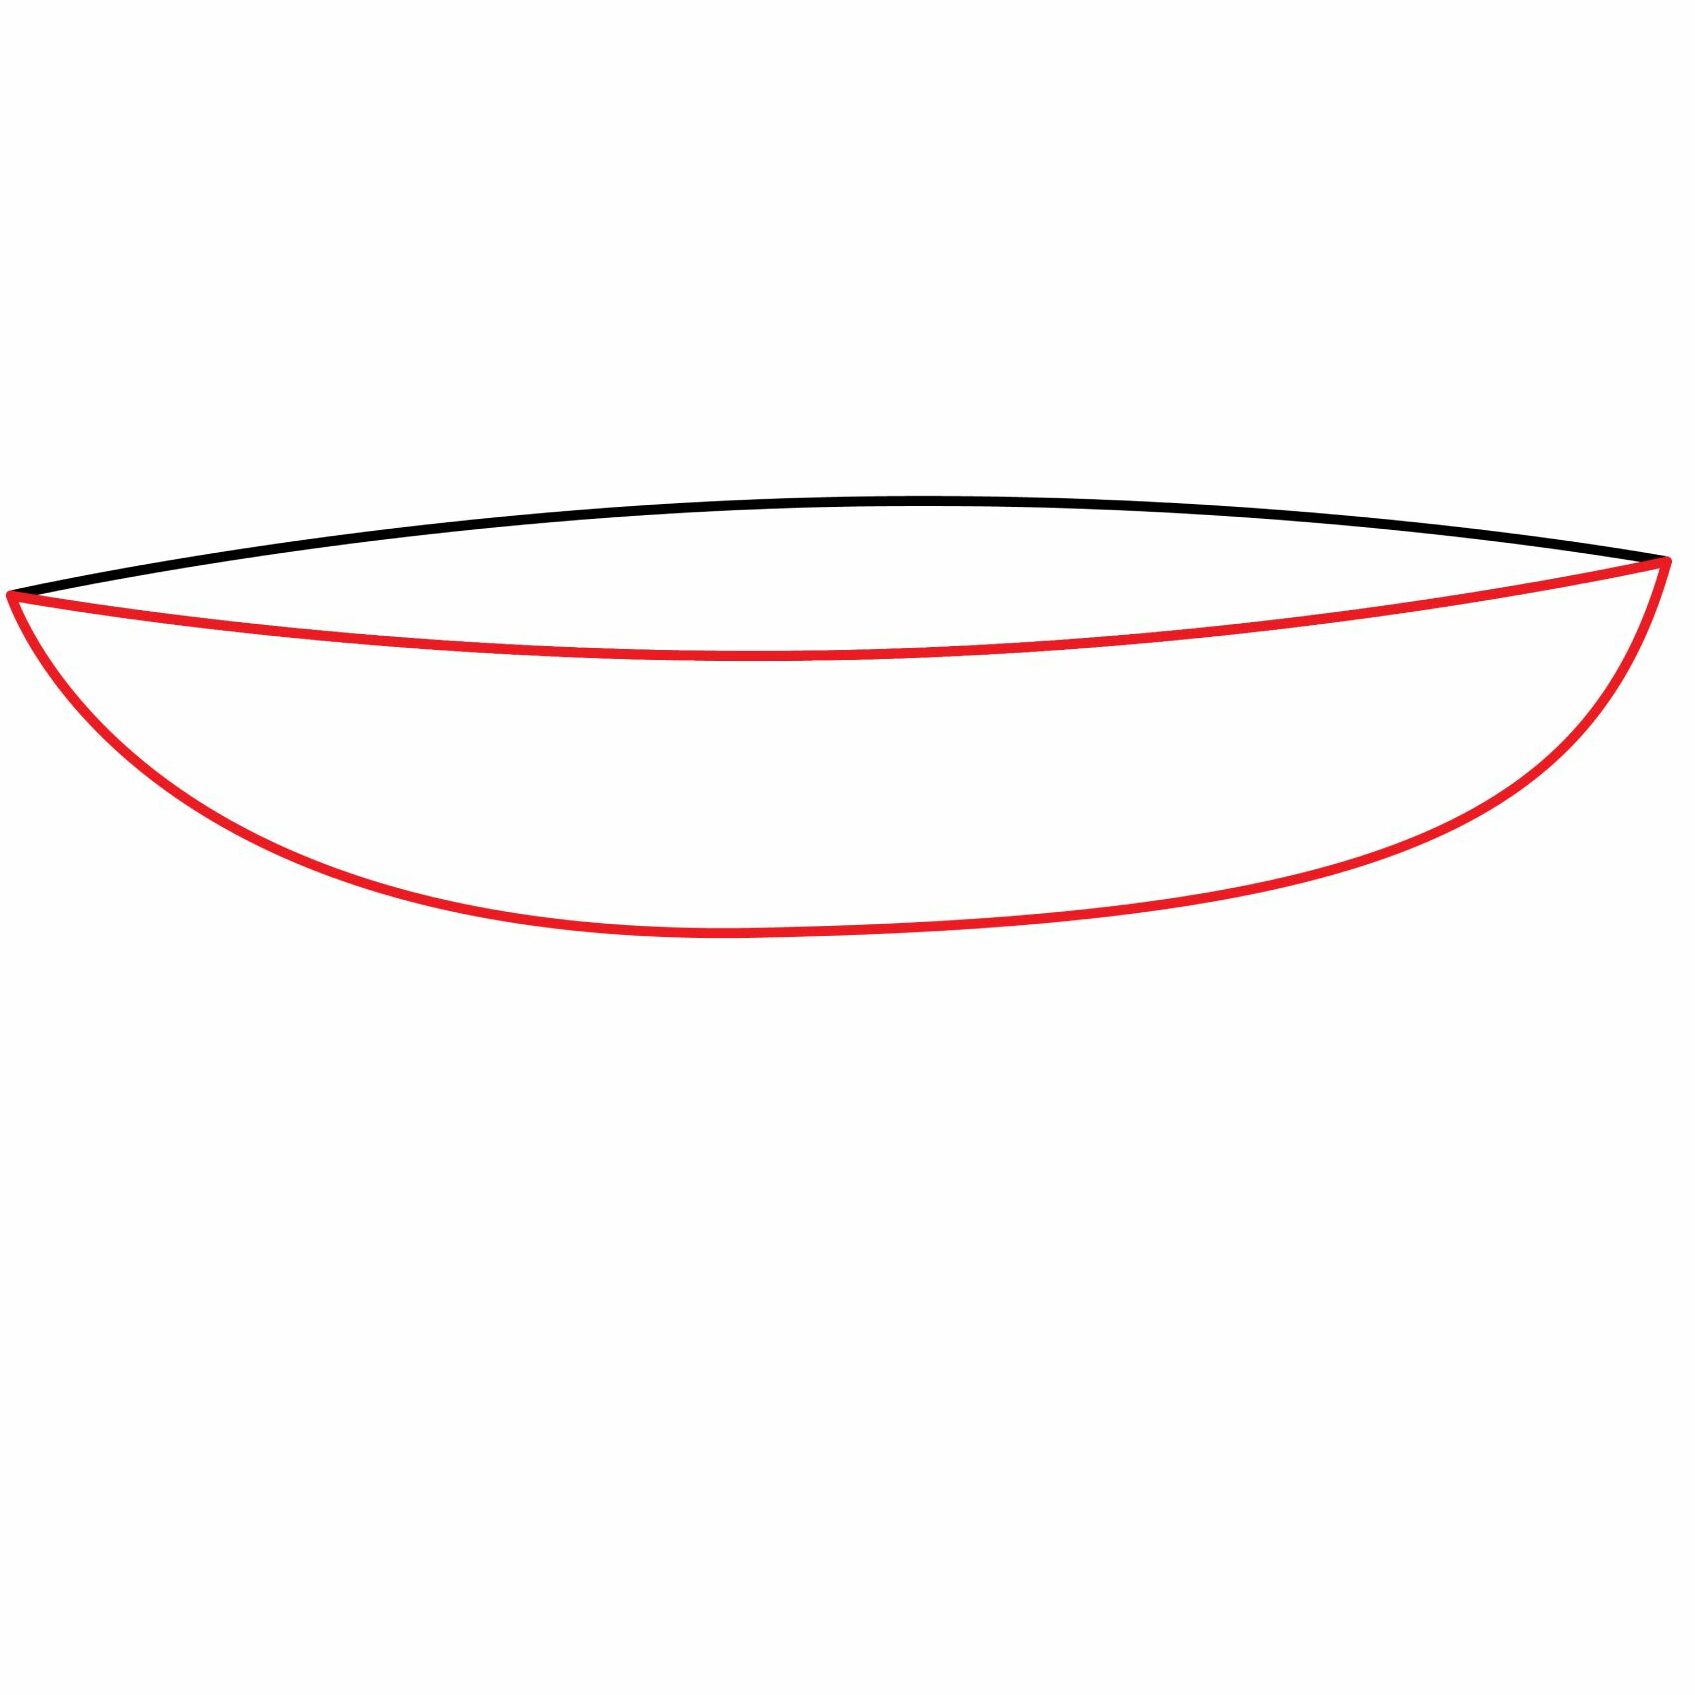
Step 2: Draw the Hull
The hull is the outer body of a rowboat. It is the part that goes partly underwater and can be made of fiberglass, metal, or wood. It is what gives a rowboat its shape and keeps water out.
To draw the hull, we need to add a curved line that starts from the front end of the top part (bow), moves down a bit, and curves upwards to connect with the back end of the boat (stern) as shown below.
- Add a curved line to draw the hull
If you are having trouble drawing a perfectly curved hull, you can use a ruler to draw a rectangle below the top part of the rowboat. Next, make the bottom left and bottom right corners of the rectangle curved.
You should then use your eraser to remove the bottom left and right corners of the rectangle until you have a shape similar to the one we have above.
Step 3: Draw the Wooden Seats
A rowboat is not built for comfort but rather for performance. As a result, it doesn’t have very comfortable seats. The seats are bench seats. In some rowboats, the seats can be padded for comfort. The seat on a sports rowboat has wheels attached to the bottom to allow the sailor to row better.
For our rowboat, we will add three bench seats. First, we need to show that the seats are not on the very top of the boat but inside it. For this, we will start by adding a line that curves upwards. The line should start and end a little bit from the bow and stern to depict depth.
Next, we will add three pairs of parallel lines inside the boat to depict the bench seats as shown in the image below.
- Draw a curved line to add depth to the top part
- Use pairs of lines to draw the seat

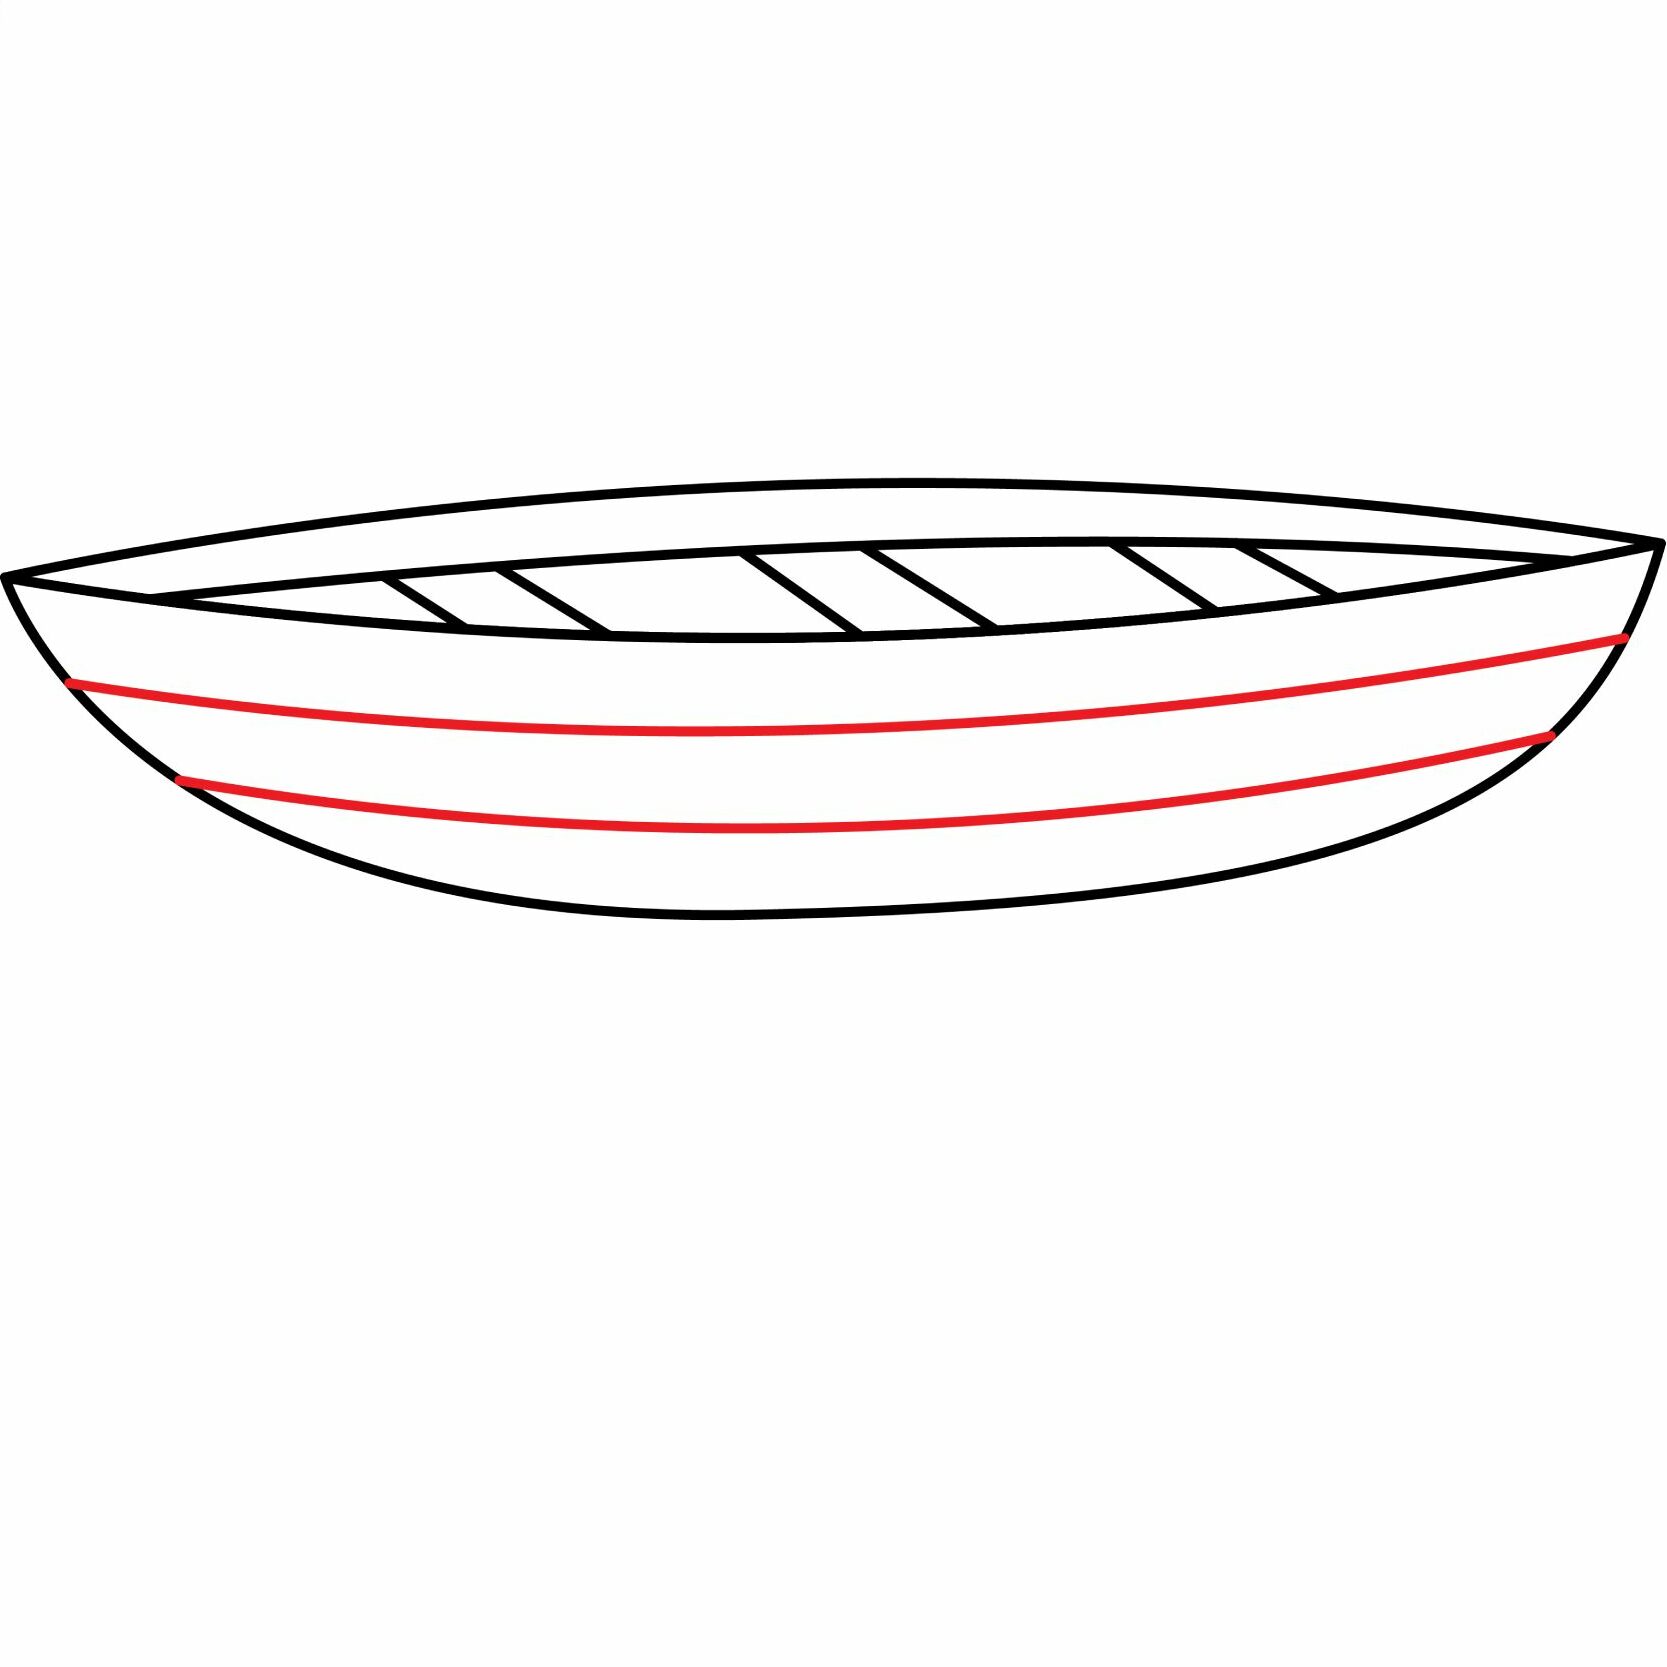
Step 4: Decorate the Hull of the Boat
As aforementioned, the hull of a rowboat can be made of wood. To show that our rowboat is wooden, we will add two lines on the side.
Draw two lines that have the same curvature as the top of the boat. Start by drawing one line right below the top part of the boat and then another line beneath the first line. Here is how our lines look.
- Use curved lines to add decoration to the hull
Be careful so that the lines don’t go outside the hull. Erase any line that spills over.
Step 5: Draw the Oar
As we mentioned earlier, a rowboat is different from a sailboat. A rowboat is propelled using oars. Two oars are needed, one for each side of the boat. If only one oar was used, the sailor would have to keep moving the oar from one side to the other to keep the boat from moving round and round when paddling.
Every oar has three main parts:
- Oar grip: This is the part where the sailor grips the oar with the fingers. It is often rubberized for comfort.
- Oar shaft: This is the long part of the oar that connects the handle to the blade.
- Oar blade: This is a wide flat section at the end of the oar that helps propel the boat when it is moved.
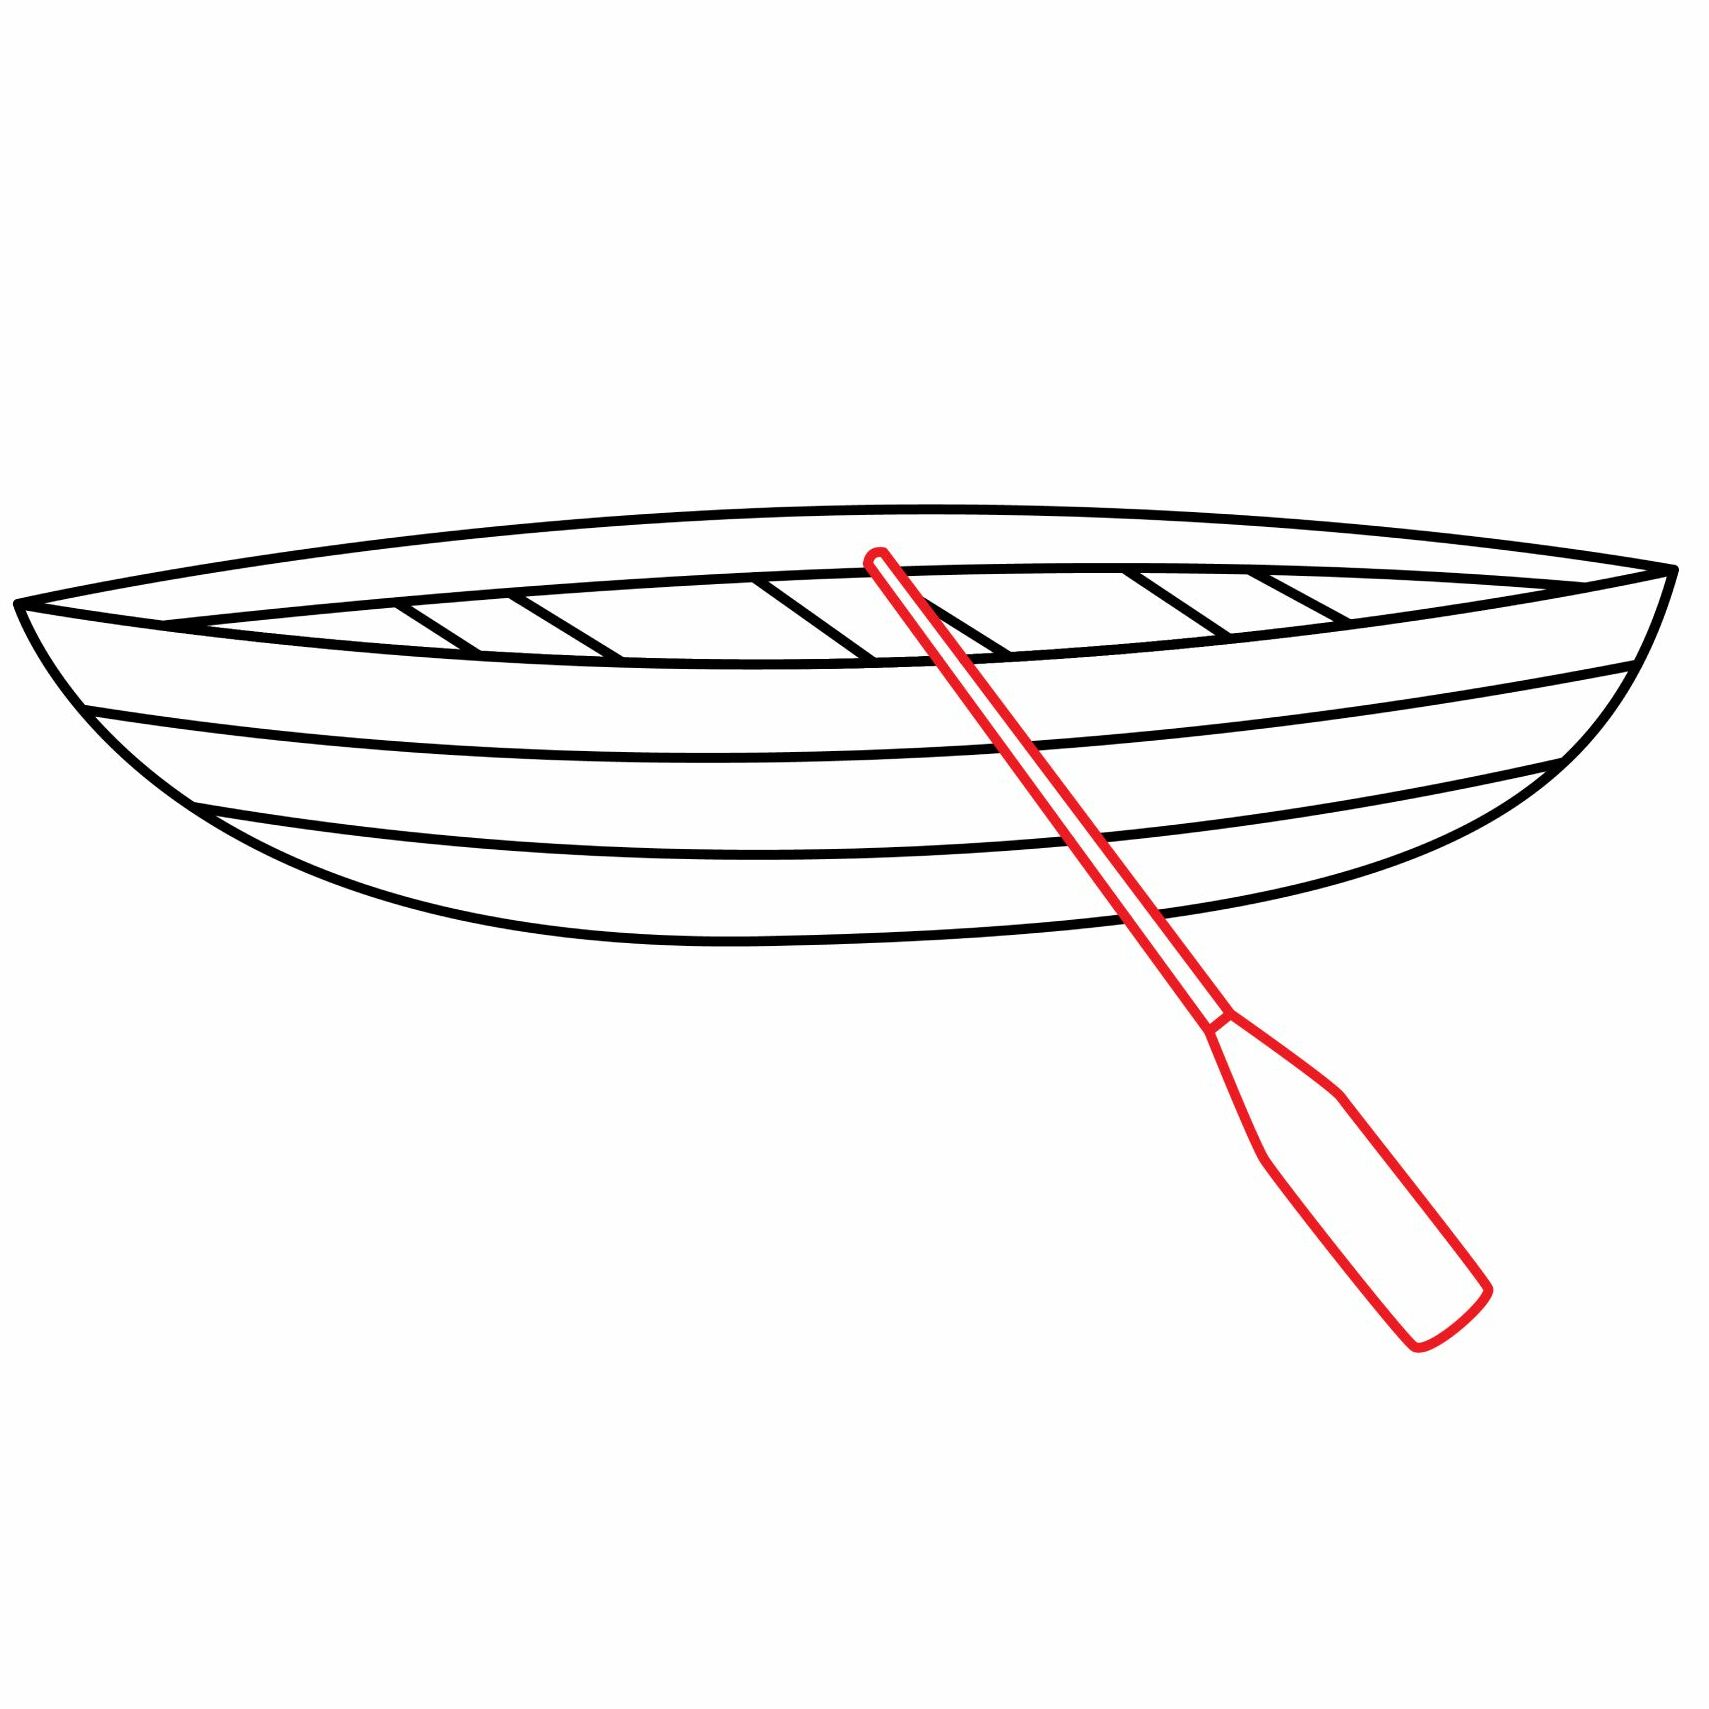
We can’t add two oars in our drawing because the second oar will be hidden behind the hull. To draw the oar, we will start by drawing two vertical lines that start inside the top of the boat and extend a little bit beneath the hull.
For the blade (the part that pushes the water), we will draw a rectangle that starts from the end of the first two lines. We will make the rectangle narrower at the point where it connects with the shaft as shown in the below image.
- Use vertical lines to draw the oar
- Use a rectangle to draw the blade
Step 6: Draw the Corners
We need to add more details to the bow and stern of our rowboat. Draw a curved line that starts from the bottom decoration line and moves up a bit past the height of our boat. Draw another curved line to connect the curved line to the top part of the boat as shown below.
- Add curved shapes to add details to the bow and stern
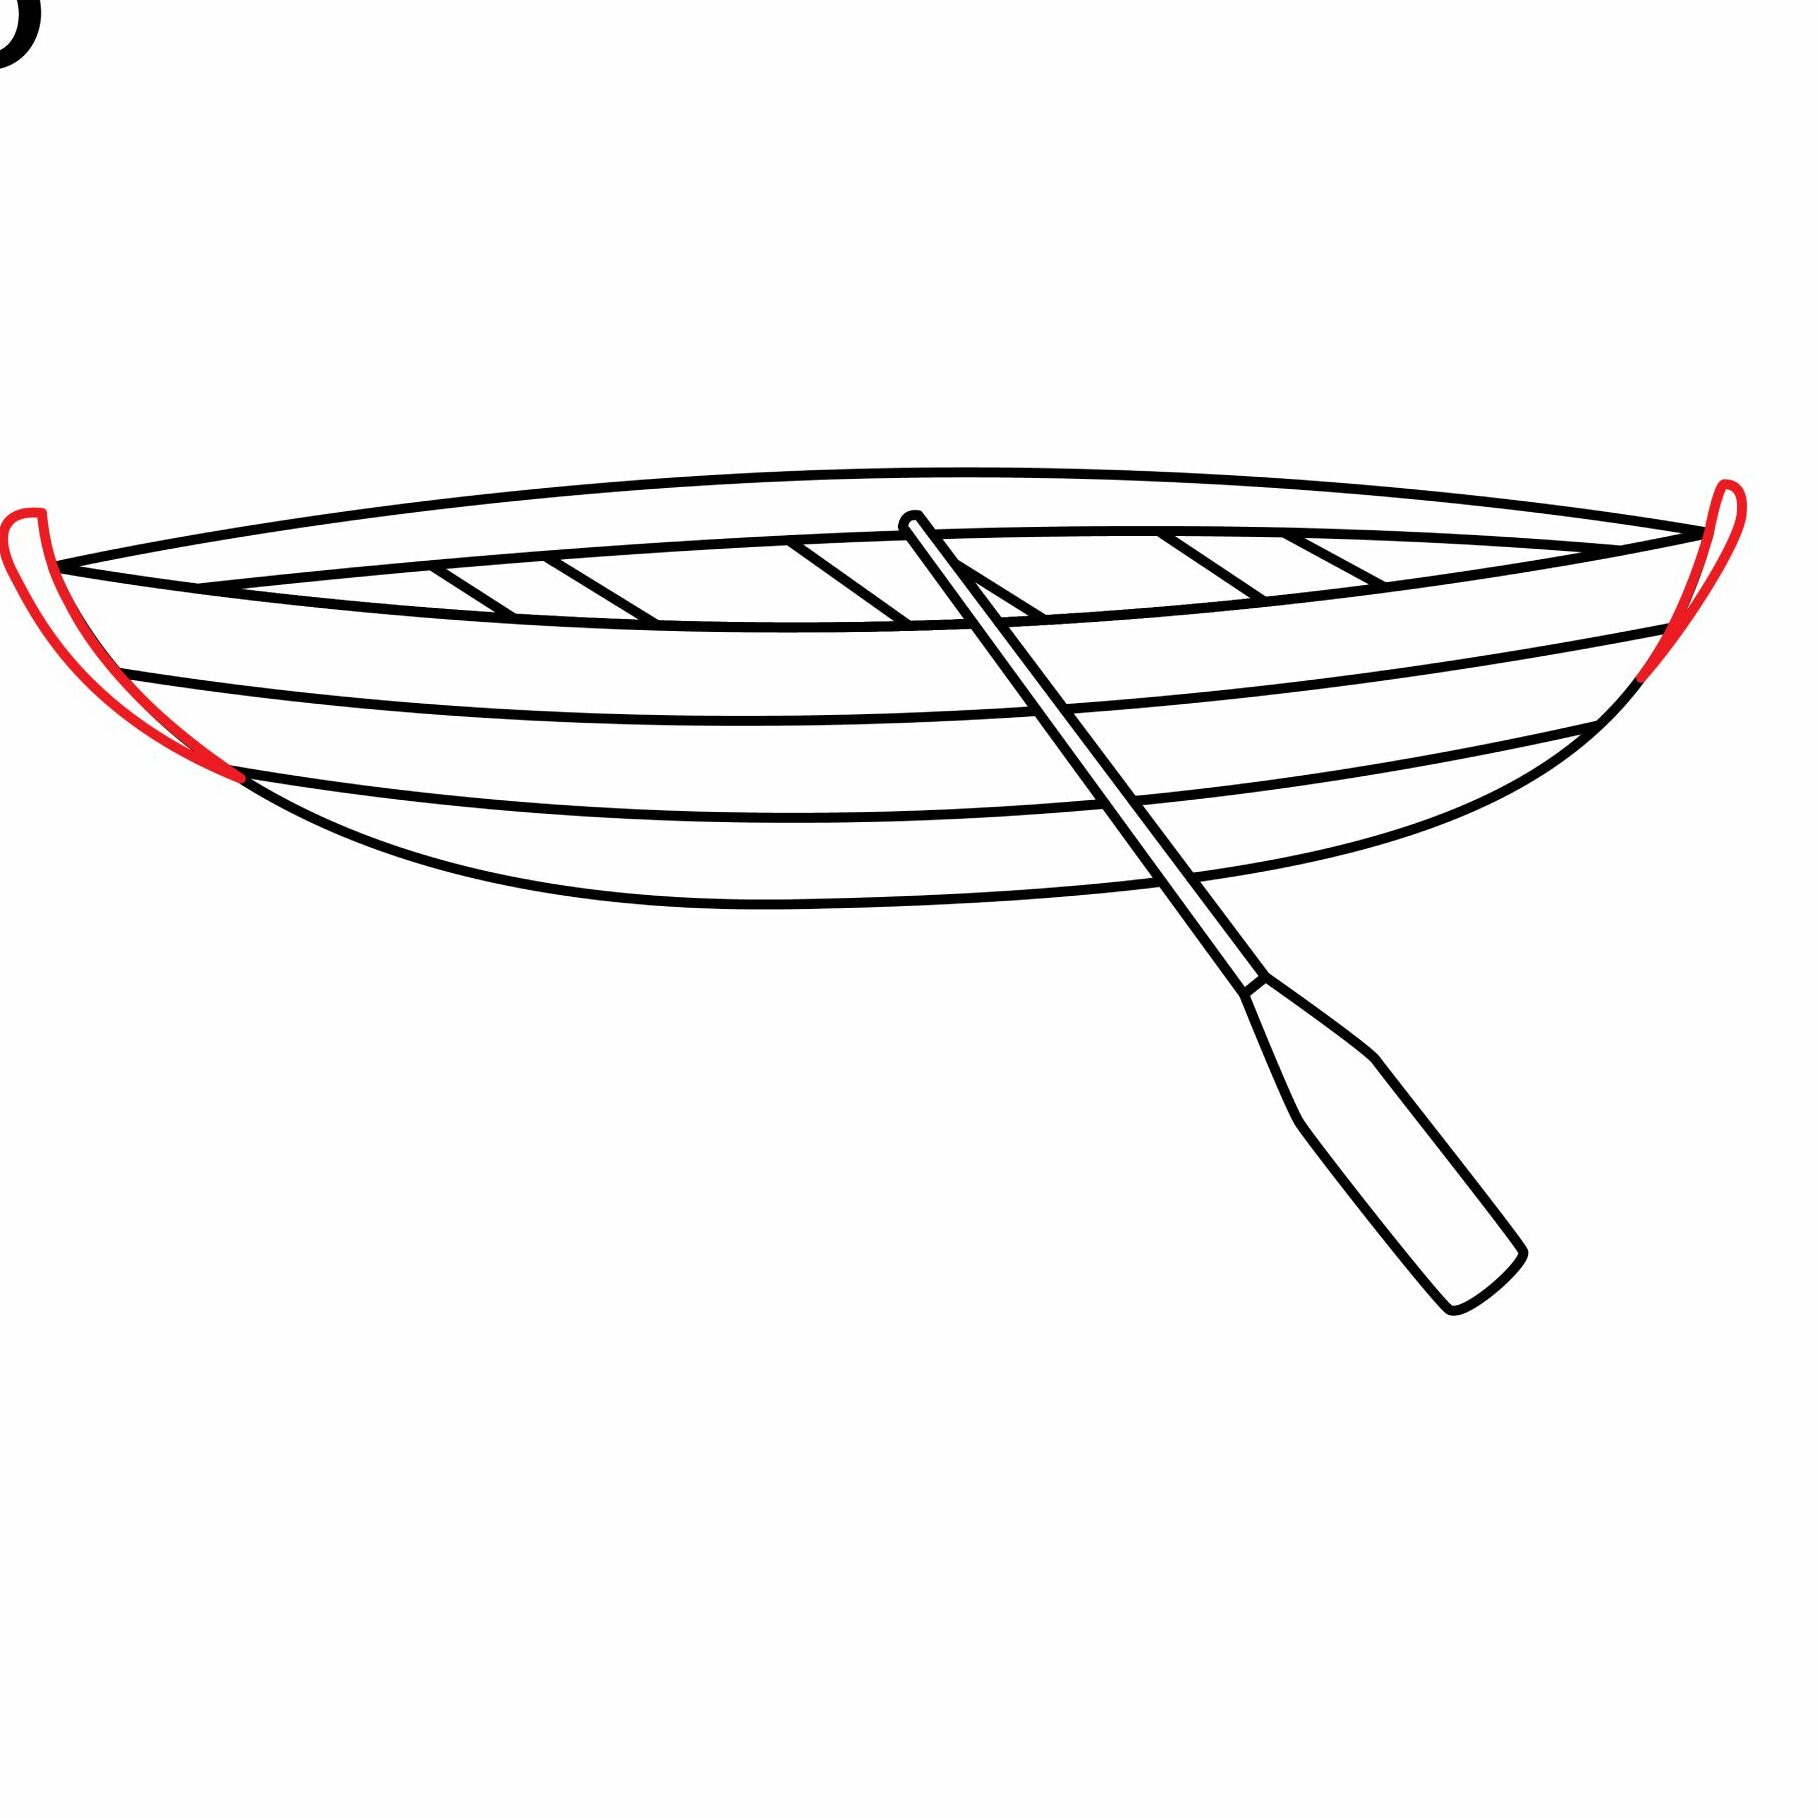
Add the same shape to the other side of the boat. To be able to distinguish the front and the back end of the boat, the curved corners you add to the front end should be bigger than the ones you add to the rear.
Step 7: The Rowboat is Complete
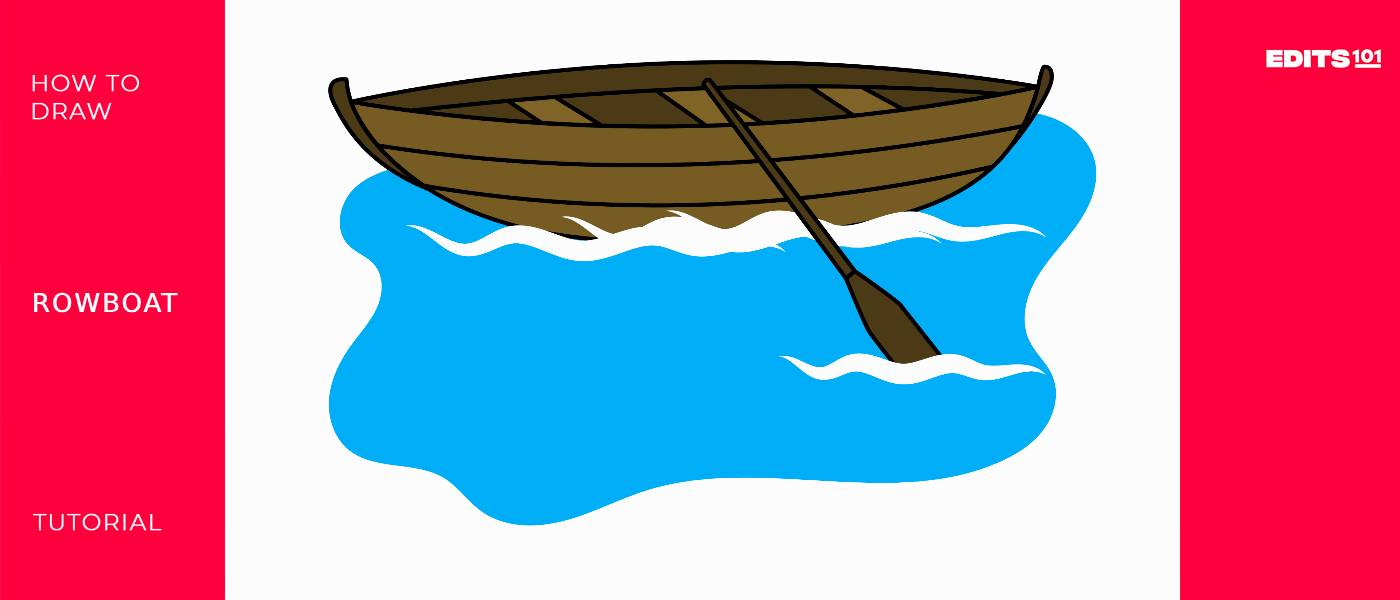
The rowboat is now ready. You should have a rowboat that looks similar to or better than ours. Here is our rowboat.
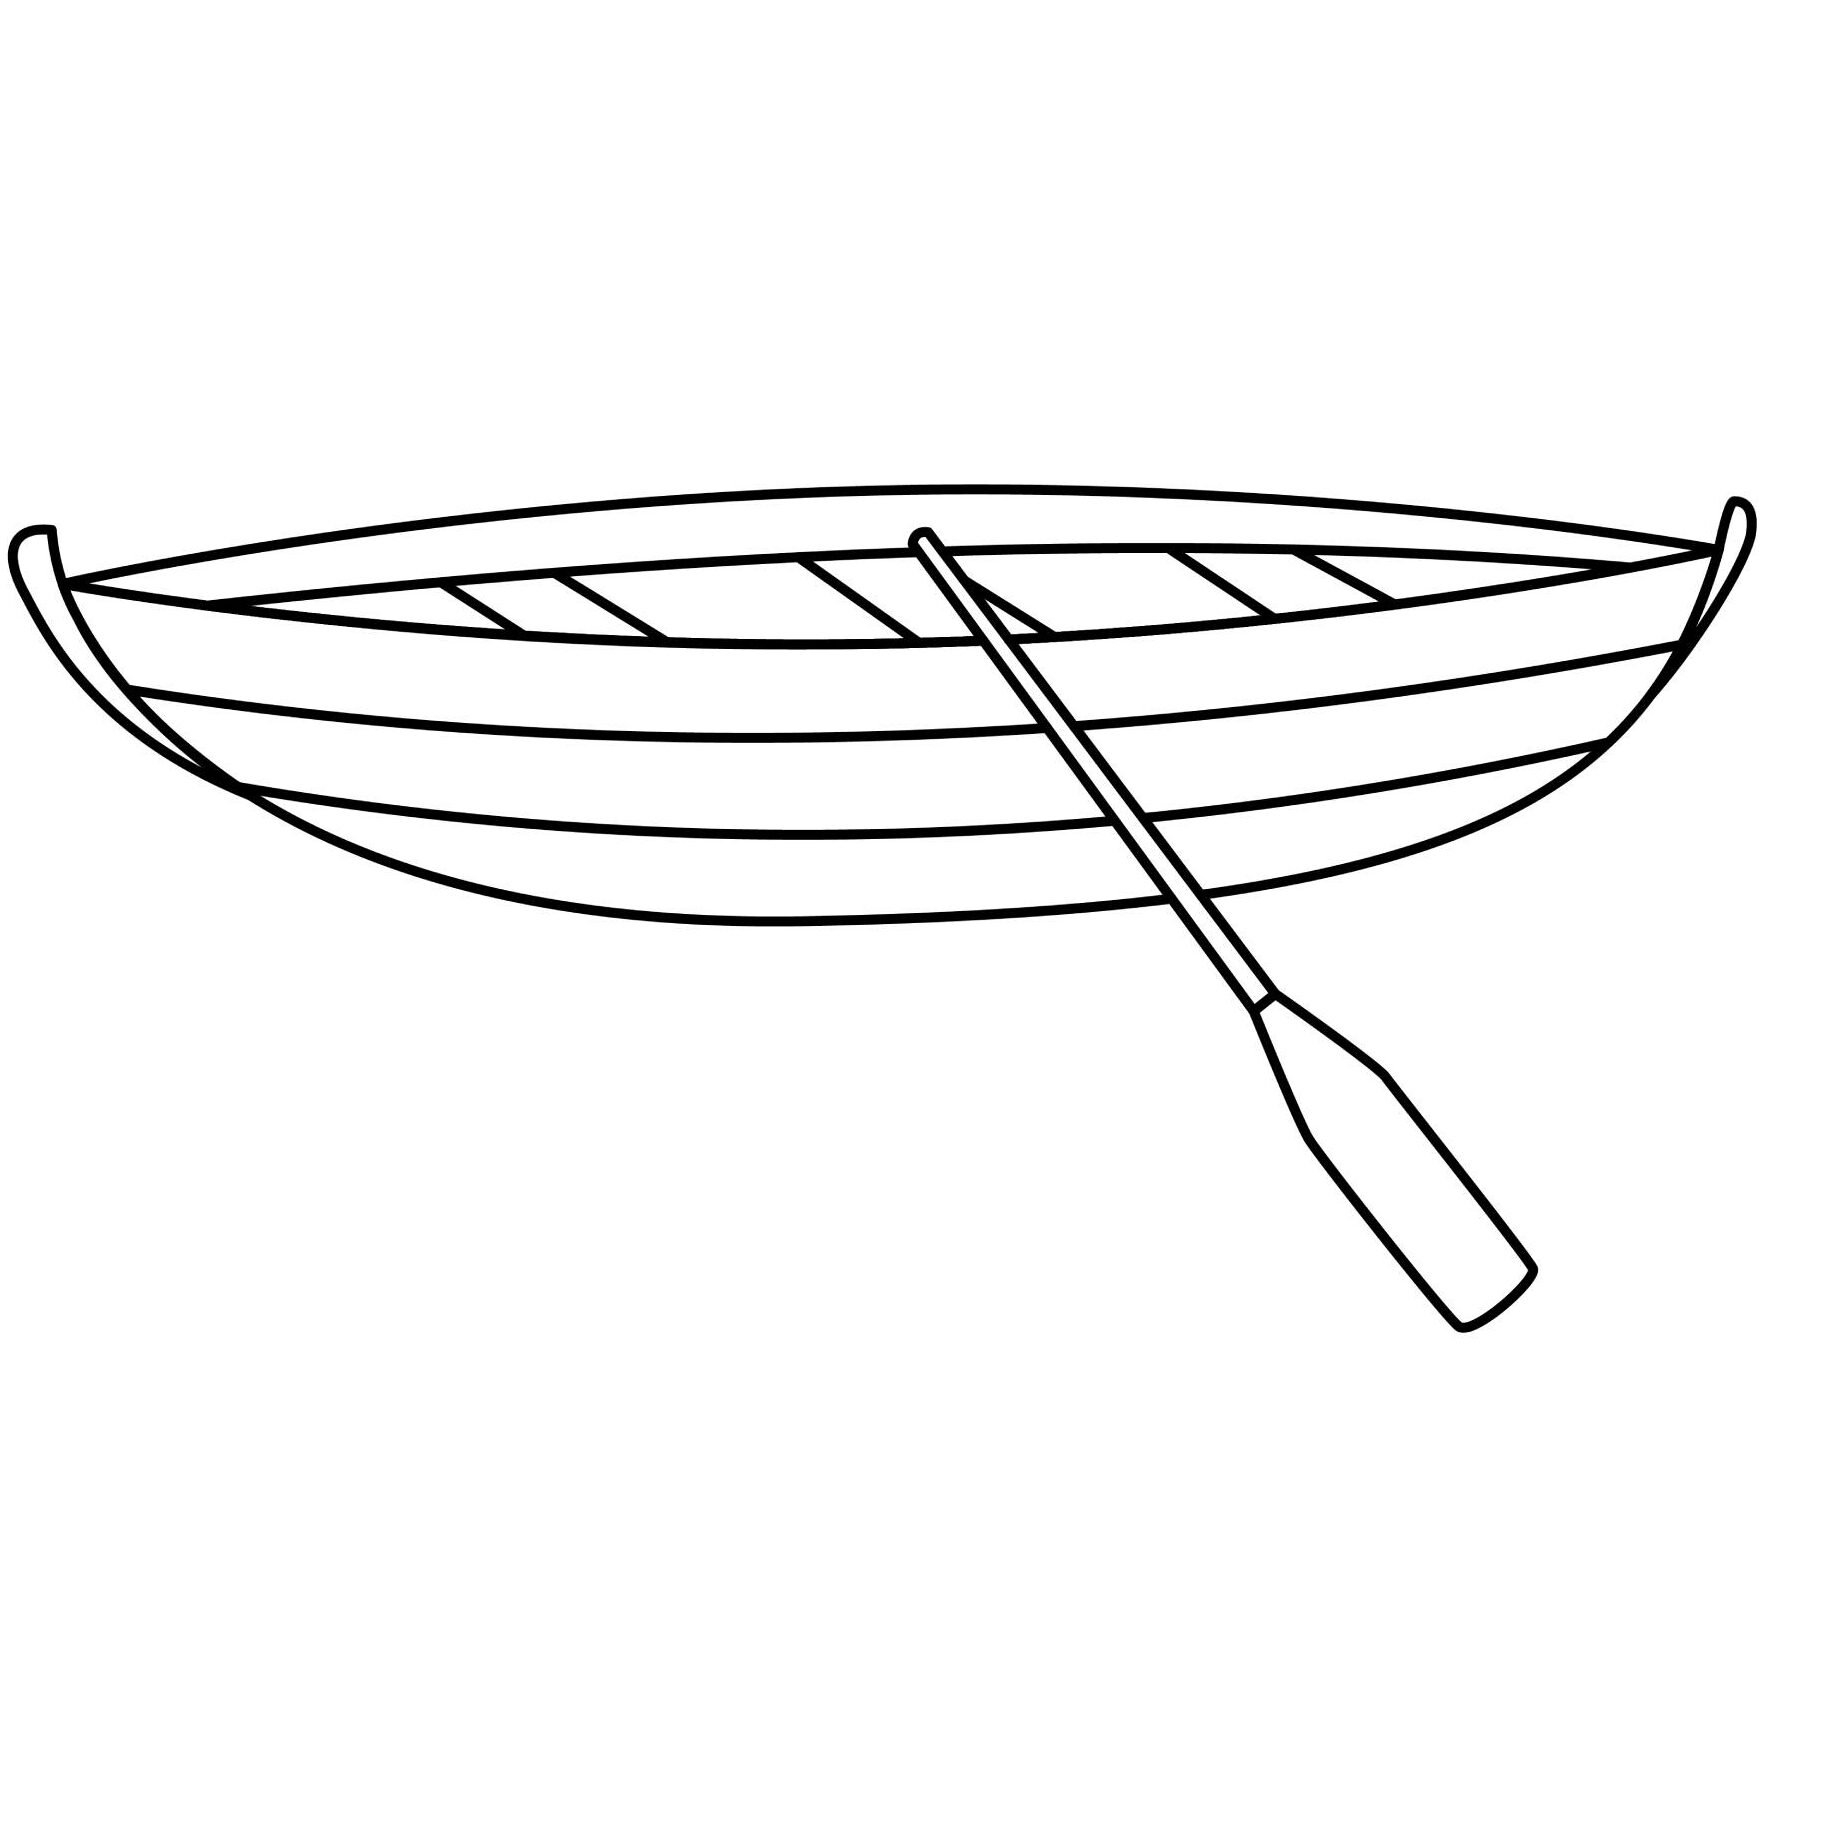
If your drawing is not as good, there is no need to be frustrated. One of the reasons we added the eraser to the list of materials you need is that no one is perfect. Use the eraser to remove the parts that are too far off and redo them.
Still not getting results that are similar to ours? No worries. No two boats are exactly the same. Yours is perfect as it is.
Add Details to Your Rowboat
Don’t take out your coloring supplies just yet. We need to make our rowboat more impressive by adding a few details to it.
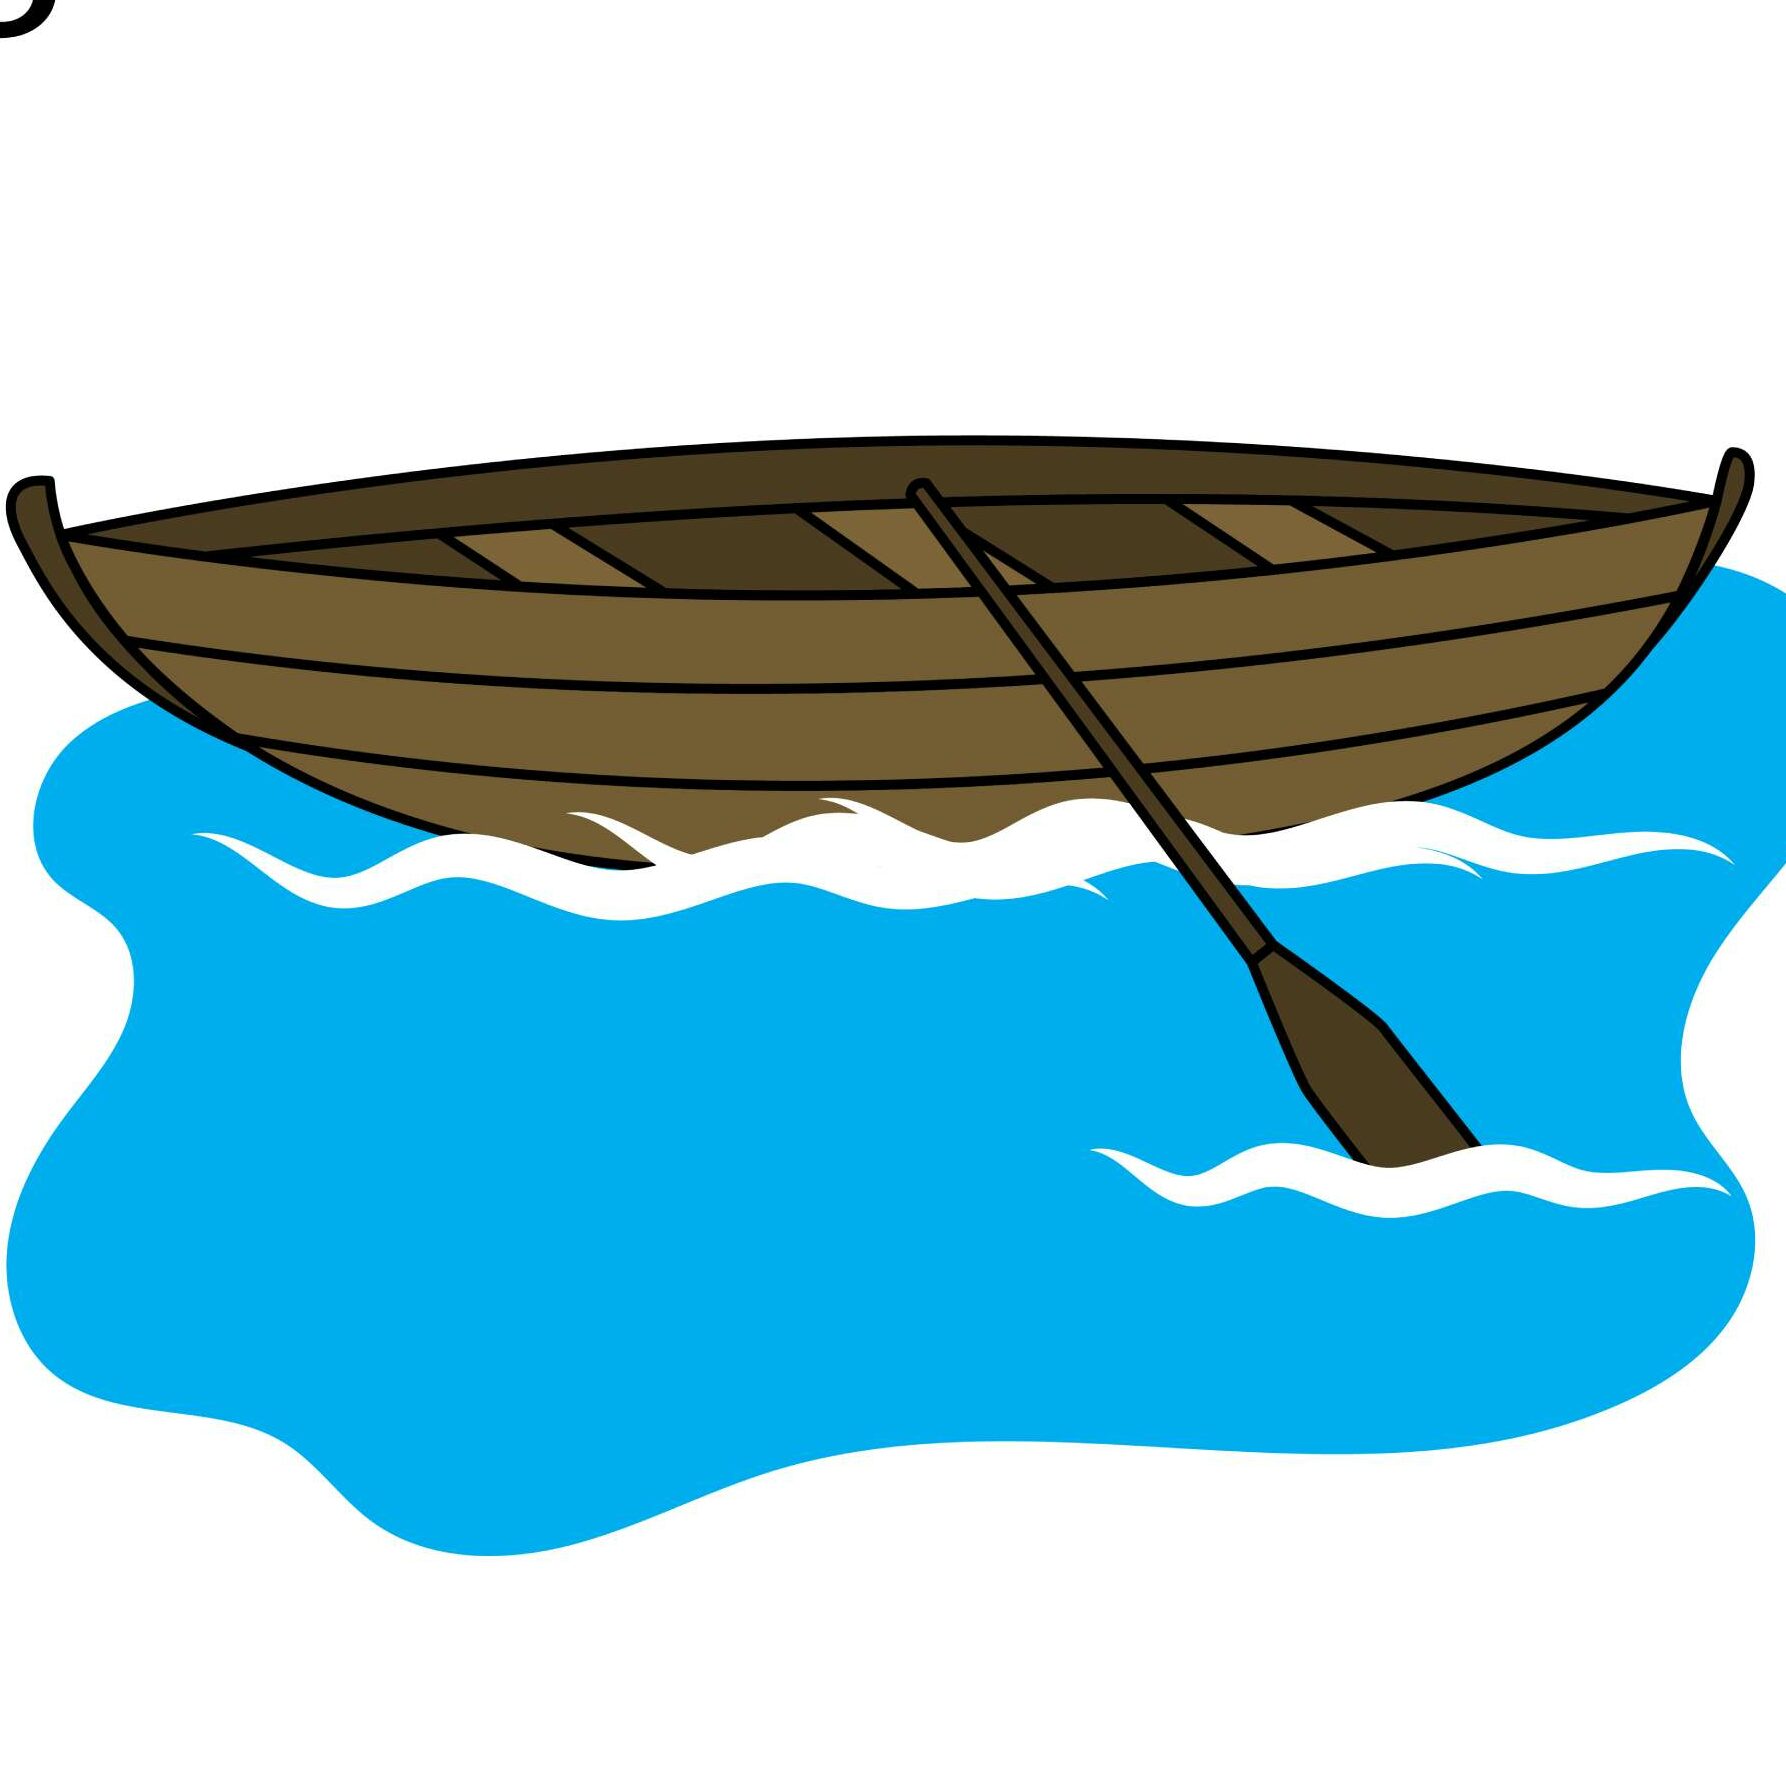
Step 8: Add Water and Waves
Adding water around the rowboat will make the drawing look better. To do this, draw a wavy line starting from the front end of the boat, move it down so that the oar is in the water, and then move up until you connect the wavy line to the back of the boat as shown in the below image.
Next, we need to depict some waves. To do so, add some wavy shapes inside the water as shown in the above image. Make sure the waves next to the boat are not over the oar. If yours are, simply delete the lines that run over the oar.
- Use wavy lines to create water and waves

Step 9: Color Your Drawing
The final step is all about coloring your drawing. You can go as wild as you want. It is, however, good to stick with the norms. For example, water is usually painted blue so don’t use red. For the waves, use a color that distinguishes it from the water. In our case, we used white.
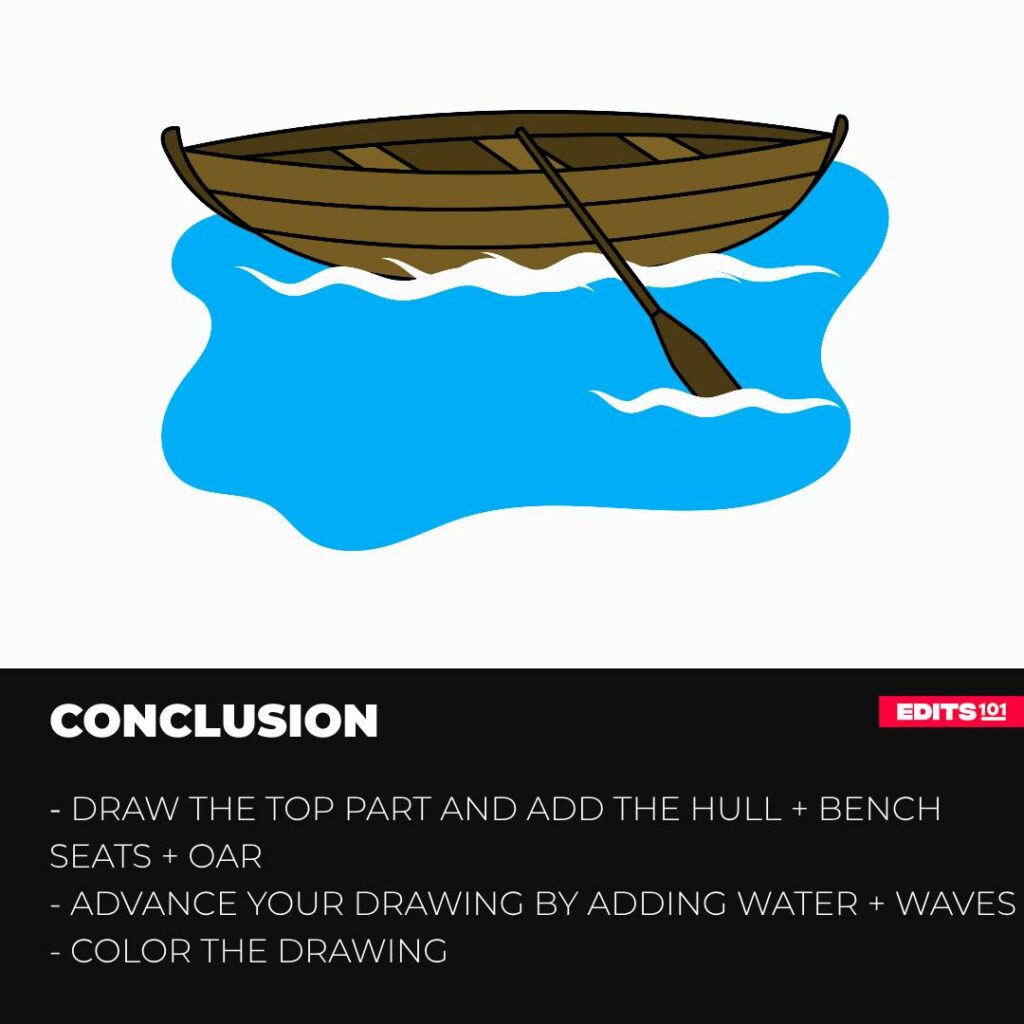
Conclusion
Drawing a rowboat is quite straightforward. We started by drawing the top part of the boat then added the hull, bench seats, oar, and water. To make our drawing stand out, we added some water and waves around the boat. We then colored our drawing.
Never be frustrated if your drawing is not looking as good. It takes time to draw a perfect rowboat. All you need is practice. You can also use these steps to draw a rowboat on any of your preferred sketching software such as Paint.
Thanks for reading & feel free to check out more of our articles!
Author Rating
Overall Rating
Summary
Learn how to draw a rowboat in simple steps. You will also learn about the names of the different parts as well as a few interesting facts.