How To Draw A Hockey Jersey | An Easy Step-By-Step Tutorial
Hockey jerseys are iconic symbols of this fast-paced, skillful sport. Their unique and stylish designs beautifully capture teams’ identities with their logos, colors, and graphics. Learning to draw an authentic-looking hockey sweater is not only a great way to celebrate a favorite squad, but it’s also fun drawing practice. In this tutorial, we will break down simple steps to sketch a hockey jersey with crucial details that bring it to life. Grab a pencil and paper, and we will begin designing our hockey uniform masterpiece!
| Steps | Complexity level |
| Draw the collar | 1 |
| Draw the outline of the jersey | 3 |
| Draw the sleeves part | 2 |
| Draw the pattern | 3 |
| Add the jersey number | 2 |
What you will need
- Paper
- Pencil
- Eraser (optional)
- Coloring supplies (optional)
How to Draw a Hockey Jersey
That’s all you need to follow along! Plain white paper or construction paper works. A soft pencil is more easy to erase, but any will do. You can leave it as a pencil sketch or color it with crayons, colored pencils, or markers later. An eraser can help tidy up and correct mistakes. With our essential tools gathered, we’re ready to hit the ice and start conceptualizing our hockey sweater illustration!
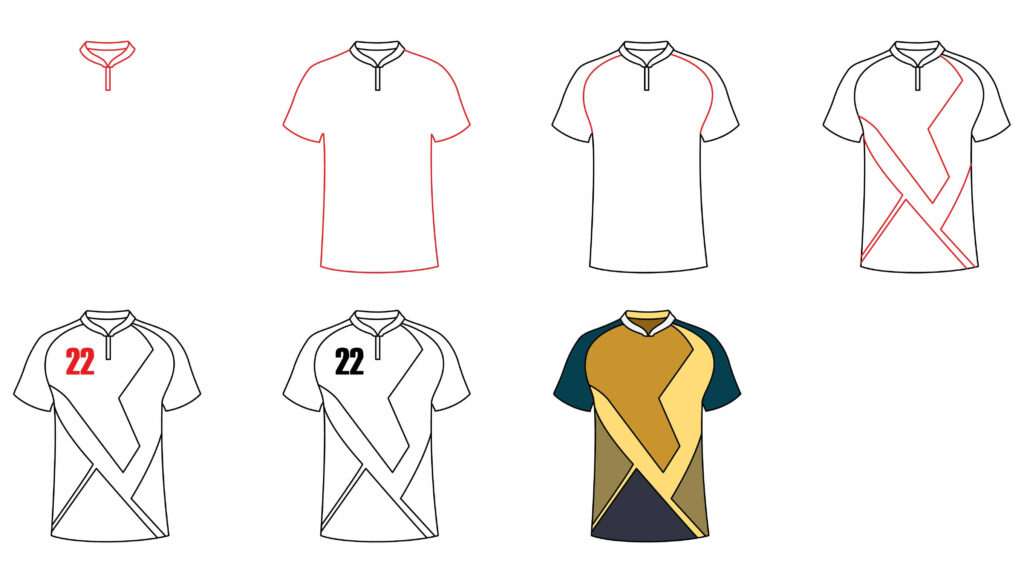
Step 1: Draw the collar
Start your hockey jersey by lightly sketching the collar area at the top of the page. Draw a wide-open, rounded letter “U” shape, leaving a gap for the neck hole in the middle. Make sure the collar shape goes straight across with both sides even. Add a small horizontal line underneath on each side for depth. These represent the edges of the shoulder yoke area.

Keep your starter lines very faint so they’re easy to erase. Leave plenty of vertical space under the collar to add the jersey’s body. Draw it proportionately – use up to a third of the page height for the collar and shoulders to leave room for more extended elements below.
- Sketch a wide rounded U-shape for a collar with an open middle
- Add short horizontal lines under the sides for shoulder yoke
- Keep collar sketch light; use 1/3 of page height
Step 2: Draw the outline of the jersey
Using your collar as an anchor, add the outline shape of the hockey sweater underneath. Lightly sketched sloped shoulders extending down diagonally from each side of the collar. Then, draw vertical lines straight down the sides for as long as you want the jersey to extend.
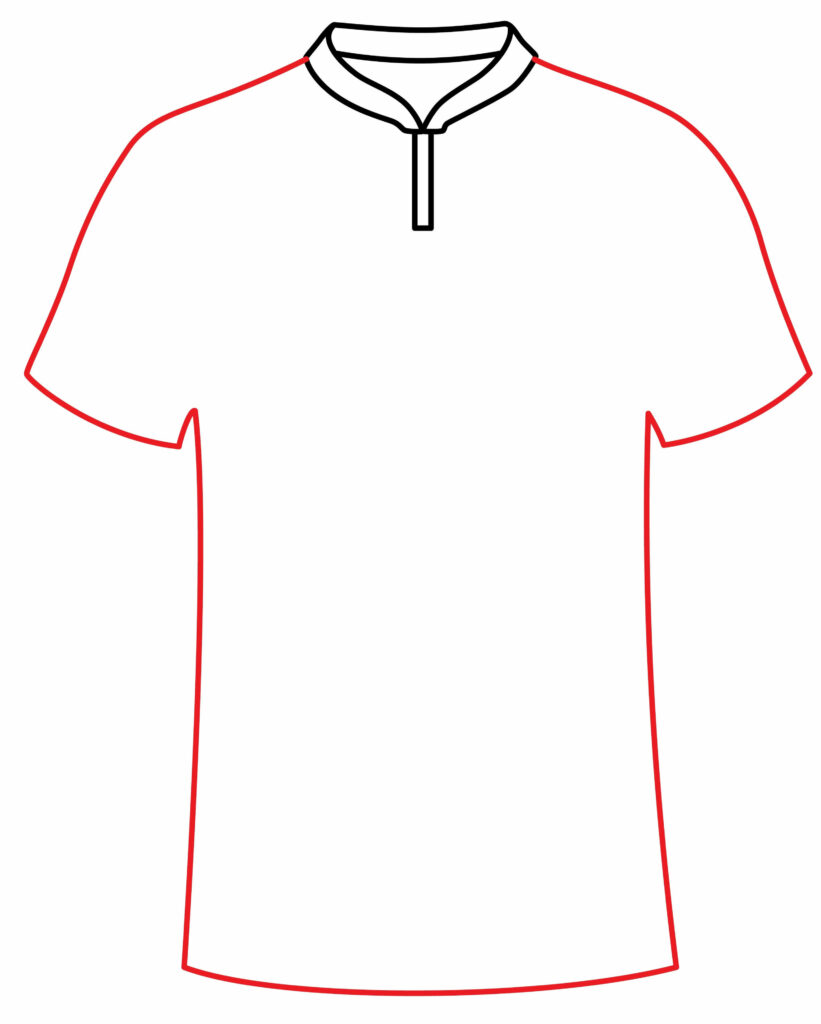
Finish by connecting the bottom tips with a gently curved hemline. Erase and tweak until you have a loose outline, avoiding straight lines and angles. A classic hockey jersey should flare out more expansive at the bottom than at the top. Fill in the open areas as you refine the shape.
- Sketch angled shoulder lines from the collar, then straight vertical sides
- Connect with a slightly curved hemline at the desired length
- Refine into a loose outline shape, wider at the bottom
Step 3: Draw the sleeves part
On each shoulder of the hockey jersey outline, sketch the capped sleeves. Lightly draw a half-oval shape extending from the shoulder on each side, curving back in to connect with the torso outline. Add a short angular line connecting the sleeves to the body.

These half-oval sleeve cuffs should bend/curve to indicate bent elbows so the arms don’t appear straight and rigid. Make both sleeves similar in proportions and shape. Keep them simple and roughly symmetric. If needed, erase and refine the torso outline to flow naturally around the sleeves you added.
- Draw half-oval sleeve cuffs extending from both shoulders
- Include an angular line connecting the cuffs to the body
- Bend sleeve shapes to imply natural arm/elbow bends
Step 4: Draw the pattern
To add team branding to your jersey, start sketching the icons and graphics. Create areas of interest by drawing shapes or lines that divide up sections of the jersey into distinguishable parts. Get creative with stripes, contrasting panels, layered shapes, or whatever hockey uniform patterns appeal to you.
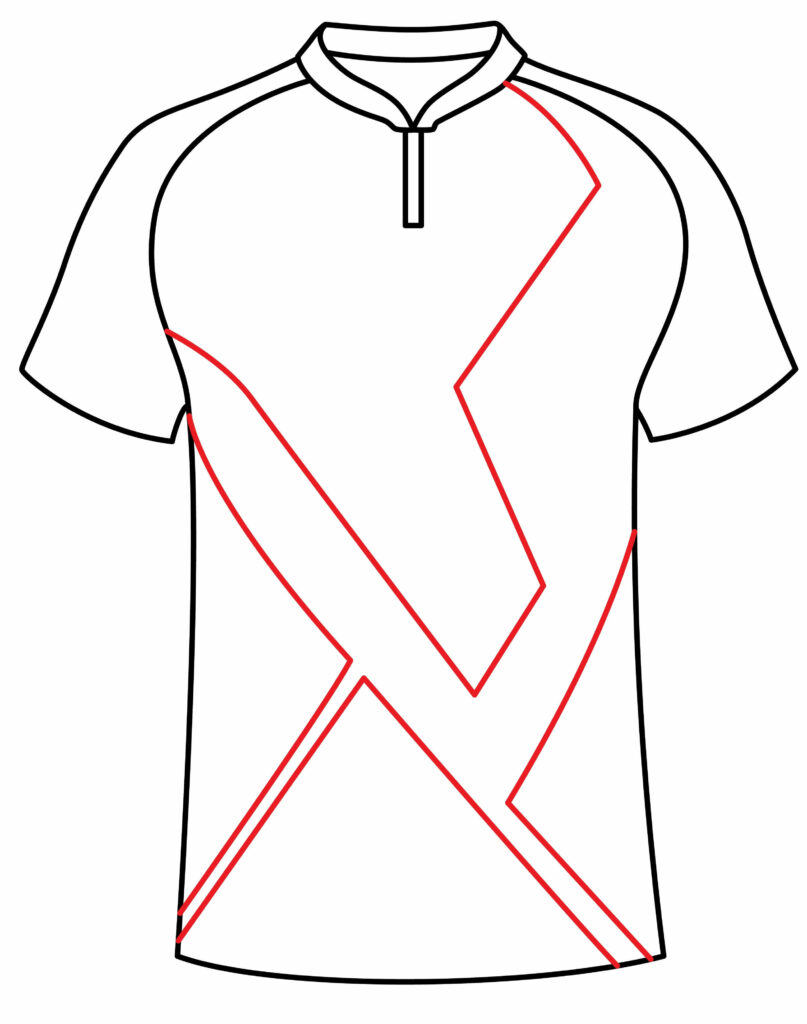
Aim for 3-5 visible elements like bands around the arms, a badge on one side, alternating color blocks, or shoulder panels. Keep the patterns bold and straightforward so they read clearly. Allow some space around them for balance. Capture the spirit of an actual team identity in your original jersey motif!
- Sketch creative patterns like stripes, blocks, or shapes
- Arrange 3-5 elements in different zones of the jersey
- Craft bold, identifiable team branding patterns
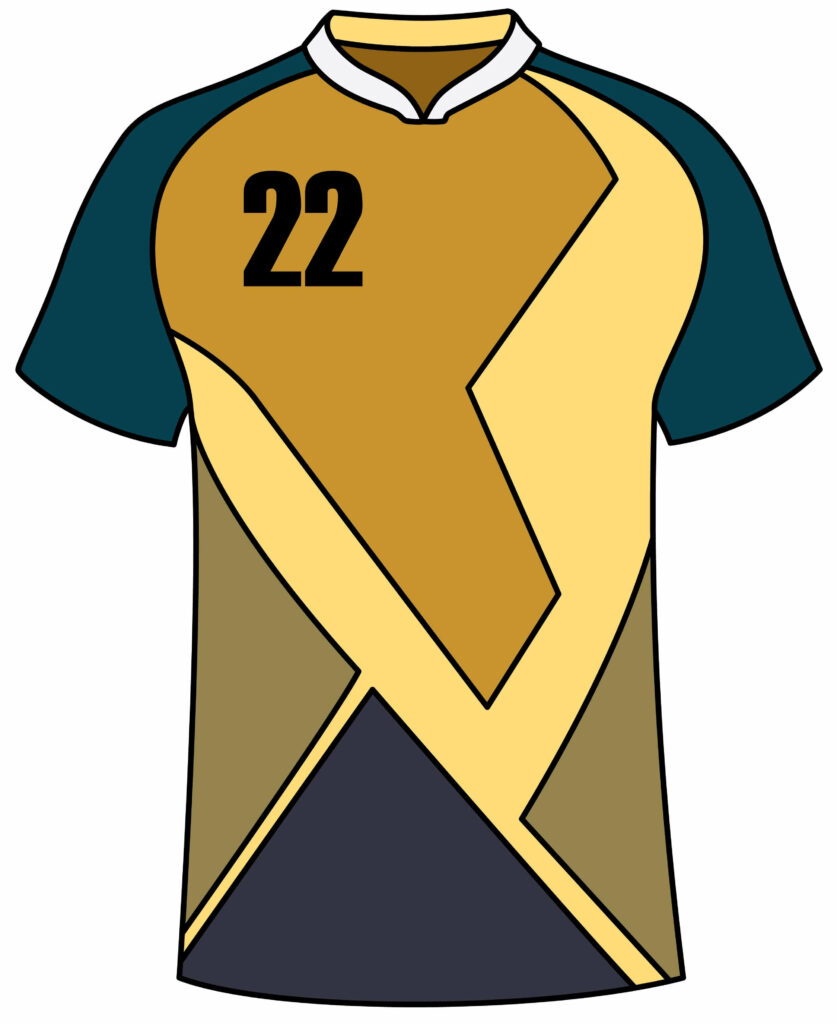
Step 5: Add the jersey number
Choose a recognizable jersey number and sketch it prominently on the upper back of your illustrated hockey sweater. Pick a number style that complements your overall jersey graphics. Use larger text and bolder lines for readability – imagine viewing it from a distance.
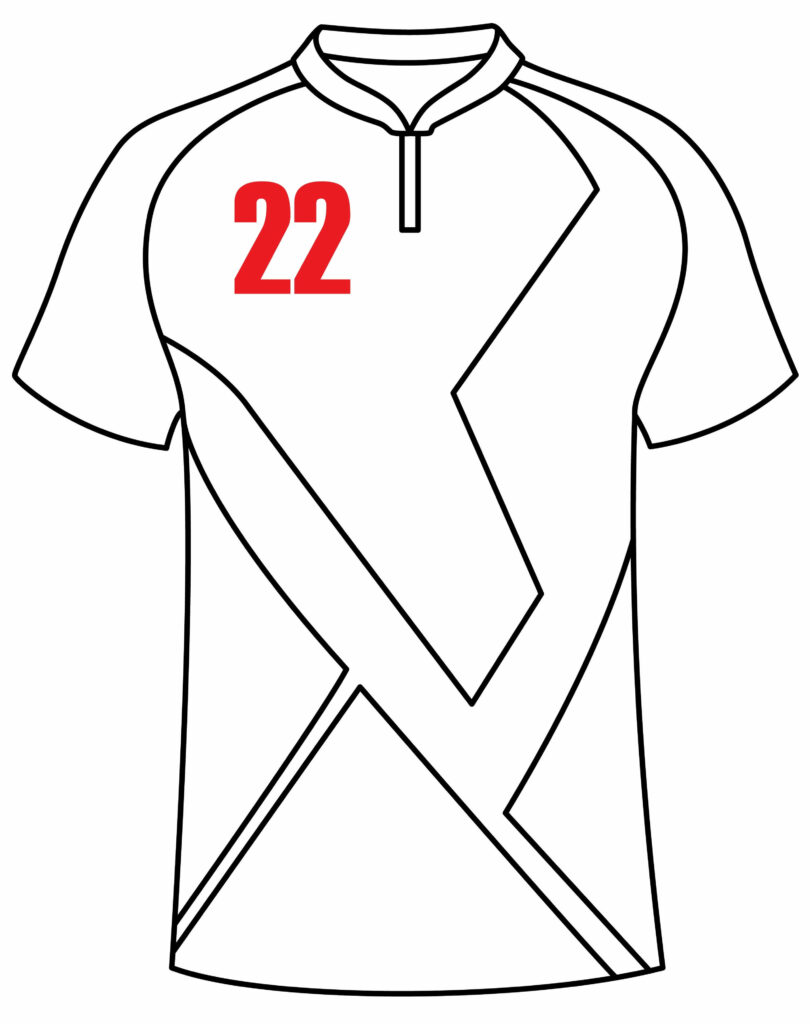
If desired, echo a smaller version of the number on the front of the jersey, too. This number association is integral to player identity and merchandise branding. Let it stand out as an eye-catching focal point amidst the other details you incorporated.
- Prominently sketch jersey number on the upper back
- Make the number style match other graphics
- The echo number version on the front is smaller for identity
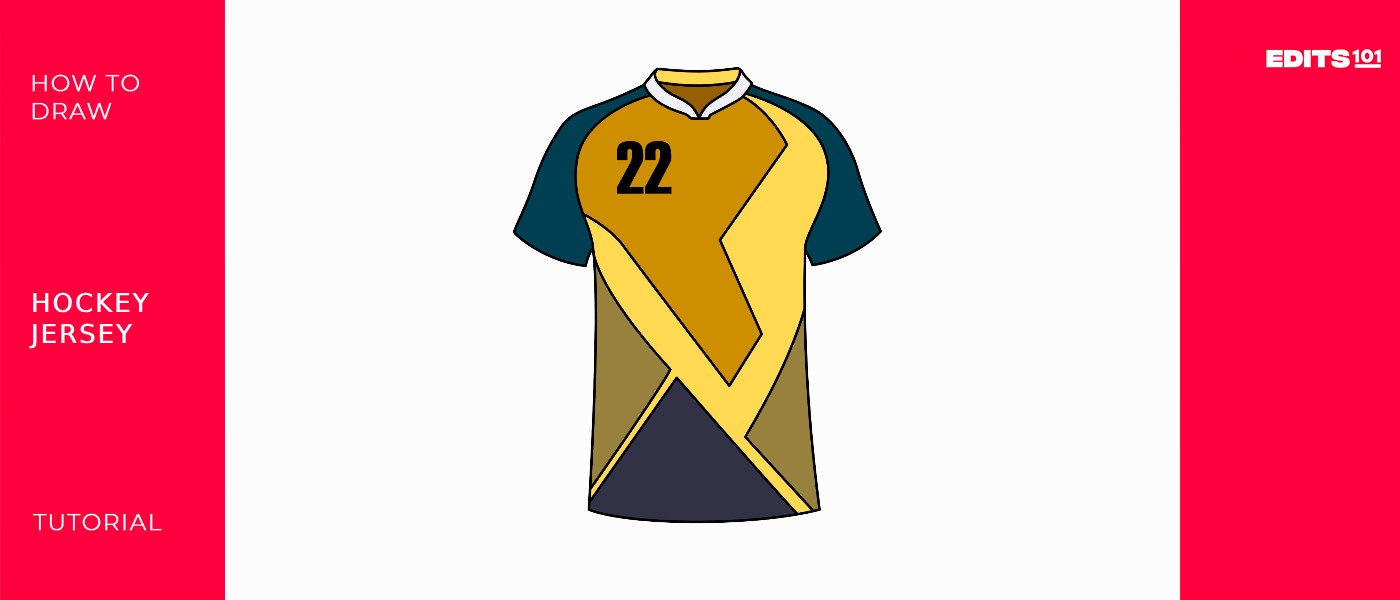
Step 6: The hockey jersey is ready
The hockey jersey is ready to be worn by a player. You did an excellent job. You created your hockey jersey, and we’re sure you followed every instruction. You can use a marker to outline the drawing to make it stand out. To improve the appearance, we will remove the pencil marks after tracing.
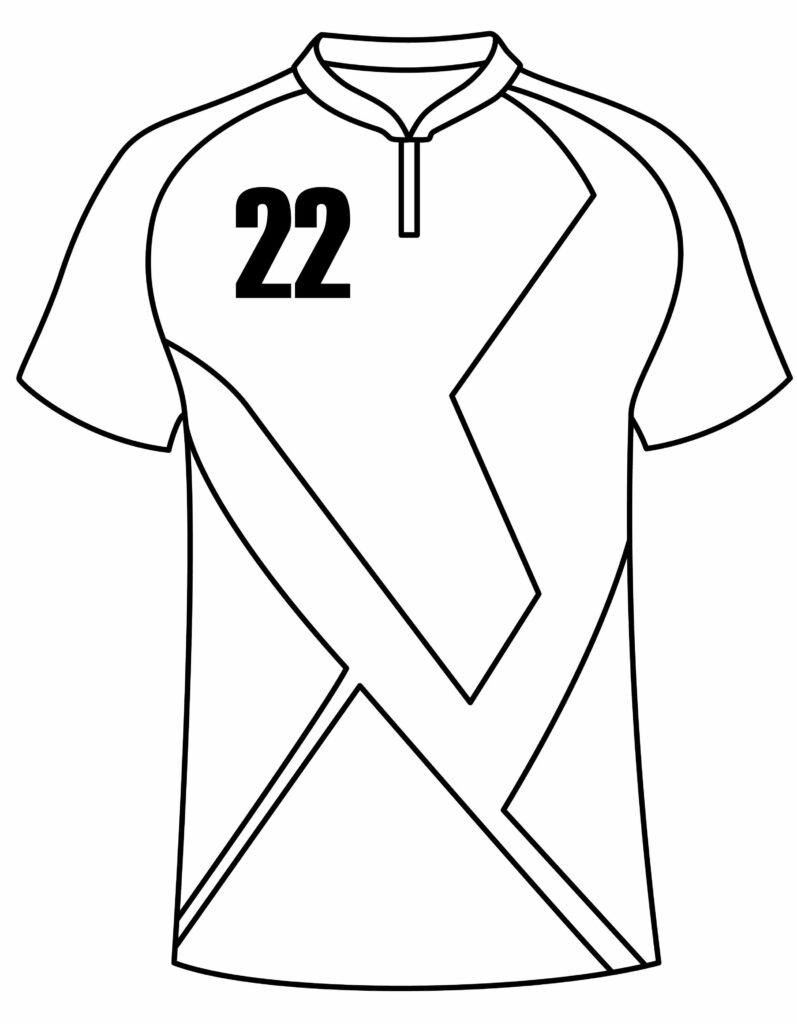
The actual fun is about to start. We are going to improve and add authenticity to our drawing. Can you produce a more refined picture with your creativity and imagination?
Taking your hockey jersey to the next level
Like any other skill, sketching requires practice. Set aside time each day to sketch, even if it’s only for a little while. Be mindful of your surroundings. This enhances comprehension of details, dimensions, and forms. You can start with the basics and work up to more complex topics. Experiment with different drawing tools like charcoal, colored pencils, watercolors, markers, and pencils. Every medium has unique characteristics that could help you identify your preferences.
You can also play with basic hatching, blending, shading, and cross-hatching techniques. Understanding these techniques will greatly enhance the complexity and realism of your drawings. When you’re drawing, use your imagination and try out new concepts.
Adding a Background
Once your hockey jersey illustration is complete, add some simple background elements to finish the overall composition. For example, very lightly sketch a head/neck shape from the collar to suggest a player wearing it. Quickly indicate facial features if desired.
You could also draw a hockey stick shape overlapped by the sleeves to imply action in a game. Other background props like a puck, goalie masks or arena elements further set the hockey context. Keep them very basic and muted so your vibrant jersey remains in full focus as the main design element.
Most importantly, don’t overcrowd the background or make it too busy and distracting. Simple is better to frame the jacket effectively without competition. Let that creative jersey design shine!
Adding Color
Opt for a three or four-subtle color scheme when coloring your illustrated hockey sweater. Boldly fill your jersey motifs and designs with two dominant contrasting team colors. For example, saturated red and navy blue work nicely. Add neat white accents and outlines for pops of brightness.
Beyond the central jersey focus, use muted, cooler background tones like light grey or tan so your vibrant figural palette attracts maximum attention by contrast. Vary your pressure when shading with colored pencils to convey depth and contours. Work slowly and cleanly for best results.
Bonus Tips
Customize your illustrated hockey sweater further by incorporating unique personalized elements that make it your stylized creation. Add things like your name/nickname across the shoulders, your significant number not used in the league, insider symbols that hold meaning just for you, or actual decorations from your genuine hockey gear if drawing from live reference.
You could also depict a non-human mascot character wearing the jersey, blend multiple existing team jersey motifs into your hybrid design or portray the sweater from an exciting perspective like hanging folded over a stick. Get creative building narrative and personality!
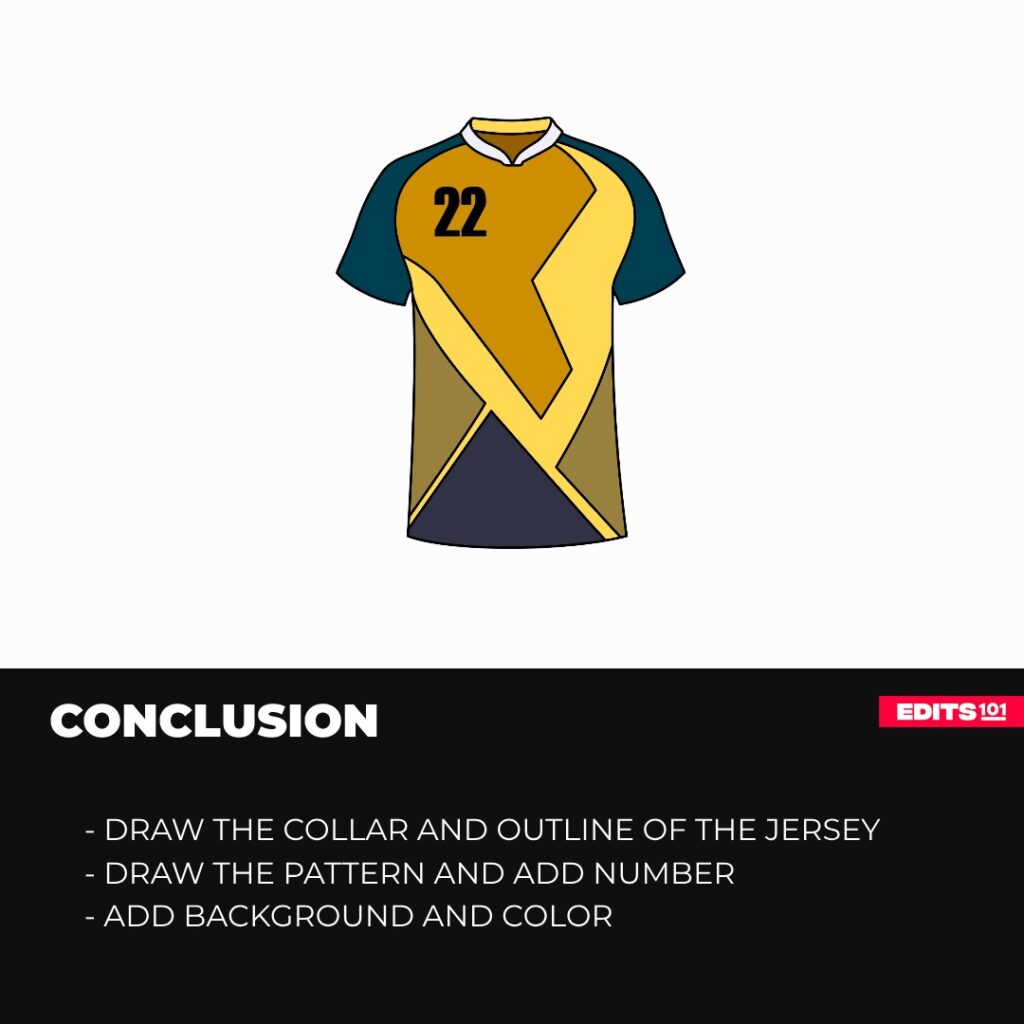
Conclusion
As you can see from following this hockey jersey drawing guide, starting with the foundational shape and then decorating it with color blocks and graphical elements builds strong illustration skills while allowing you to invent imaginative uniform concepts. Experimenting with different pattern panels and palette combinations results in unique designer outcomes bursting with your creative vision.
Practice using these techniques to concoct the perfect fantasy jersey commemorating your original team. Hockey-themed art is delightful and rewarding for both sports fans and art hobbyists alike. So grab some coloring supplies, turn up the game highlights for inspiration, and see what eye-catching jersey visions you can bring vividly to life!
Thanks for reading & feel free to check out more of our articles!
Author Rating
Overall Rating
Summary
Learn how to draw a hockey jersey in simple steps.