How to Draw a Fencing Mask | A Step-by-Step Guide
Fencing masks were created to protect the face and head of fencers from potential injuries during matches.
The design of fencing masks ensures that the eyes, nose, and mouth are shielded while allowing for clear vision and proper breathing.
Today, fencing masks are still used as vital safety equipment in the sport to prevent serious accidents such as eye injuries or facial lacerations.
They also contribute to a fair and competitive playing field by ensuring that all participants have an equal level of protection.
In this tutorial, you will learn how to draw your very own fencing mask in 6 easy steps. We’ll also be providing you with some bonus tips to really take your fencing mask drawing to the next level.
| Steps | Complexity level |
| The Mesh | 2 |
| The Shell | 4 |
| The Bib | 3 |
| The Metal Tongue | 2 |
What You Will Need
- Drawing paper or a sketchbook
- Pencils (2b, 3b or 5b)
- An eraser
- Color pencils or markers
- Ruler (optional)
- 20-25 minutes
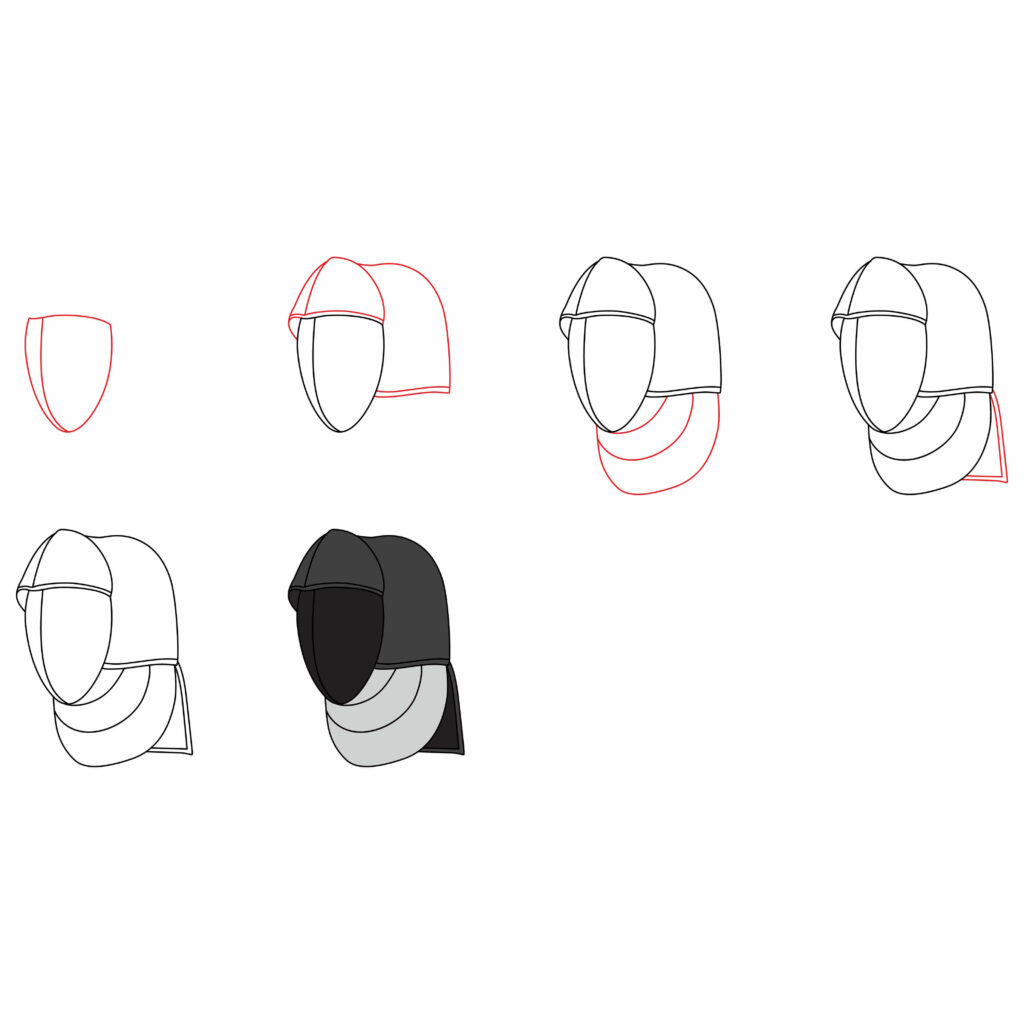
How to Draw a Fencing Mask
The design of a common fencing mask is basically comprised of four things; the mesh, the shell, the bib and the metal tongue.
When taking in the drawing as a whole, it may seem difficult to complete, but by breaking them up in singular parts, drawing a fencing mask is entirely achievable.
Check out the outline below that includes all the steps you will be doing before you start. This will help you familiarize yourself with the process. Grab all of your drawing utensils and without any further ado, get started!
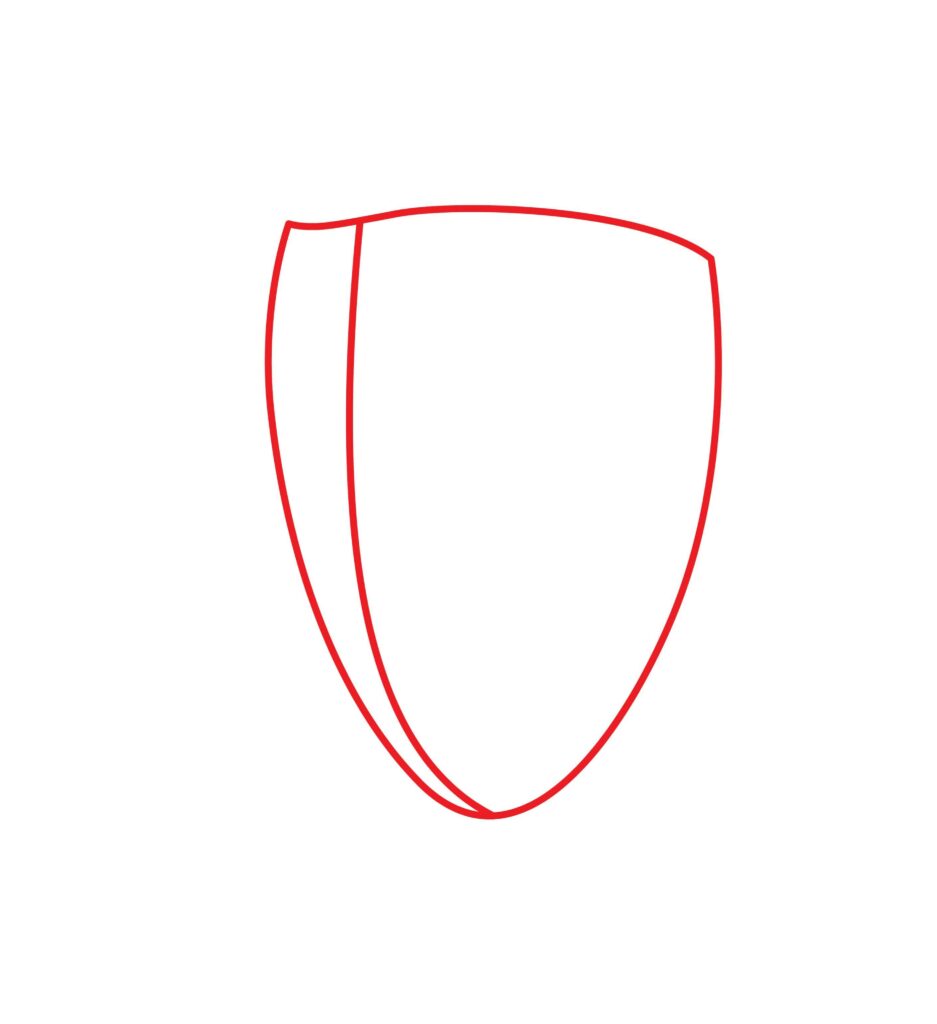
Step 1: Draw the mesh
The mesh material used in fencing masks are made up of strong, durable materials such as steel or stainless steel wires. They’re designed in such a way that fencer’s have optimal protection while still allowing them to breathe.
To complete this step, start by drawing a semi-oval shape in the middle of your page. The bottom should look somewhat like a chin and the top should have an empty space. This is to draw a slightly curved horizontal line from one tip of the oval shape to the other.
Next, draw a vertical line inside your semi-oval shape, starting from the left side of the horizontal line you just completed and then connecting it to the middle of the chin-like part of the oval shape.
Take your time with this step and remember to keep your drawing hand as fluid as possible to assist you with some seamless curves.
- Draw a semi-oval shape on the middle of your drawing paper
- Add a curvy vertical line on the left side of your oval-shape
- Keep your drawing hand fluid for wavy curves
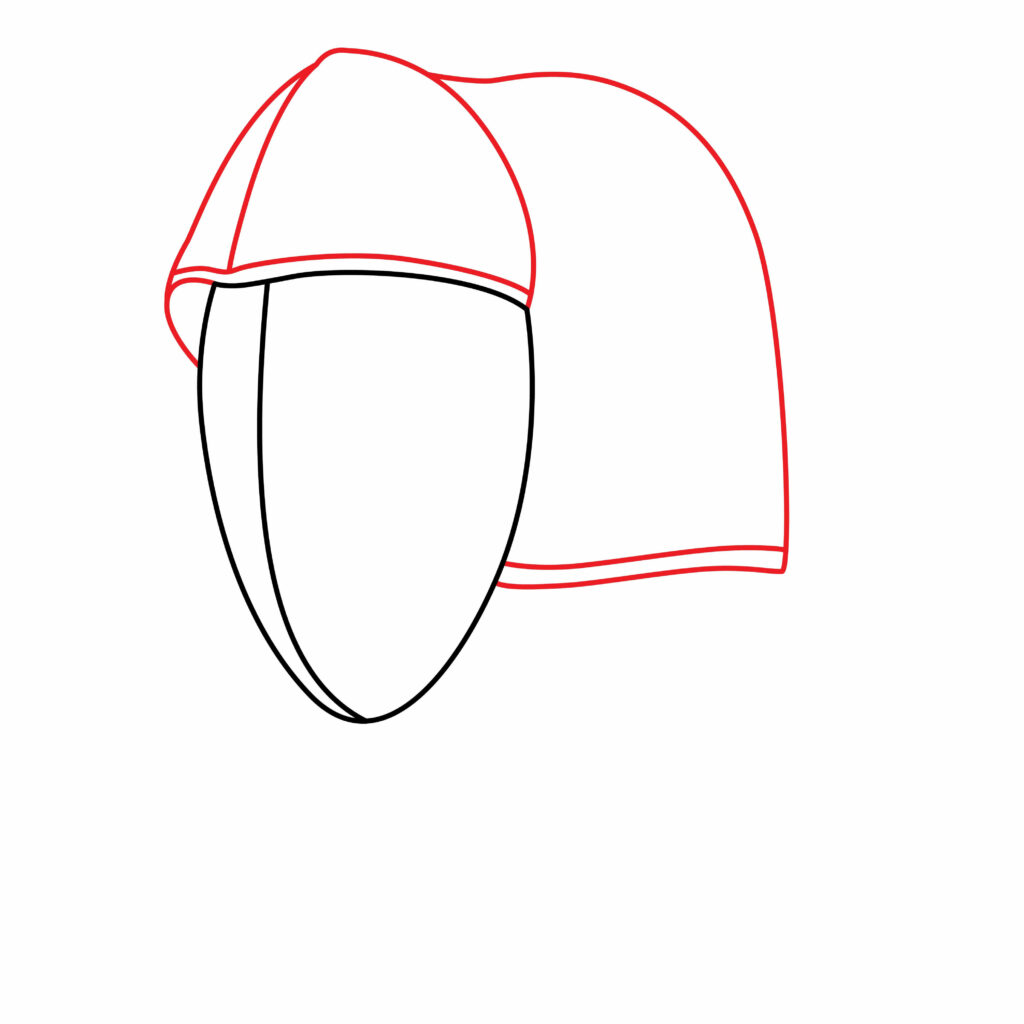
Step 2: Draw the Shell
The shell of a fencing mask is the hard, protective outer covering that surrounds and shields the top part of the face and the back of the head.
First, start by drawing a small circular shape against the top-left part of your mesh, that goes downward. The shape should kind of look like the outline of a an ear, but without the ear-like curves.
Once you’re finished, go to the opposite end of your mesh and start by drawing a horizontal line above it with a small space in between, and make sure the curves match the ones on the top of your line done in step 1, plus the ear-like shape you’ve just added.
Next, from the left, draw a vertical line that is slightly curved although not too much, starting from the side of the ear-like shape and ending a few inches above.
After that, draw another vertical line, this one more straight though, starting from the little indented curve you drew on top of the mesh, and then connect this line with the one you drew above.
It should look like a thin triangle above your mesh shape right now, but don’t stop there. Keep the line going by bending it at the top and then drawing a slight curve that connects to the right side of the mesh.
Now, starting from the right part of what you’ve just drawn, only a few inches away from the top point, draw a horizontal line that first starts out straight, then curves downward into a vertical line. Be sure to put a nice bit of space in between this line and your mesh.
End the line roughly around the middle of your mesh. You need to visualize where that may be, so your guessing skills are going to come in clutch right about now.
Once you’re done, draw a slightly curved horizontal line to the left, until it finally connects against the middle of your mesh. Draw another horizontal line beneath that, which matches to it almost seamlessly.
- Add a series of curvy vertical and horizontal lines to create a 3D shell
- Continuously check the provided image for a guide as you draw
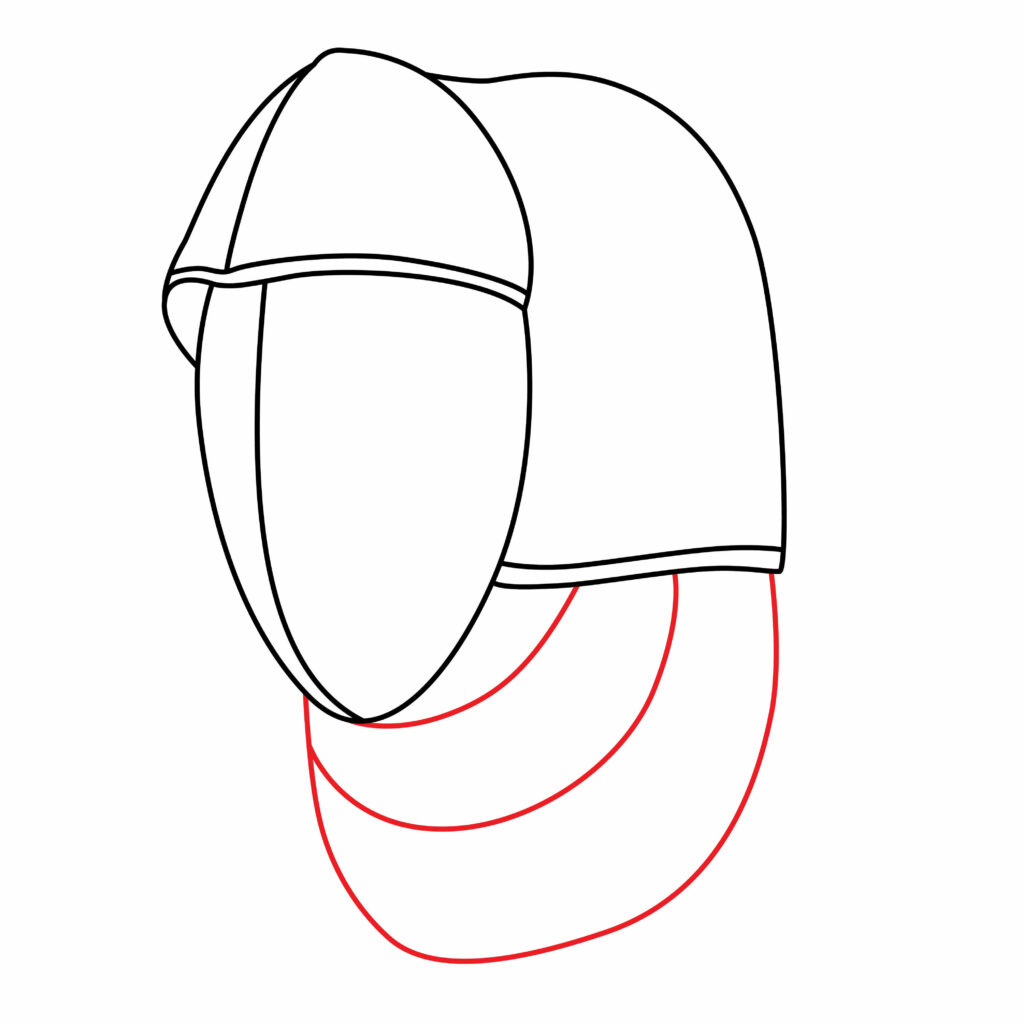
Step 3: Draw the Bib
The bib of a fencing mask is the part that wraps around the neck of a fencer. It consists of multiple layers of padding, either foam or rubber, and is enclosed in a durable fabric cover.
This step of the tutorial is fairly easy to complete. All you need to do is draw some curved lines! To make it even more easier, let’s start from the outside going in.
First, starting from the far right bottom edge of the shell you drew in step 2, draw a line that curves rather widely to the left and connects with the left side of your drawing; namely, the side of the chin-like part you drew for the mesh.
Remember, make this line nice and big. You want it to be big enough to cover your fencer’s neck, a bit of their shoulders, and their upper chests.
Then, starting from the middle of the bottom part of the shell, draw another curved line that flows nicely with the outer one. End it off by connecting it with the line you just drew. Keep a few inches of space in between them for some detail.
Finally – similar to what you just did – draw another curved line, this one starting a little bit closer to the mesh, and connect it to the tip of the chin-like part of the mesh.
- Draw three wavy lines beneath the shell and mesh
- Follow the provided image for a guide if you get stuck
- Ensure that the dimensions are accurate
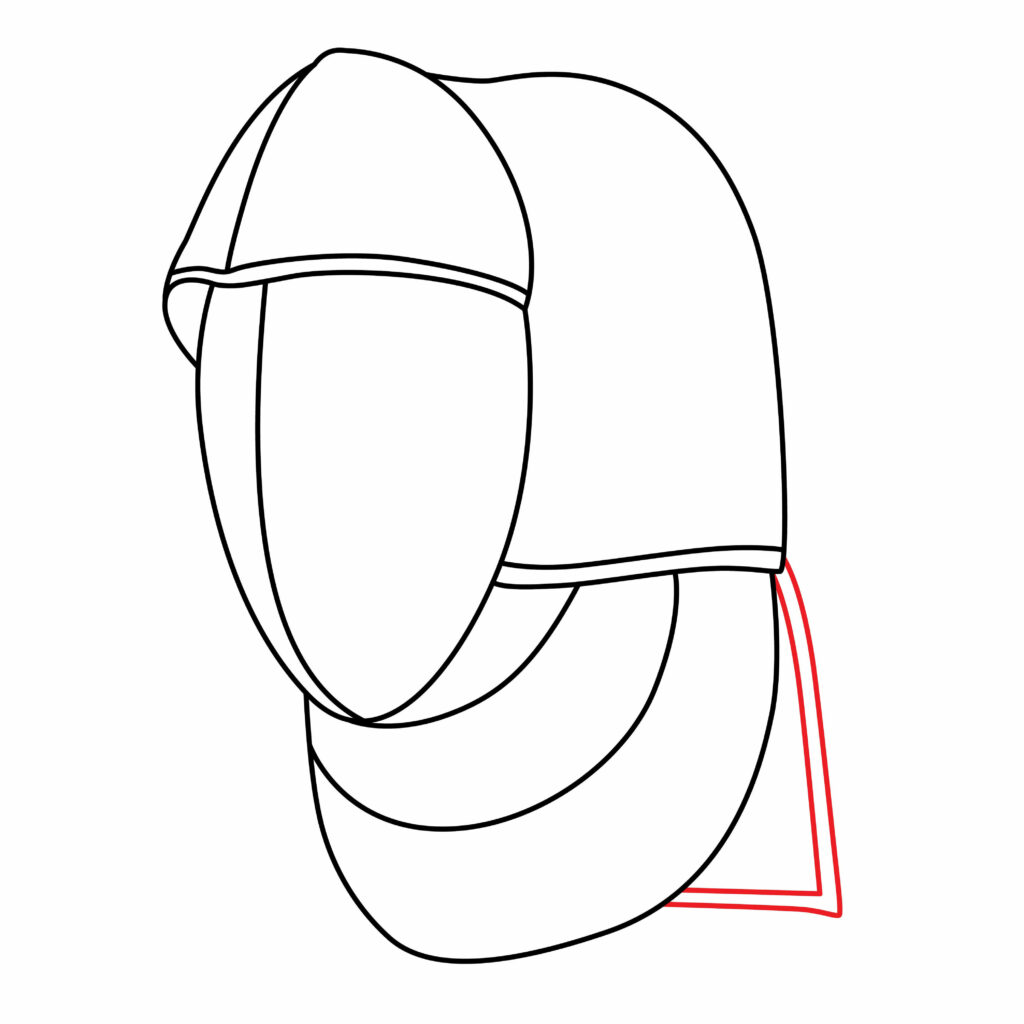
Step 4: Draw the Metal Tongue
The metal tongue is the part at the back of a fencing mask that goes over the fencer’s neck. It’s there for some added protection, but mainly it helps keep the mask in place by making sure the fit is snug and comfortable on the fencer.
In order to complete this step, start by drawing a vertical line going downward from the right corner edge of your shell. When your line reaches the point just before the bib curves, turn the vertical line into a horizontal one. Keep drawing until the line connects with the bib.
Then, add another vertical line starting from the corner edge of the shell and ending along the side of the bib. This line however, should be drawn inside the outer one, and there should only be a small space in between these two lines.
- Draw an inverted right angle beneath the shell that connects to the bib
- Add another line within the shape with a small space in between
- Use the image below for a guide on the desired dimensions
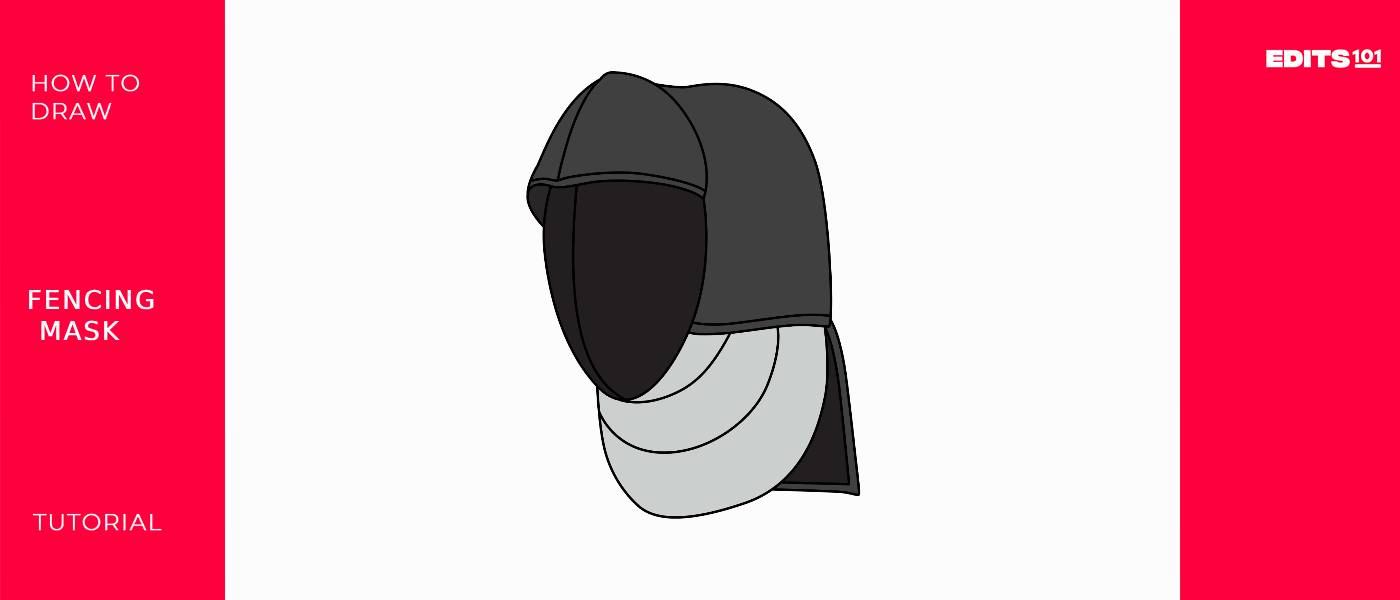
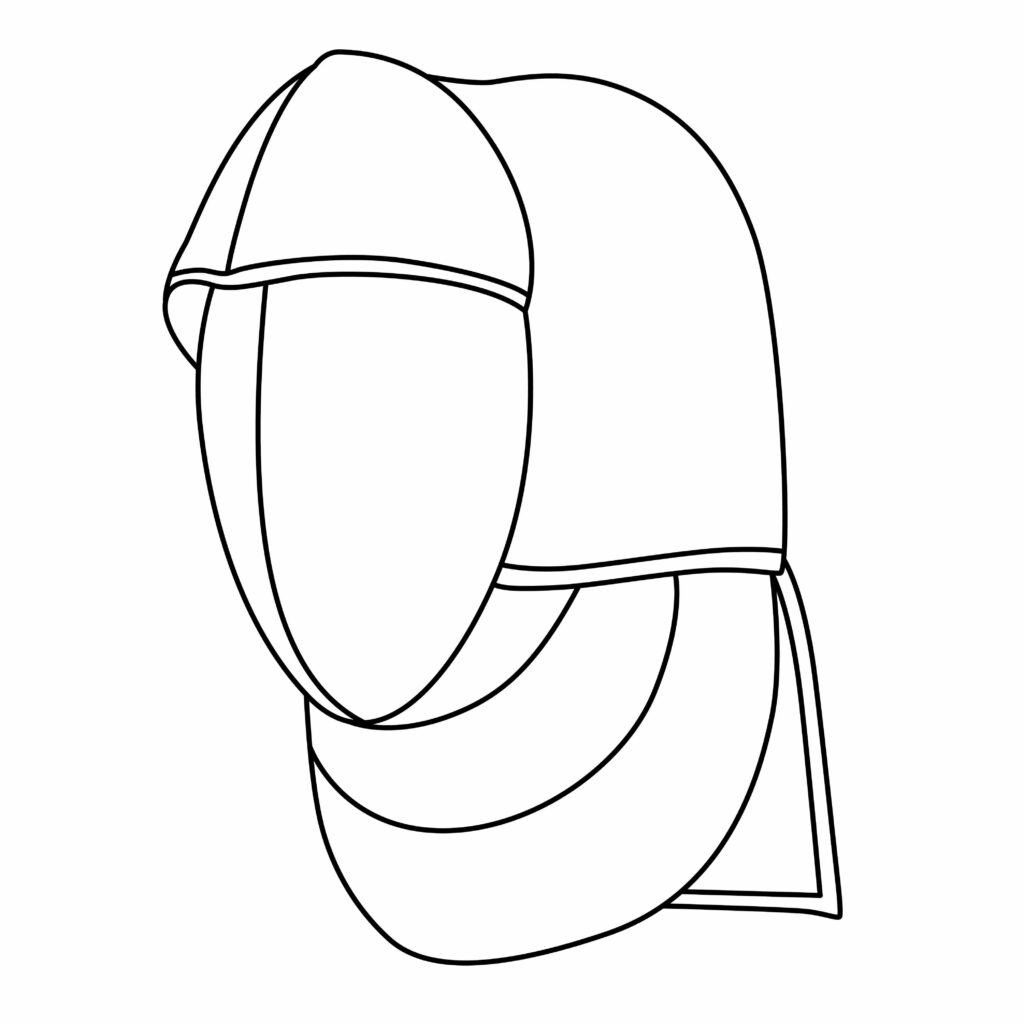
Congratulations! Your Fencing Mask Drawing is Complete
Your black and white sketch is now finished. Assess your drawing to make sure you’re happy with the results. Any parts you’d like to correct can now be done with a few swoops of your eraser.
Taking Your Fencing Mask Drawing To The Next Level
If you’re happy with the drawing you’ve created thus far, and want to leave it as it is, that’s perfectly fine. You’ve drawn a beautiful depiction of a fencing mask, after all. However, if you want to go even further and make your art reach new heights, follow the steps below.
Step 5: adding a background
A background is a good way to boost the quality of your drawing because it opens up the scope of the art and inspires imagination. With a fencing mask, there are a couple of background ideas to choose from.
In order to pick the best one, take some time to ask yourself where you’d like your fencing mask to be. Is it lying on a ground, having been discarded after an intense match?
Is it perhaps being held in a fencer’s hands? Is it on a table? Is it inside a room or outside? Is the vibe you’re going for a little bit edgy and dark, or is it light and carefree? Really take your time and play around with a few ideas in your head.
We’re sure whatever you decide to draw will be beautiful!
In the meantime, here are some ideas to inspire your imagination. This tutorial in particular has a really cool background if you’re opting for a light and carefree feel. You can also draw a piste or a strip in the background, since it’s the main playing area for moden fencing.
Additionally, become inspired by drawing tutorials of other fencing equipment. Like a fencing sword, gloves, or an outfit. You could create a fencer rocking a full gear using all these tutorials and putting them on one page.
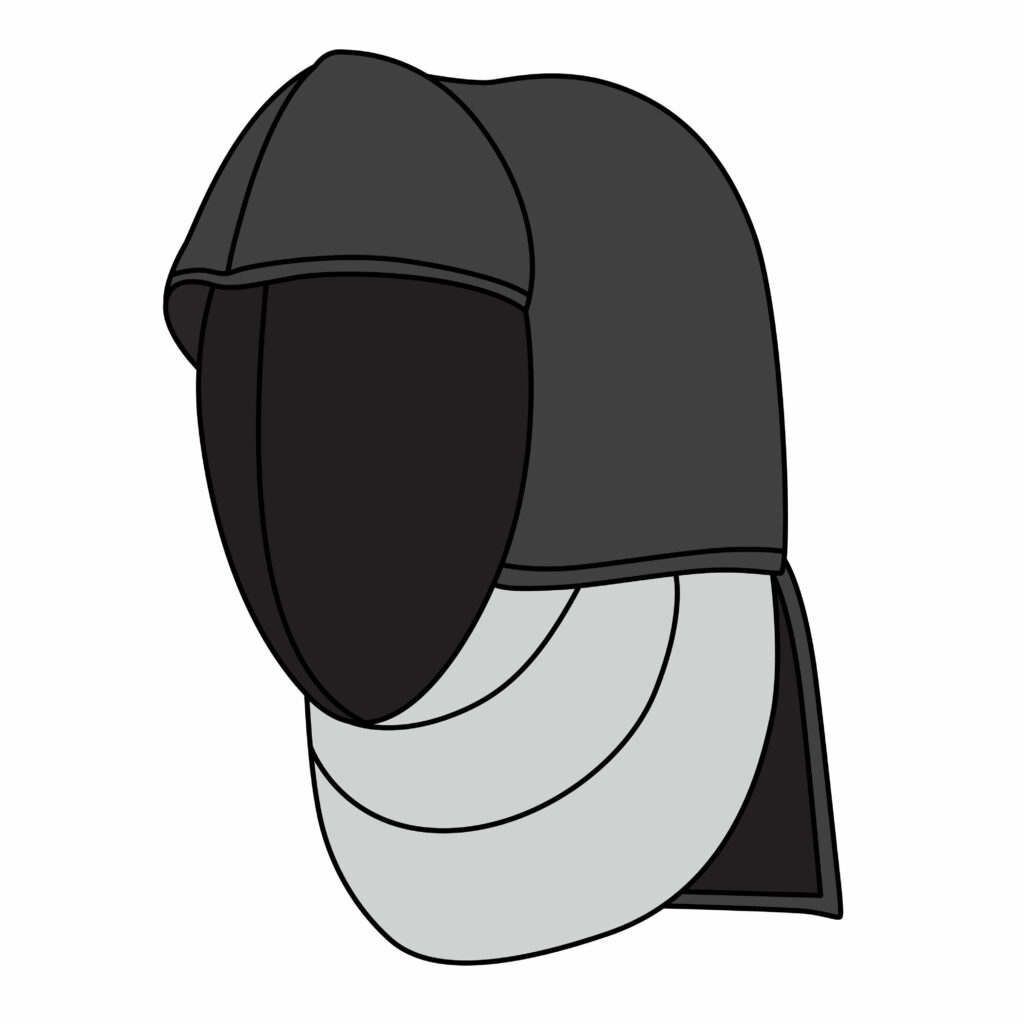
Step 6: Adding Color
Adding some colors is one of the best ways to immediately improve the quality of a drawing. It brings the drawing to life almost instantly because it stimulates imagination and visualisation at the same time.
For your fencing mask, if you want it to have a realistic look, opt for darker tones as we’ve done with ours.
The mesh could be black, the shell could be a dark gray, and then your bib could possibly be a light gray.
Different colors on different parts will only highlight them individually and boost the overall look of the drawing.
Bonus Tips
Add some more distinctive features of a fencing mask, like small squares or hexagons inside the body of your mesh.
Adding some shading when you’re coloring in the drawing is also an incredible way to give your artwork some more life. Use darker colors for shadows and lighter colors to highlight the parts you want to.
Be sure to add your name somewhere on your page for a personalized touch!
Check out some other fencing tutorials for some added inspiration or an idea of what you could possibly draw next.
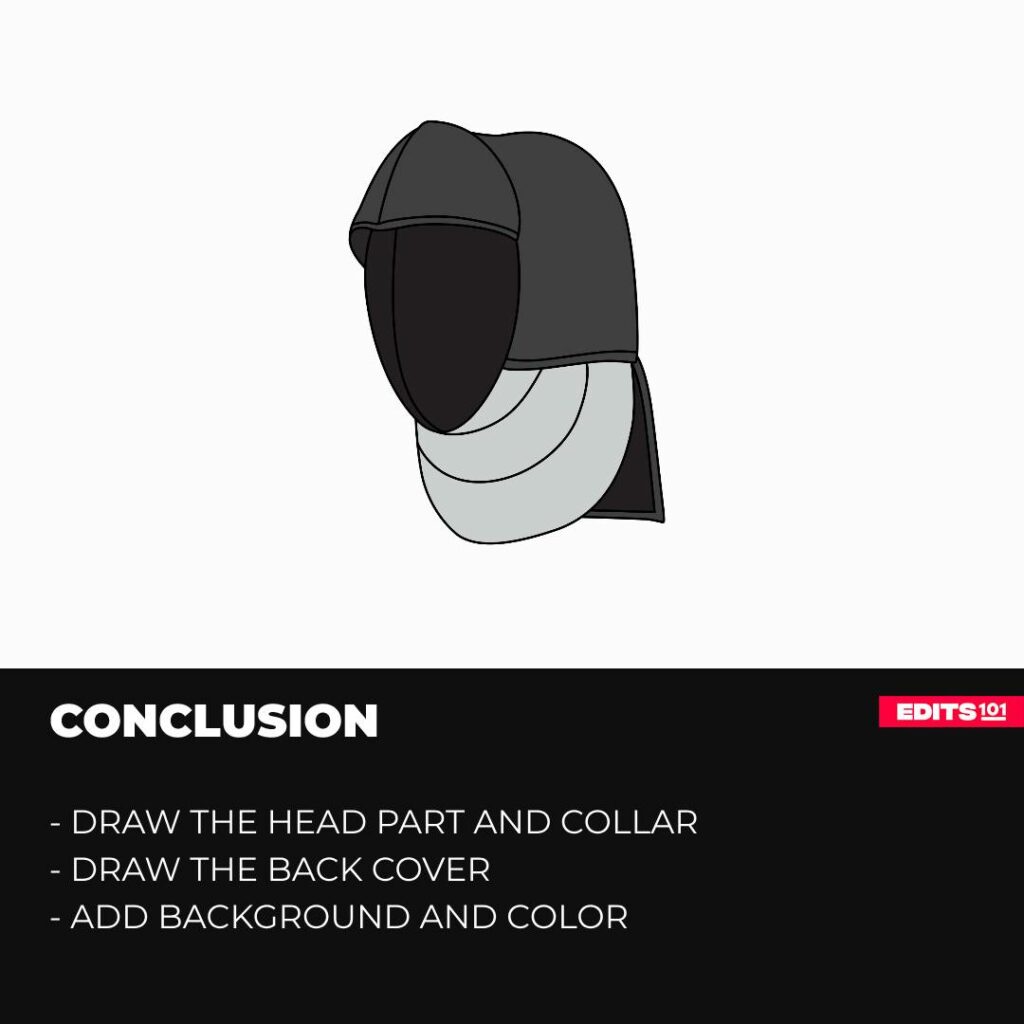
Conclusion
All in all, you’ve done a great deal of work by completing this tutorial. Hopefully you’ve learnt some new things about the sport of fencing, and improved your drawing abilities as well.
This is only the beginning though! Expand your drawing collection by checking out some of our other tutorials.
Thanks for reading & feel free to check out more of our articles!
Author Rating
Overall Rating
Summary
This guide explains how to draw a fencing mask and you will also learn a few things about their design and features.