How To Draw An Old Biplane | A Step-By-Step Tutorial
Welcome, talented minds! It’s time to glide through the air. Have you ever wondered how a plane flies and what parts are attached to it? With the help of our pencil, we’ll bring a biplane to life on our paper. That sounds really exciting, doesn’t it?
Before we start, do you know that the birds were the inspiration behind the invention of these flying machines? Biplanes were the earliest ones that were invented.
What you will need
- A pencil
- An eraser
- A sheet of paper
- Coloring kit
- Ruler
- 30 minutes
how to Draw an old Biplane
Today, we will learn how to draw a biplane by following simple steps in this guide.
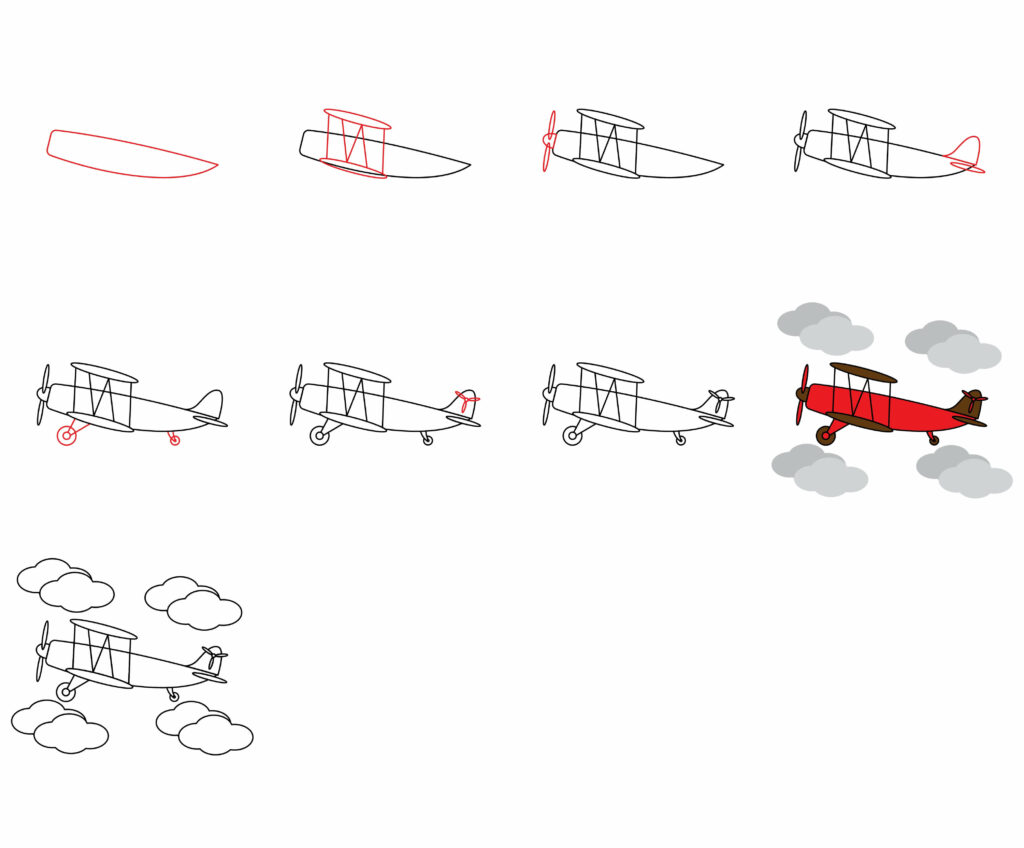
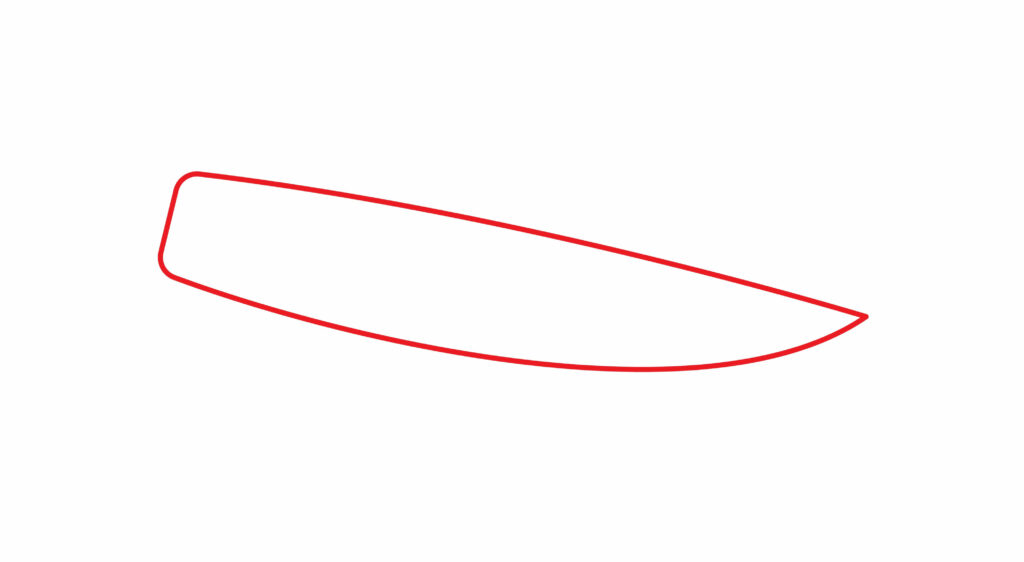
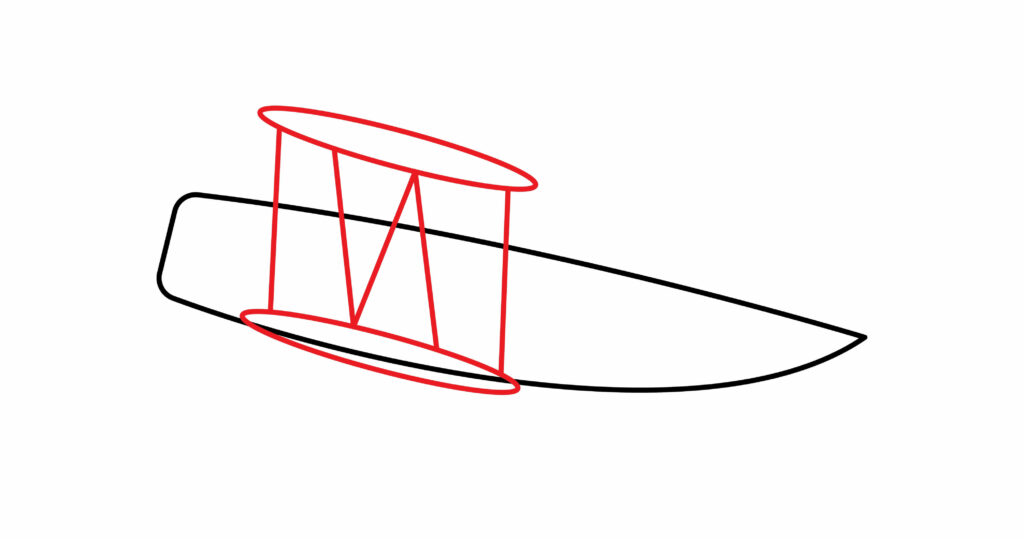
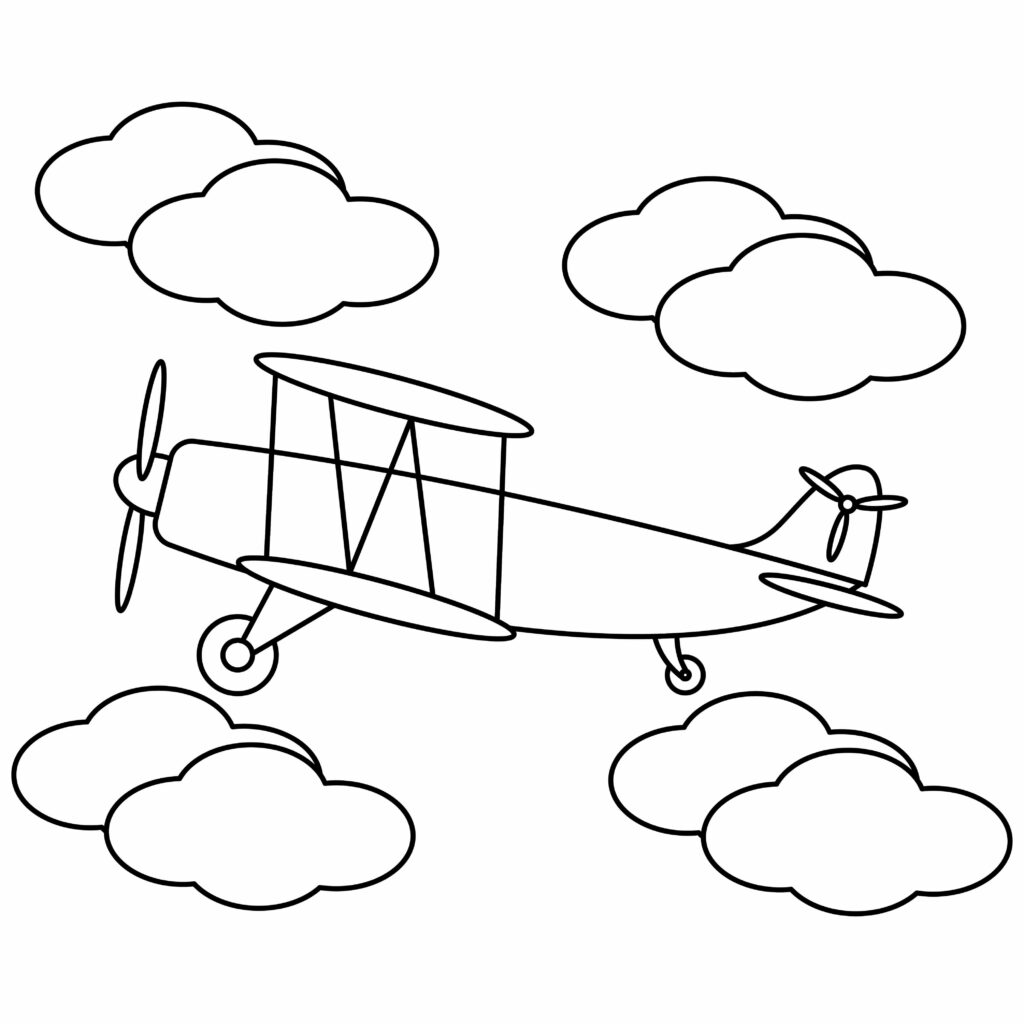
Step 1: Draw the main body of the plane
The plane’s main body is the heaviest part, just like a rocket or an airplane. It has many components attached to it. While the bodies of modern planes are complicated, the body of the old biplane is simple to draw.
We will draw a slanted and elongated rectangle in the middle of the paper. The rectangle should seem as if it is about to take off. After this, we will erase the right vertical line of the rectangle and a small part of the lower horizontal line. Now, we will make a curve at this part. The body of the plane is ready. The foundation is set for the rest of the biplane.
Step 2: Draw the wings
Without wings, a plane cannot fly. Wings play an important aerodynamic role in flight and have a specific shape that allows air to lift them.
To draw the wings, we will draw two elongated ovals. The first oval will be on the lower horizontal line of the plane’s body. We will draw the second oval of the same shape and size above the plane’s body. We don’t want the wings to get separated from each other during flight. We need a firm connection of wings.
We will draw several vertical lines that will connect both wings. We will use a ruler to draw straight lines.
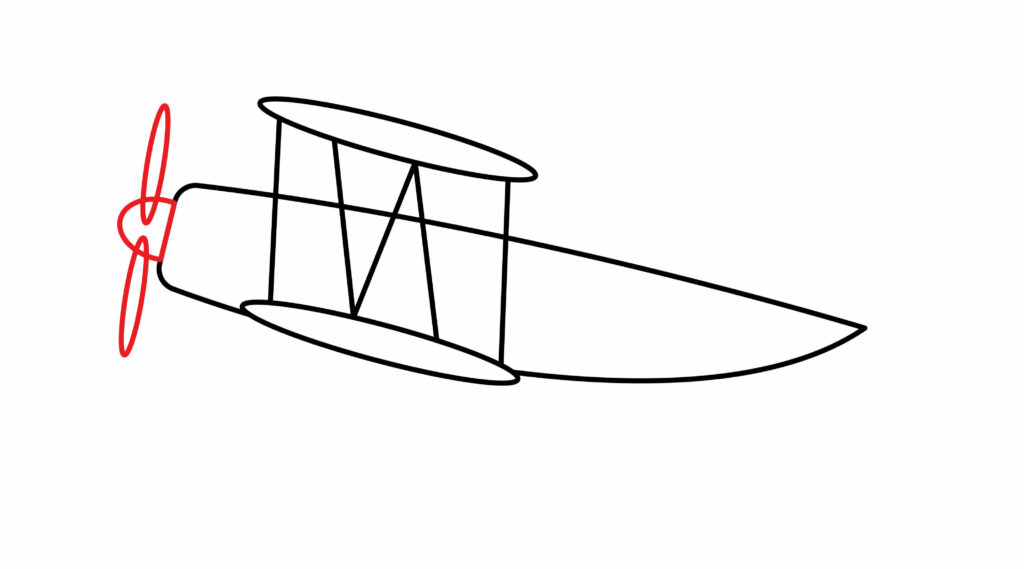
Step 3: Draw the front fan
Unlike modern passenger planes or jets, old biplanes had a fan in front of them. The fan helped the planes in the flight. The size of the fan isn’t too big compared to the body of the plane.
We will draw a semicircle on the front side of the plane’s body to draw the fan. Now, we will draw two elongated ovals on this semicircle. The oval represents the wings of the fan. There are just two fan wings.
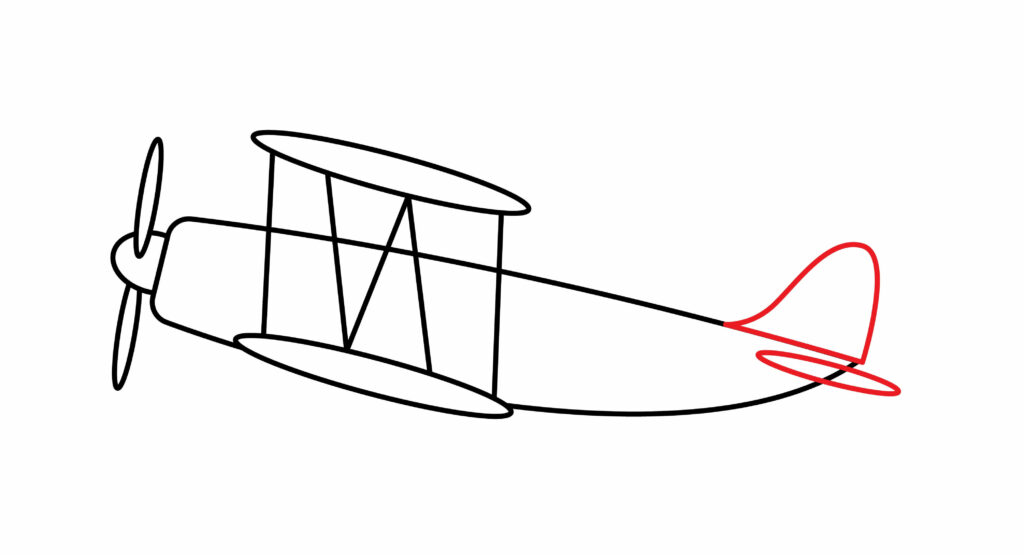
Step 4: Add the tail wing
The tail wing is also known as the stabilizer. It has two parts: the horizontal stabilizer and the vertical stabilizer. If the airplane is tilted by strong winds, the stabilizer brings the plane back to its stabilized position. This tail wing is also present in the fighter jet.
We will draw an elongated horizontal oval at the back of the plane’s body to draw the vertical horizontal stabilizer. Now, we will draw an upright semicircle over the top right corner of the plane’s body. This will be the vertical stabilizer. We’ll make the left side of the semicircle a bit elongated, as shown in the image.
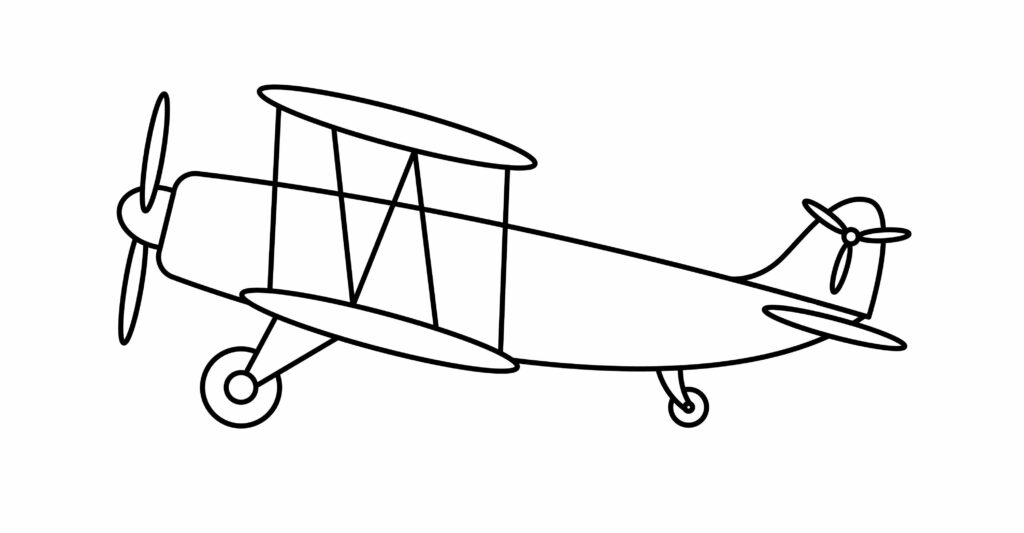
Step 5: Draw the wheels
The plane is not always flying; it also rests on the ground. Before taking a flight, it runs on the ground. Wheels are important for the safe departure and landing of the plane.
To draw the front wheel, we will make two angled vertical lines below the front side of the plane’s body. At the end of these lines, we will draw a small circle that connects both these lines. This circle represents the rim of the wheel. We will draw another circle outside the first circle to make the wheel.
We will draw a small cone-shaped structure under the backside of the plane’s body. At the end of this cone, we will draw a tiny circle and another circle around it. We’ll ensure the back wheel is smaller than the front one.
We will use any round lid to make the wheels. In case we don’t have the round lid, we will use the freehand technique to make the wheels.

Step 6: Draw the back fan
The back fan is located on the horizontal stabilizer of the plane. To draw it, we will draw a tiny circle in the middle of the horizontal stabilizer. Around this circle, we will draw three equal-sized elongated ovals. This will be the back fan of the plane.

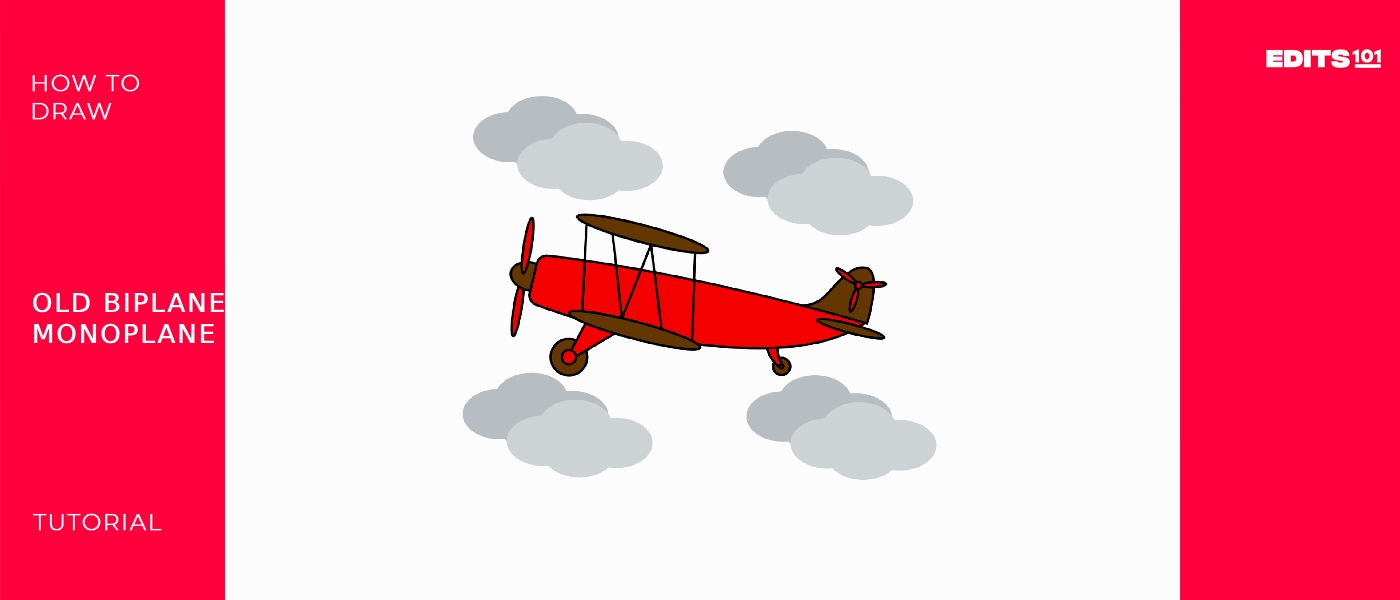
Step 7: The Old Biplane is ready
Congratulations, young gun! Our plane is all set to go on a flight. You’ve crafted an amazing piece of art with us. It seems difficult to draw a plane on paper, but this guide has made it pretty easy for you.
We’re certain that you followed each step and made an amazing aircraft. The fun part is about to begin. We have drawn the basic drawing, but how to make it more attractive and appealing? Don’t worry! We got you. We’ll assist you in shaping your art.
Taking your drawing to the next level
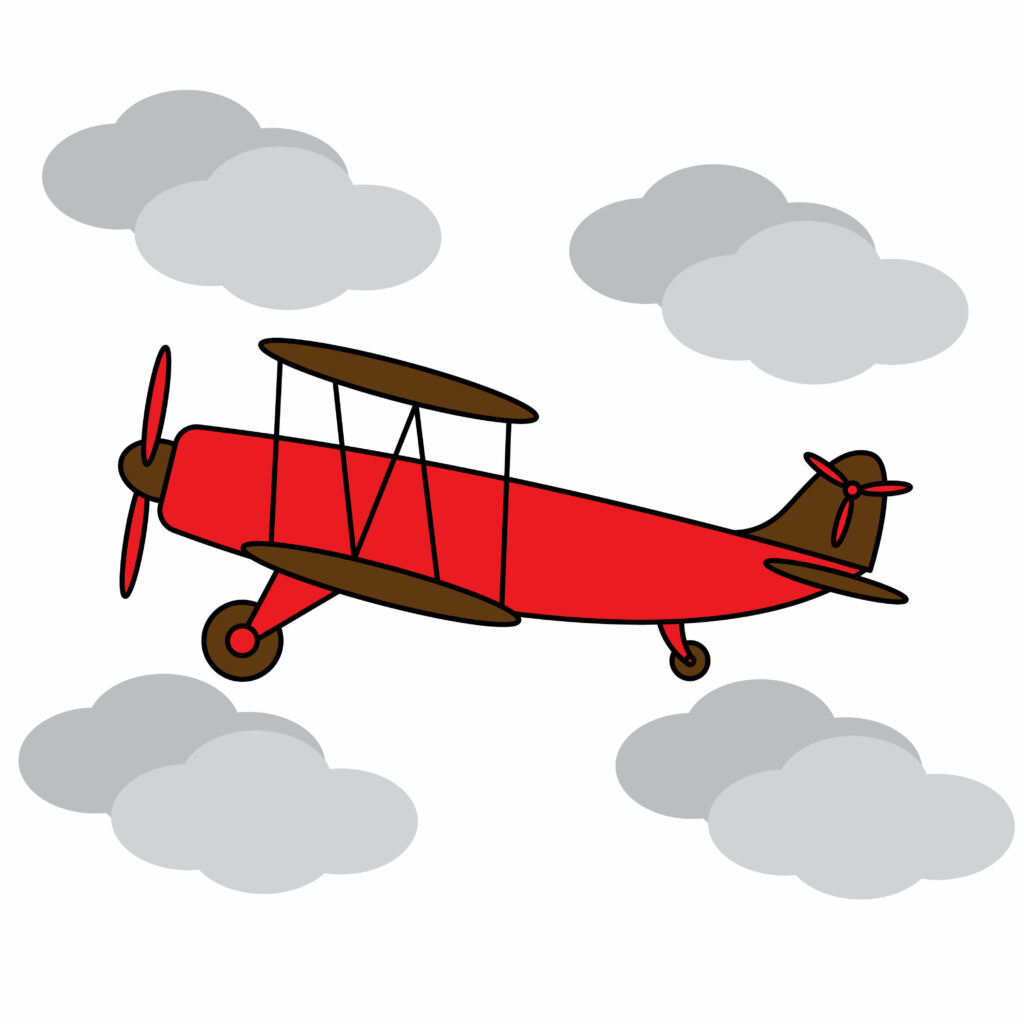
We have sketched the plane, and it seems quite basic. It has no perspective or colors in it. How cool it would be if our drawing had glittering colors in it.
This section will unleash your inner artist. You have to let out your imagination and do experiments with it. That way, your drawing will look astonishing.
Remember that imagination has no limits; use it well to your advantage. We will assist you by providing some ideas on how you can upgrade your drawing.
Adding background to your drawing
Imagine you’re in a cinema and watching a movie with popcorn in your hands. The story is going well, and you’re enjoying every moment. All of a sudden, the background gets removed, and you only see the actors performing against a black background. Wouldn’t it seem odd? There would be no perspective of what’s going on.
The same goes for our drawings too. If there is no background, the story is incomplete. We need to add a background for a better scenic view. We can add any type of background to our drawing. Since we drew an old biplane, we will add clouds and sky in the background. It’ll look as if our plane is flying high in the air. Isn’t that what we are aiming for?
Adding colors to your drawing
We have added the background; our drawing looks much better now. But we’re not done yet. We can add colors to our drawing to make it look purposeful and appealing. You can use any type of coloring material. Pick the one you’re good at. Either it can be posted colors or crayons.
We have colored the clouds gray. It depicts that our plane is flying in the windy hours. This makes our drawing even more scenic. Make sure you color your drawing nice and tidy. The secret to a perfect-looking drawing is the cleanliness in it. It should be soothing to the eyes.
P.S Bonus Tips
The secret to a perfect-looking drawing is the details in it. The more the details, the better the drawing is. But how to add more details? This is the common question that everyone’s mind gets.
We’re here to assist you in this as well. We will give you some ideas that you implement in your drawing. Remember, ideas are vast, and you must use your creativity to craft more ideas to play with. Don’t limit yourself to two or three ideas. Be a pool of ideas.
You can add your name to the main body of the plane. Imagine the plane flying high with your name on it. Literally, your name would be flying high. You can also draw your country flag and attach it to the back of the plane. A plan with a country flag on it would look something unique.
Apart from this, you can add any type of detail to your drawing. Play with your drawing and expect the best results.
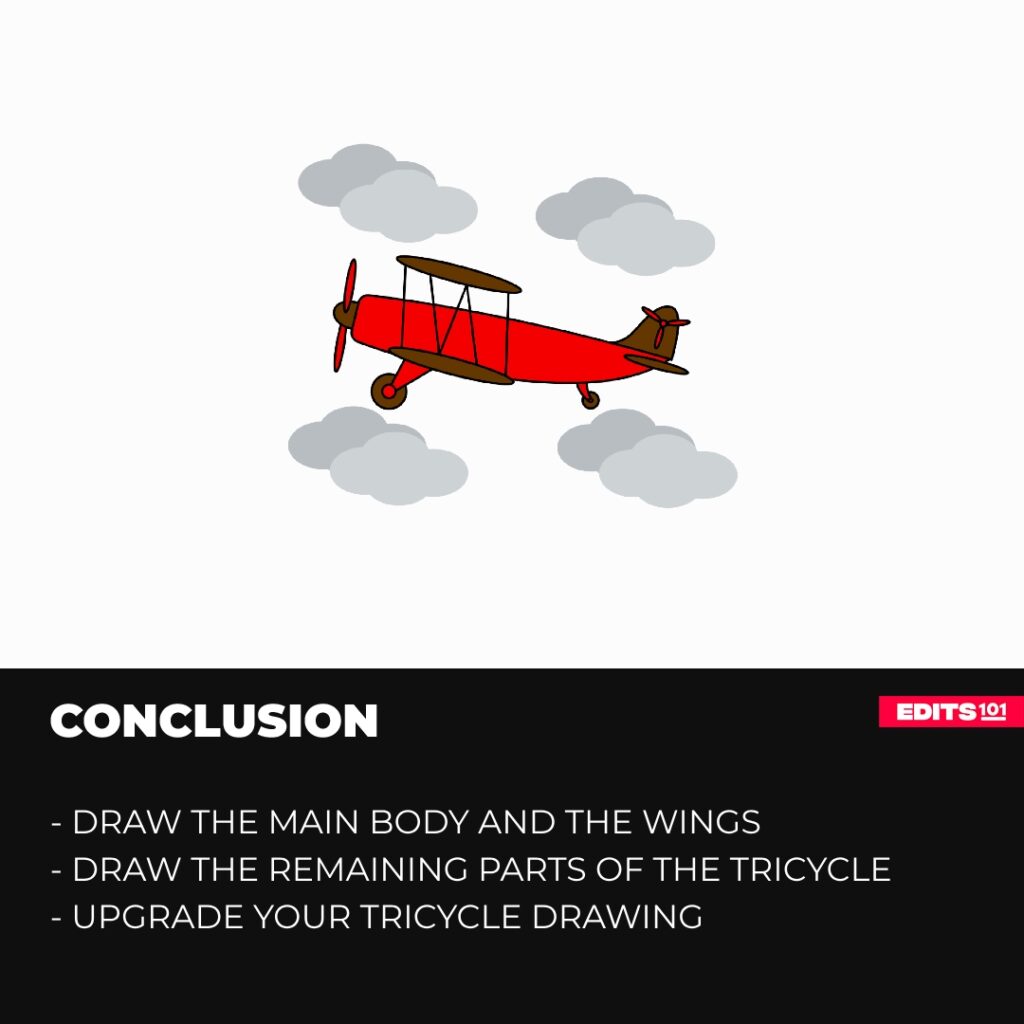
Conclusion
Drawing is a fun way to express one’s emotions. It’s such an activity that is enjoyed by people of all ages. In today’s tutorial, we began by drawing the plane’s main body; then, we added the wings. After that, we installed the front fan and the tail wing. Later, we added the wheels and back fan. Once our outline was on the paper, we upgraded it with different methods. We added a background and colored it nicely.
Don’t get frustrated if your results are not satisfactory. Take it easy and try again. After just a few attempts, you’ll have an amazing drawing. No one gets perfection on the first try, so be patient and trust the process.
Thanks for reading & feel free to check out more of our articles!
Author Rating
Overall Rating
Summary
This guide explains how to draw an old biplane. You will also learn a few interesting facts about this vehicle.