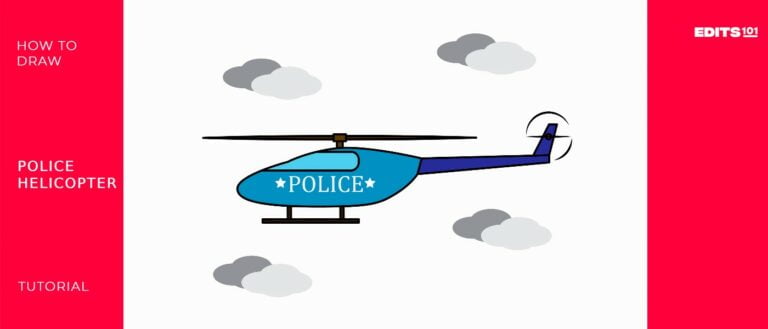
How To Draw a Helicopter | Fun Tutorial
Young artists! Are you ready to touch the sky? Today, we brought you another exciting drawing. We will draw a helicopter.
A helicopter is a rotorcraft with horizontally spinning rotors that supply lift and thrust. This allows the helicopter to take off, land vertically, hover, and fly forward, backward, and laterally. These attributes allow helicopters to be used in congested or isolated areas where fixed-wing aircraft and many forms of short take-off and landing (STOL) or short take-off and vertical landing (STOVL) aircraft cannot perform without a runway.
What you will need
- A pencil
- An eraser
- A sheet of paper
- Coloring kit
- Ruler
- 30 minutes
How To Draw a Helicopter
Grab your flying gear and fly high in the sky. All you have to do is follow each step carefully. By doing that, you will have a fantastic helicopter within a few minutes. The following steps will show you how to do it.
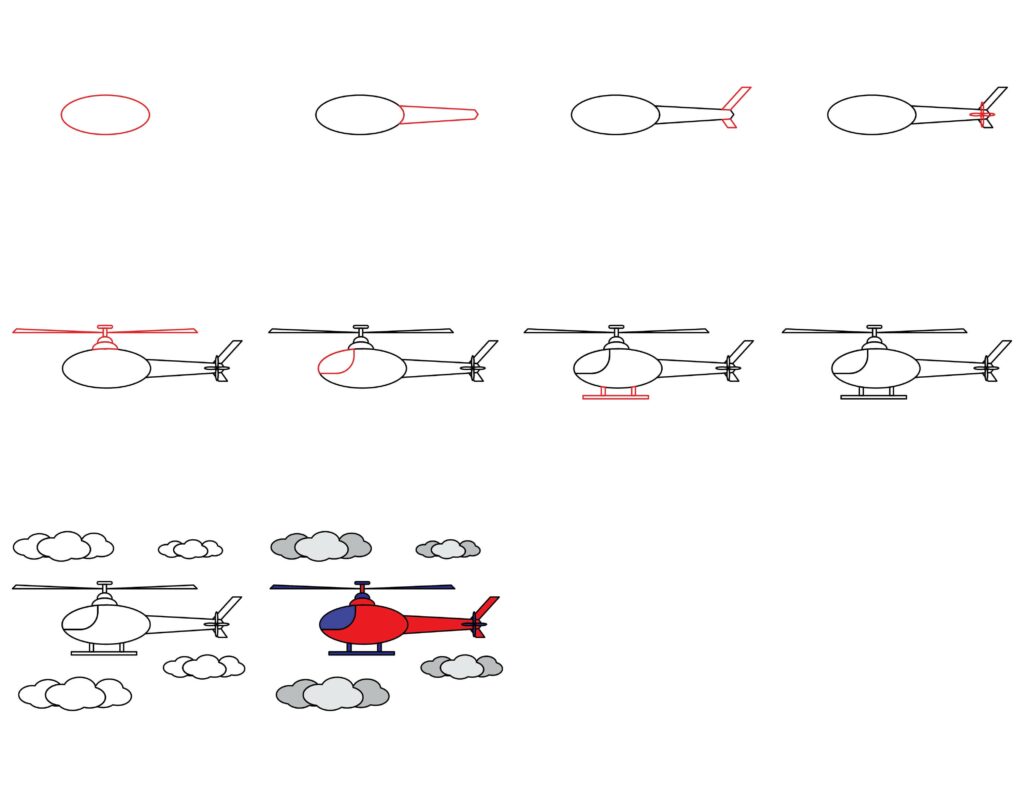
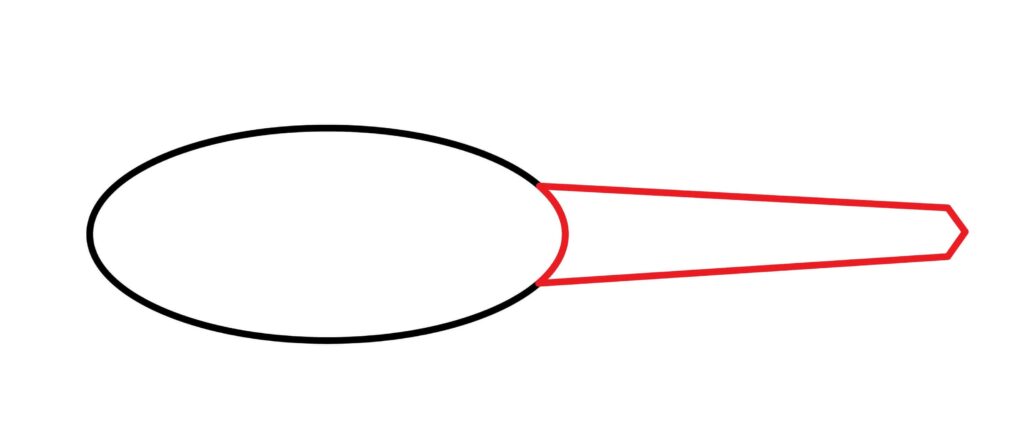
Step 1: Draw the head
The head is the part of the helicopter with wings attached to it, and further, it is connected to the engine, so when given power, it spins at a very high speed.
Draw an oval shape in the middle of the page to make the helicopter head. The oval shape is like an egg but with equal proportions on both sides.
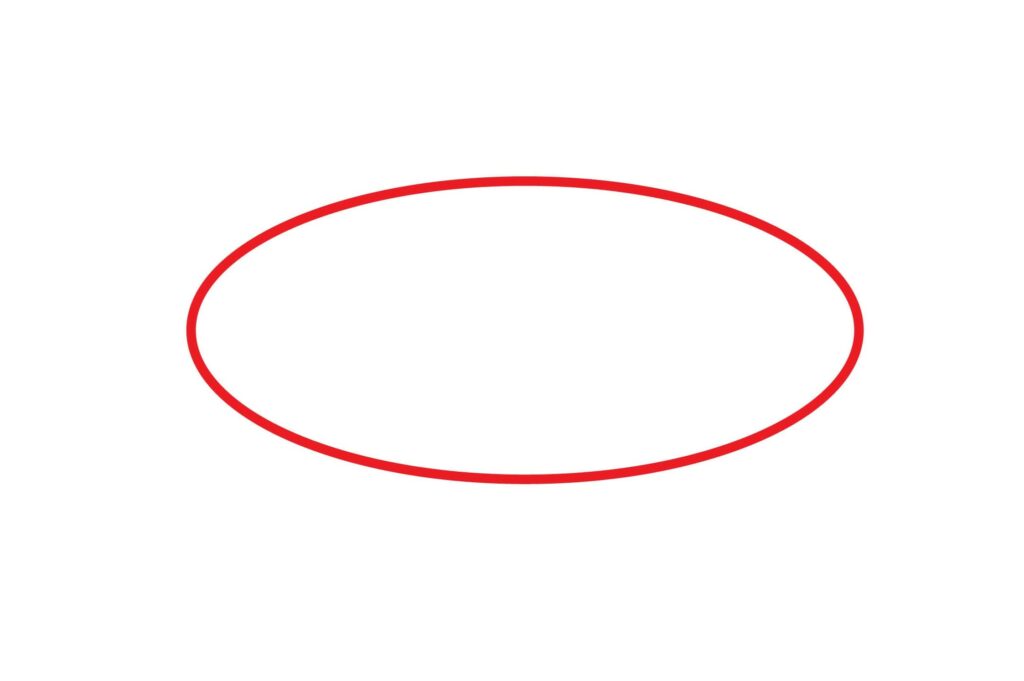
Young artists! This was an easy step, and the following steps are even more accessible. You’re doing a great job, and let’s complete it.
Step 2: Draw the tail
A helicopter is a rotorcraft wherein lift and thrust are furnished through one or extra horizontally spinning rotors. Using contrast, the autogyro (or gyroplane) has a loose-spinning rotor for all or part of the flight envelope, counting on a separate thrust device to propel the craft forward so that the airflow units the rotor spinning to provide lift. A helicopter has a rear wing that moves left and right and gives an angle to the helicopter’s motion.
The tail is connected at the right side of the head and extends far from it with a converging angle. Draw 2 Lines with the right side of the head to make the helicopter tail.
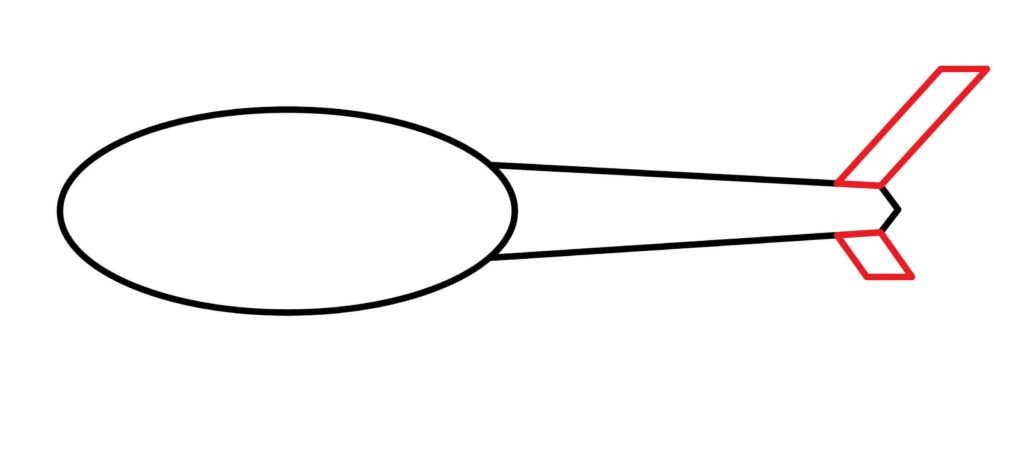
Step 3: Draw tail rudder
The rudder is used for the aerodynamics of the helicopter. It helps move swiftly through the air without drag, making the flight smooth.
Draw 2 angled lines at the end of the tail for rudder. Both rudders are inclined towards the right.
Step 4: Draw the tail rotor
The rotor device, or, greater honestly, rotor, is the rotating part of a helicopter that generates carry. A rotor system can be set up horizontally, as most essential rotors are, offering to elevate vertically, or it may be mounted vertically, which includes a tail rotor, to offer horizontal thrust to counteract torque from the principle rotors. The rotor includes a mast, hub, and rotor blades.

Draw a small circle and 4 ovals around it to make the tail rotor. The ovals must be very thin to give them the blade of a fan appearance.
Step 5: Draw the engine and main rotor
The main rotor has three huge blades spinning at a very high speed, blowing the air beneath to lift the helicopter. They are directly connected to the engine to draw the engine stack two ovals, the biggest connected to the main head and the other on top.
Draw 2 half circles up to each other for the engine and 2 lines consistently vertical and horizontal for the rotor connecter. And 2 horizontal lines for the main rotor.

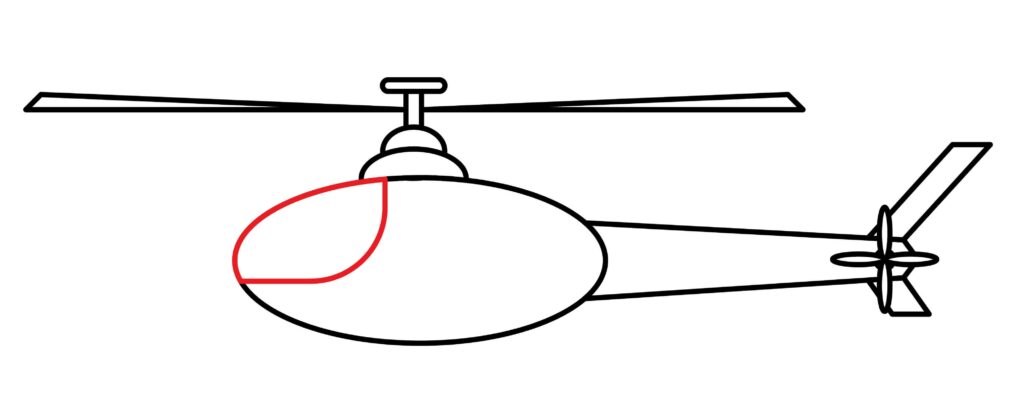
Step 6: Draw the cockpit
The cockpit is the sitting area for the driver from where he controls the helicopter. A helicopter has four flight control inputs. These are the cyclic, the collective, the anti-torque pedals, and the throttle. The cyclic control is usually located between the pilot’s legs and is commonly called the cyclic stick or just cyclic. On most helicopters, the cyclic is similar to a joystick.
Draw the cockpit with some lines on the front part of the head like the image. For easy understanding, create a partition at the top left corner of the head.
Step 7: Draw the landing skid
The landing skid is the support on the helicopter to make its landing safe and smooth. Skids are a simple landing gear system where the shock absorption is built directly into the skid. The cross braces are curved, attaching to the skids via a saddle. These curved skids are very light, with modern helicopters using advanced composite materials that are highly flexible and light.
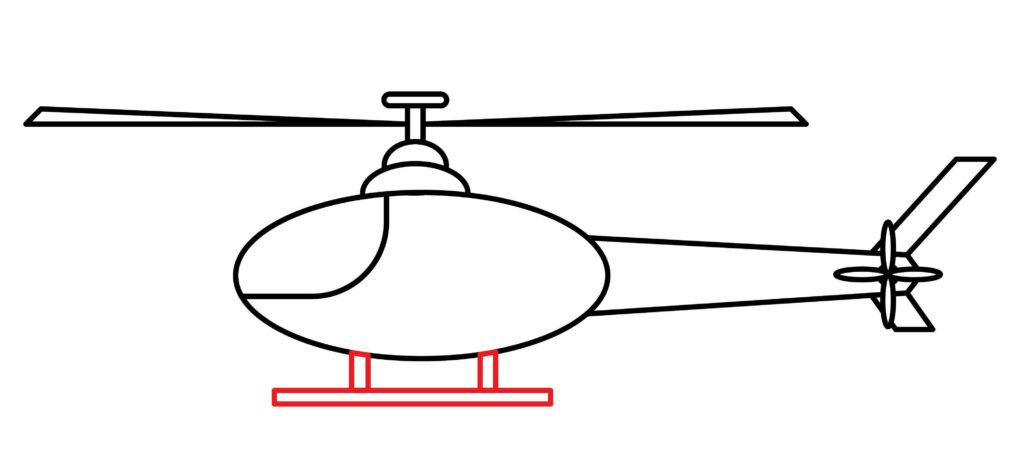
Draw 2 vertical lines with the head and one horizontal narrow rectangle with the vertical lines to make the landing skid.
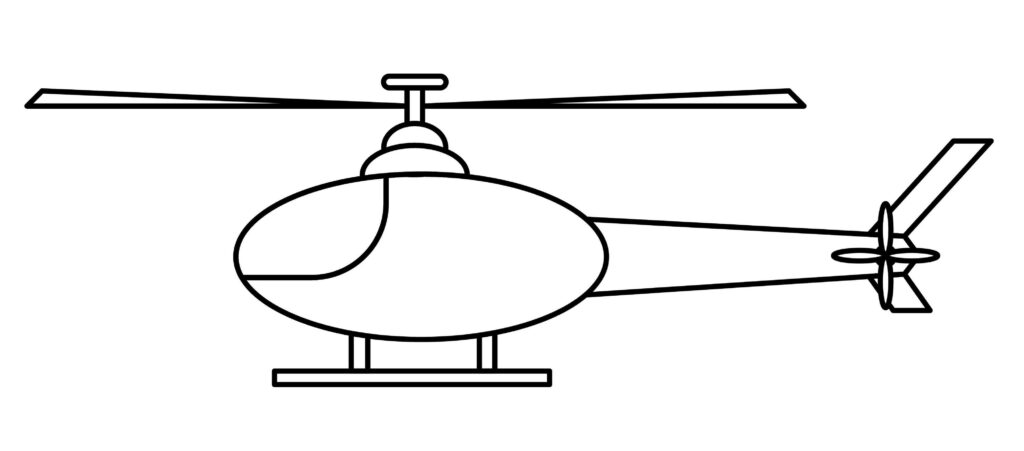
Step 8: The helicopter is ready
The helicopter is ready to take off. You did a wonderful job. We are sure you followed each step and made your helicopter correctly. To make the drawing more prominent, we will outline it using a marker. After outlining, we will erase the pencil for a neat look.
Hey, wait! The real fun is about to begin. We are about to upgrade our drawing and make it look more realistic. Are you ready to unfold your imagination and creativity to make your drawing professional?
Taking your Helicopter drawing to the next level
Your imagination has no boundaries. If you use it effectively, you can do anything. Likewise, you can take your drawings to the next level by using your creativity. Let your thoughts flow freely and draw something genuinely remarkable.
Doing this will make you feel more confident and willing to draw more things. This section is all about creativity and experiments. We’ll add different things to our drawing.
Grab your stationary and let the magic begin.
Adding background to your drawing
You can tell your story by adding a background to your picture. Having a background gives the drawing a whole new look. It enhances detail and gives perspective.
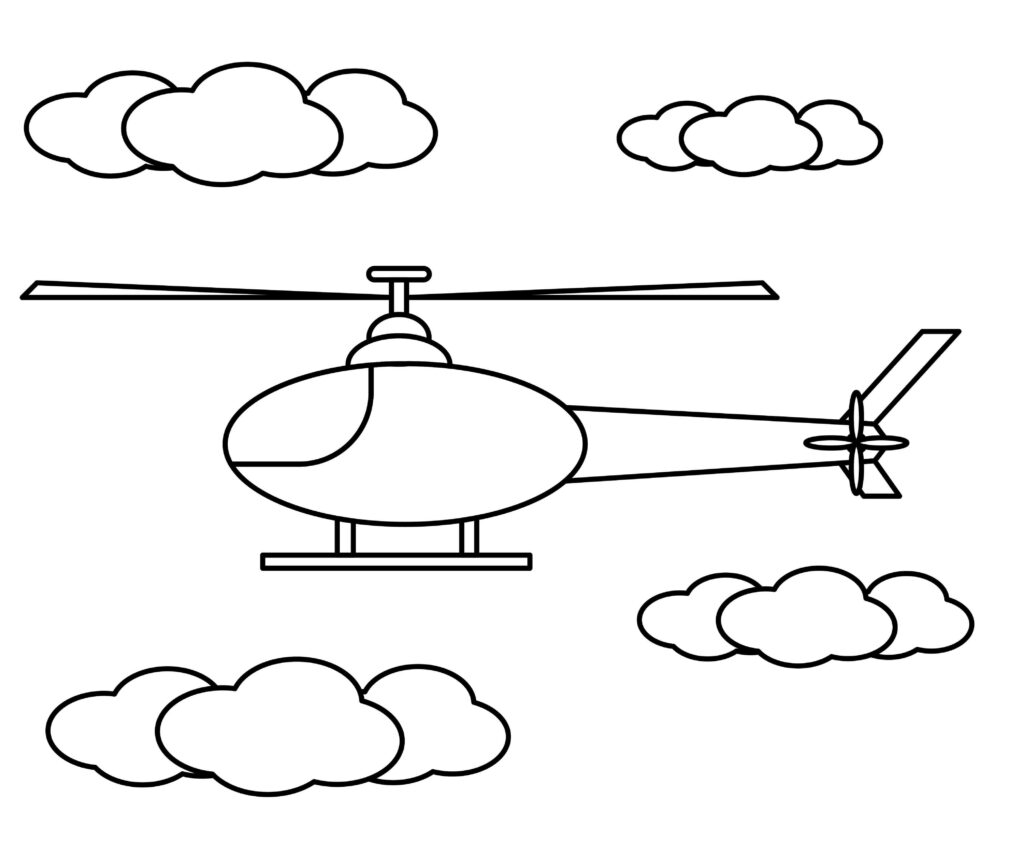
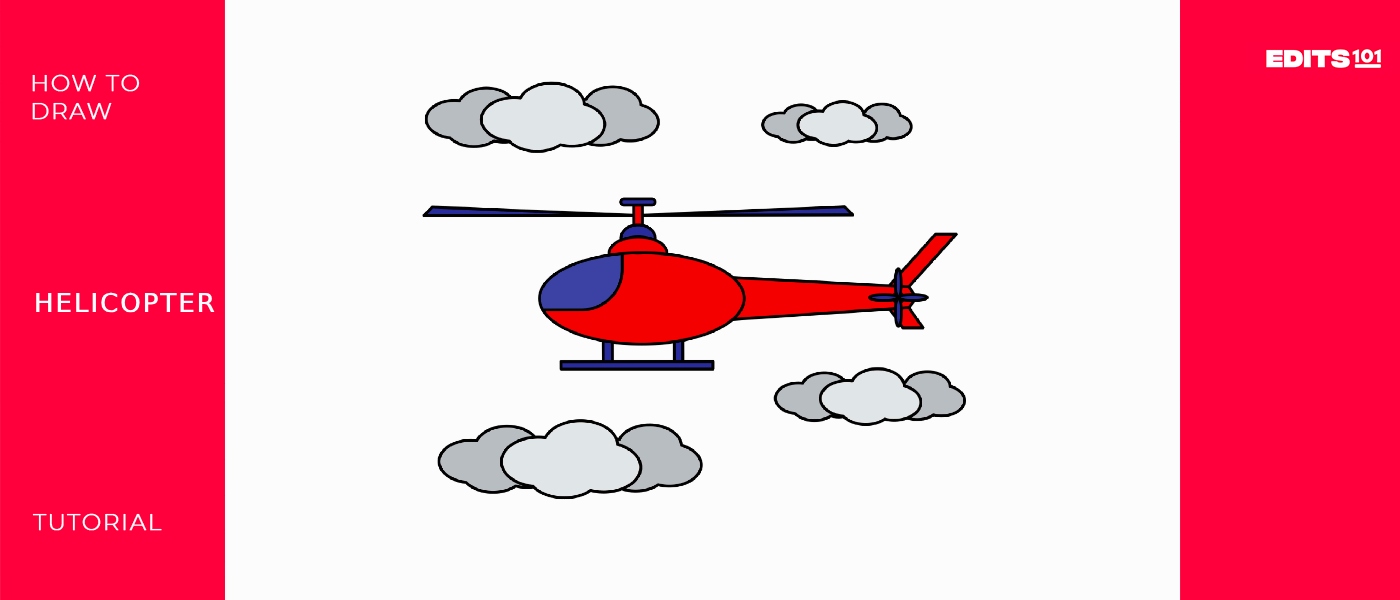
You can add clouds, rain, thunder, stars, etc. This is an idea about background; you can also add a background of your choice.
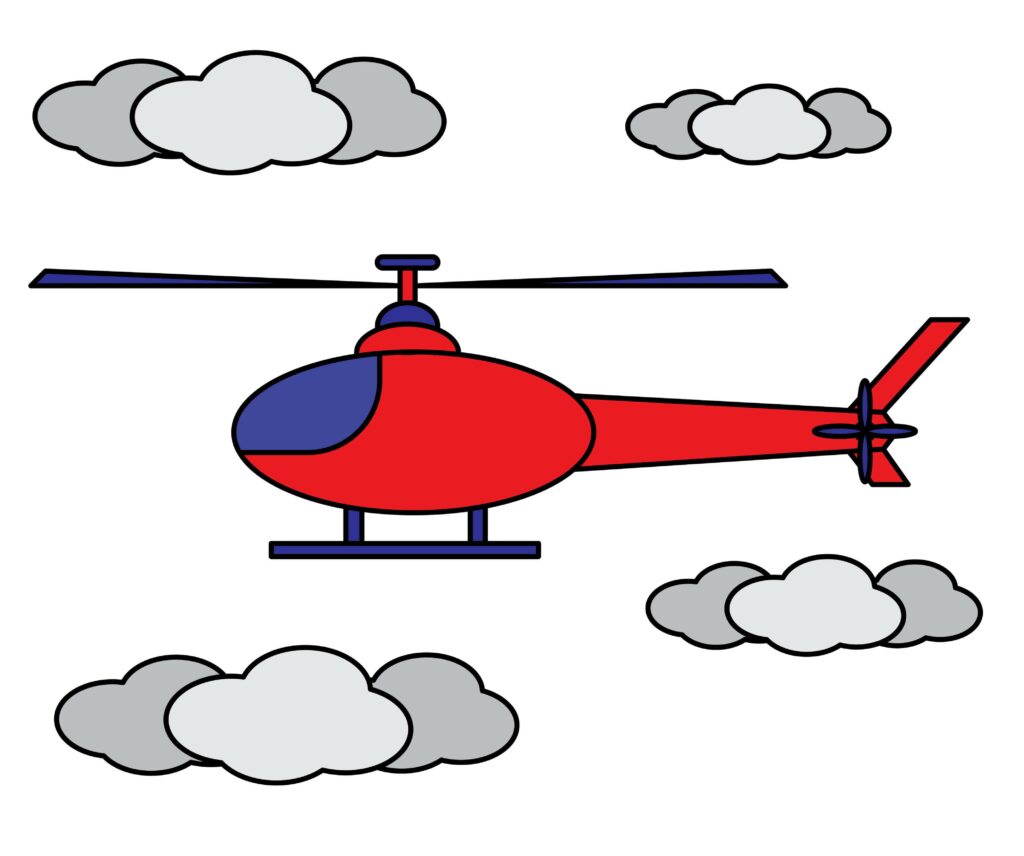
Adding colors to your drawing
Color in images is vital because it may evoke feelings, carry that meaning, and create an ecosystem. It transforms flat traces into lively, dynamic compositions, giving the work of artwork new lifestyles. The color scheme you pick out can affect your temper. Vivid colorations can provide a chilled vibe, while cool colors can encourage rest or disappointment. Further, colorations help decide the form and depth so that the item may be prominently moved to the front or again. It creates a concord or contrast that draws the viewer’s eye and impacts the general visible effect.
We will give life to the helicopter and the background by playing with our creativity in colors. Few things will be colored as they are in real life. It is a fun way to explore your artistic nature. Every color adds a new layer of magic to your drawing. It’s a whole new world. So grab your crayons, marker colors, poster paints, or anything you choose, and let the colorful magic begin. You can add any color of your choice, but be realistic.
P.S. Bonus Tips
We’ve finished our drawing, and we hope you liked it as much as we did. There are no restrictions on one’s ingenuity, as was previously said. Any improvement can be made to the drawing. Although we added a background and some colors, you can still do more.
You can put some stickers on the helicopter. You can create a rain effect, as mentioned, or even a tornado to make it exciting, adding to a great-looking picture.
These are just a few thoughts and ideas. Don’t limit yourself to these ideas only. Use your creativity and deliver your drawing a brand new appearance. You may use your creativity on this component to be innovative.
Conclusion
It’s done now! Our drawing is now finished and ready to go. It was a simple and enjoyable process. We’re confident you completed an incredible drawing by carefully following each step. This manual provided the most precise explanation of each procedure. We started by building the head, followed by the tail, the rudder, the main rotor, the engine, and a cockpit.

Thanks for reading & feel free to check out more of our articles!
Author Rating
Overall Rating
Summary
This guide explains how to draw a helicopter. It aslo offer some interesting facts.