How To Draw A Motorcycle With A Sidecar | In 10 Steps
A motorcycle with a sidecar, also known as a rig or hack, is a vehicle that consists of a two-wheeled motorbike attached to a small third wheel, known as the sidecar.
The sidecar is usually positioned beside the motorcycle and can accommodate one or more passengers, providing additional stability and allowing room for extra cargo or passengers.
Sidecars are often used for transportation purposes, like commuting, touring, or even off-road adventures.
They offer a unique riding experience and are popular among motorcyclists who enjoy sharing their journeys with others.
In today’s tutorial, you will learn how to draw your very own motorcycle with a sidecar in 10 easy steps!
What You Will Need
- A sheet of paper or a sketchbook
- Pencils (2b, 3b or 5b)
- An eraser
- A ruler
- Compass (optional)
- Coloring supplies
- 20-25 Minutes
| Steps | Complexity Level |
| The Headlight | 2 |
| The Body and Fender | 2 |
| The Front Wheel | 1 |
| The Sidecar Body | 3 |
| The Sidecar Connector | 3 |
| The Sidecar Tire | 2 |
| The Handlebars | 2 |
| The Convex Mirros | 1 |
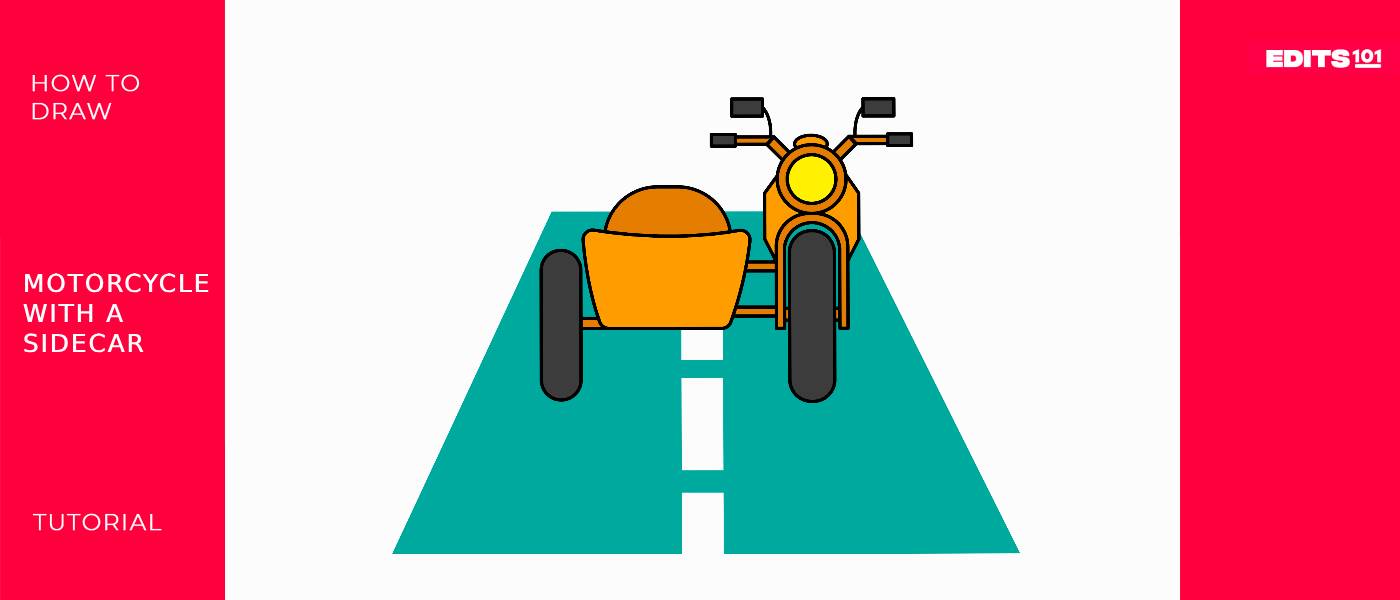
How to Draw a Motorcycle with a sidecar
In this step-by-step guide, we will walk you through each stage of the drawing process to ensure your final result looks authentic and visually appealing.
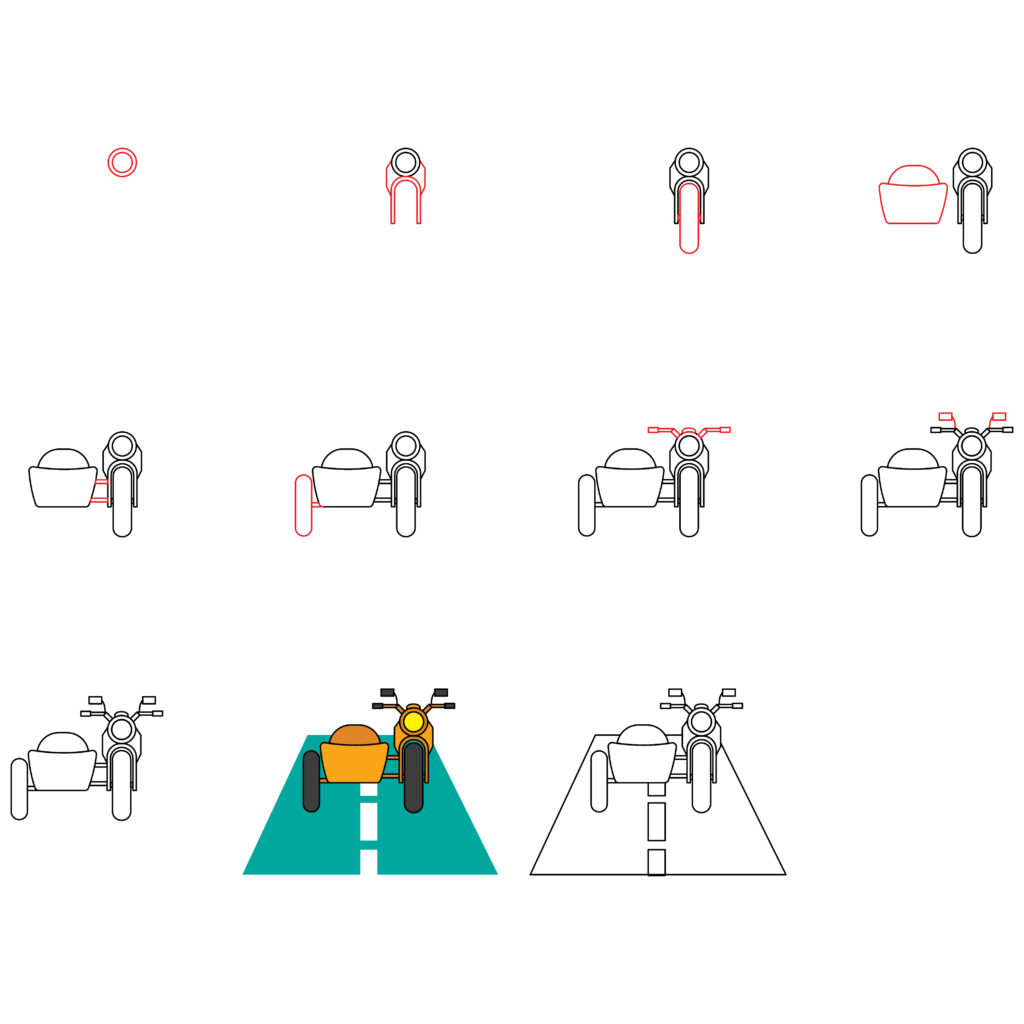
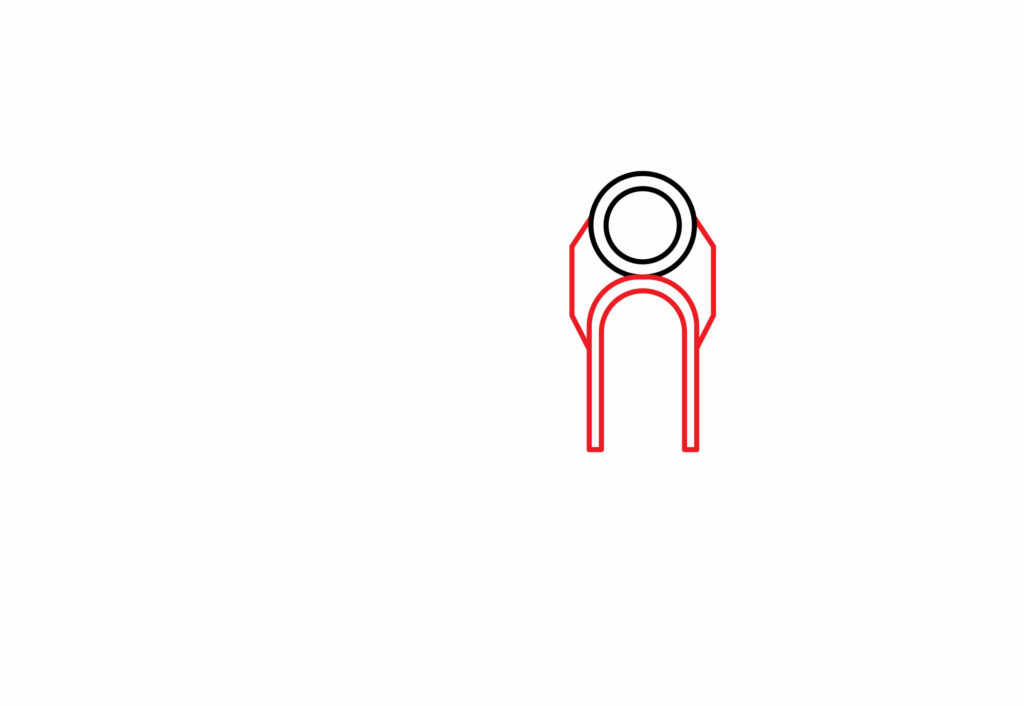
Step 1: Draw the headlight
The headlight of a motorcycle is used to illuminate the road ahead and increase visibility for the rider.
To complete this step, start by drawing two circles on the right side of your drawing paper – big and small. For smooth lines, make use of a mathematical drawing compass or a small circular household object like a coin or a bottle cap.
The larger circle represents the outer edge of the headlight, while the smaller circle symbolizes the inner bulb of the headlight.
Ensure that the smaller circle is drawn within the larger circle to create the typical headlight design.
- Draw two circles on the surface, one big and one small
- The larger circle indicates the outer edge of the headlight
- The smaller circle acts as the bulb of the headlight

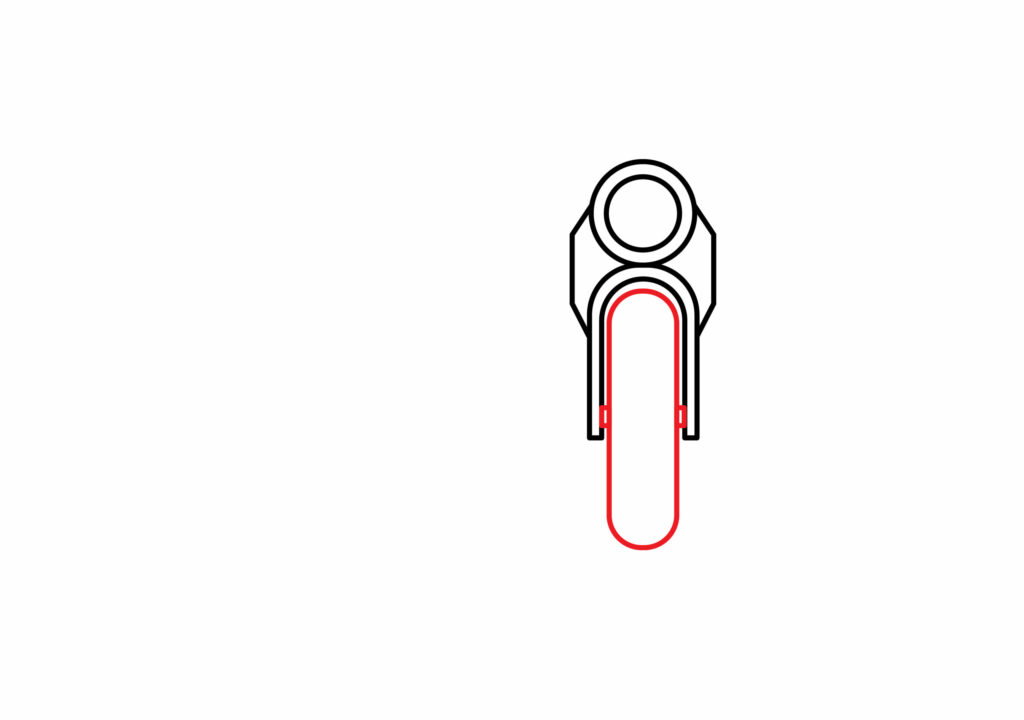
Step 2: Draw the Body and Fender
The motorcycle’s body provides aerodynamic protection and houses the engine, while the fender protects the rider and bike from debris, water, mud, and other elements kicked up by the wheels.
First, draw a shape resembling a hexagon starting from the mid-sides of the headlight. For the fender, draw a half-oval shape directly beneath the headlight.
Ensure that the breadth of the half-oval aligns with the breadth of the headlight’s circle. Add another half-oval within the first one to accurately represent the fender.
Lastly, erase any lines that possibly overlap with the sides of the headlight and the upper sides of the fender.
- Draw several lines to outline the shape of the motorcycle’s body
- Sketch a half-oval shape for the fender
- Use the image provided below as a guide for dimensions
Step 3: Draw the Front Wheel
Since our motorcycle drawing is angled from the front, you will only need to draw the front wheels throughout this tutorial.
Start by drawing a vertical oval within the center of the fender. Ensure the oval is horizontal and about twice as long as the fender’s length.
Add a small square on each center-side of the oval that connects to the bottom-inner sides of the fender to resemble some bolts.
- Draw an oval shape in the middle of the fender
- Ensure the oval is horizontal and twice as long as the fender
- Add two squares on the sides to resemble bolts
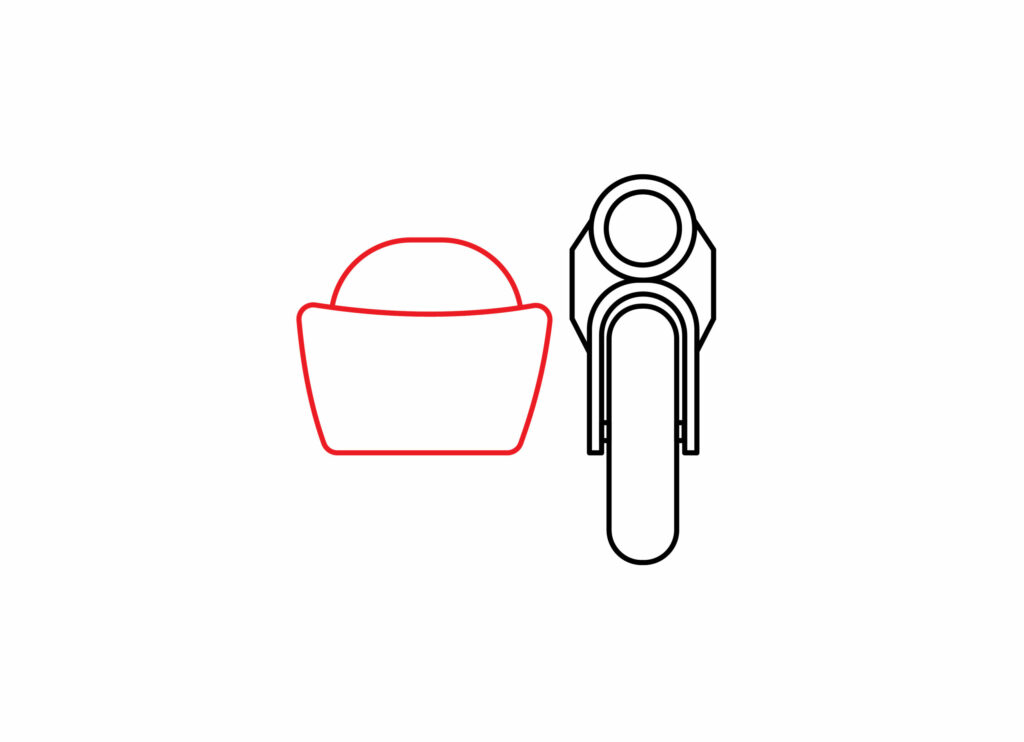
Step 4: Draw the sidecar Body
First, draw a rectangle on the left side of the motorcycle with a small space in between.
Ensure that the upper sides of the rectangle span out in width and that the upper line has a slight indent in the center.
The bottom of the rectangle should also align with the bottom of the fender.
An easy way to determine whether they’re aligned is to place a ruler horizontally over your sketch at the point where the fender ends.
Finally, draw a semicircle above the rectangle and connect the semicircle to the rectangle using two straight lines to form the base structure of the sidecar.
- Draw an upright rectangle for the sidecar’s body
- Sketch a semicircle at one end of the rectangle for the sidecar wheel
- Connect the semicircle to the rectangle with two straight lines
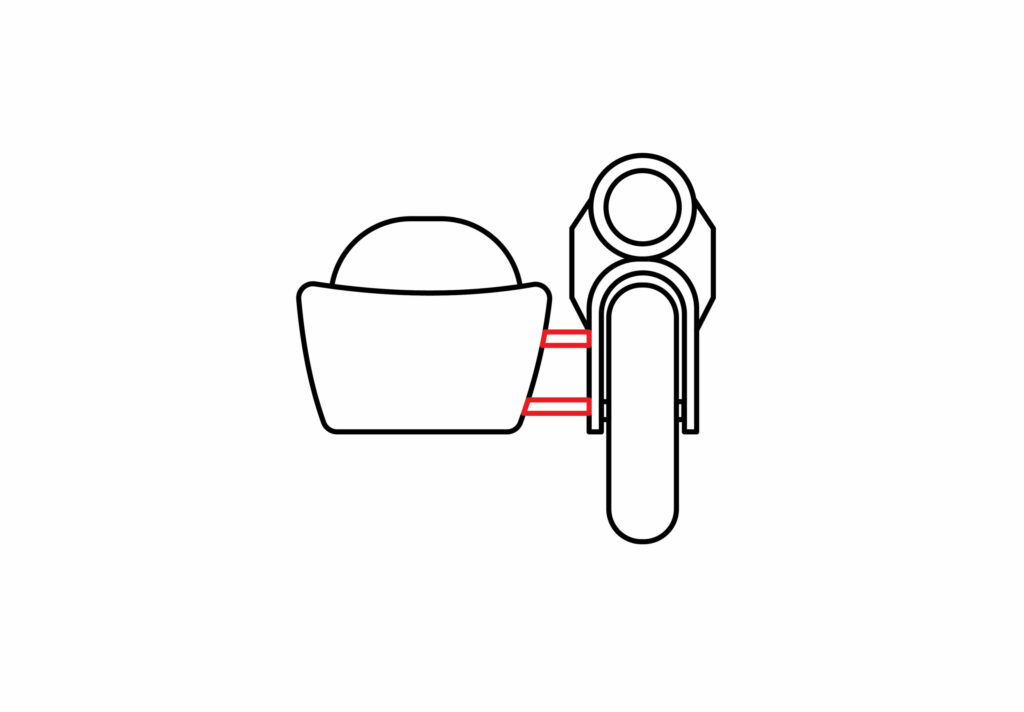
Step 5: Draw the sidecar connecter
As the name suggests, a sidecar connector ensures the sidecar is securely attached to the motorcycle.
To complete this step, draw two horizontal rectangles side by side with a width of equal size, drawn parallel to each other between the sidecar and motorcycle’s body.
The upper rectangle should be slightly shorter than the bottom one. If necessary, use your ruler to draw straight lines.
- Draw two horizontal rectangles to create the sidecar connector
- Make sure the rectangles are of equal size to each other
- Make sure their longer sides run parallel to each other
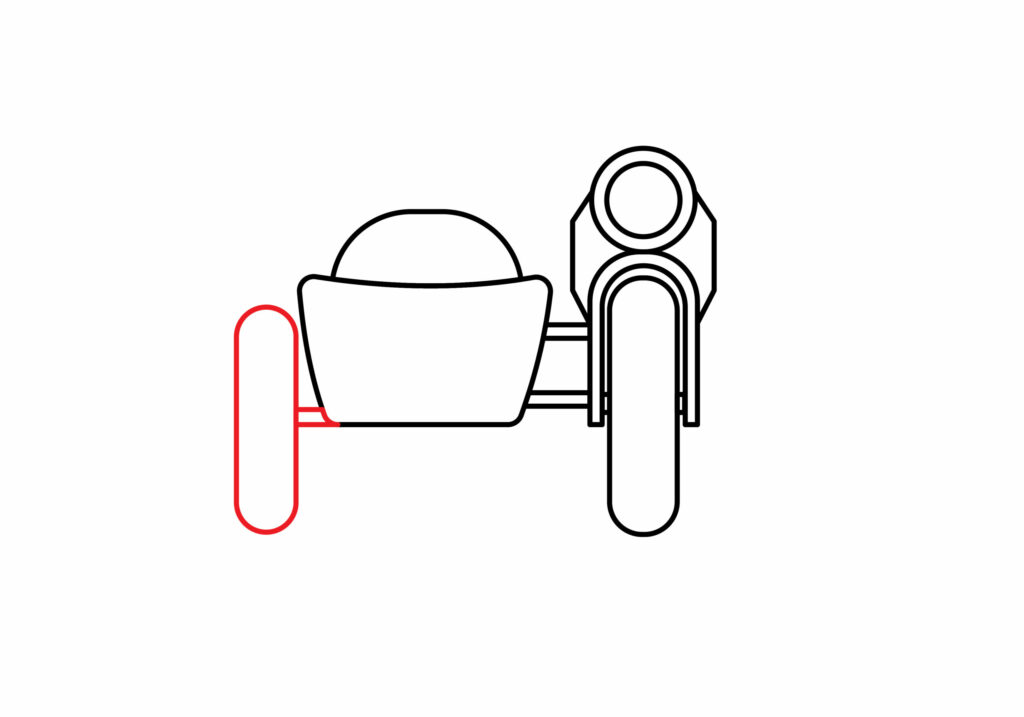
Step 6: Draw the Sidecar Tire
You’ve now reached the halfway mark of the drawing tutorial!
Feel free to take a break before continuing with this step. Wring your drawing hand’s fingers if needed so you don’t strain yourself.
Once ready, add the sidecar tire by drawing a thin horizontal rectangle along the bottom left side of the sidecar’s body.
Next, draw a vertical oval connected to the end of the small rectangle on the left, similarly to the front wheel completed in step three.
Ensure the bottom of the oval aligns with the bottom of the front wheel by utilizing your ruler!
- Draw a thin rectangle from the bottom left side of the sidecar’s body
- Add a oval shape connected to the rectangle
- Check out the image for guidance on the desired lengths and dimensions
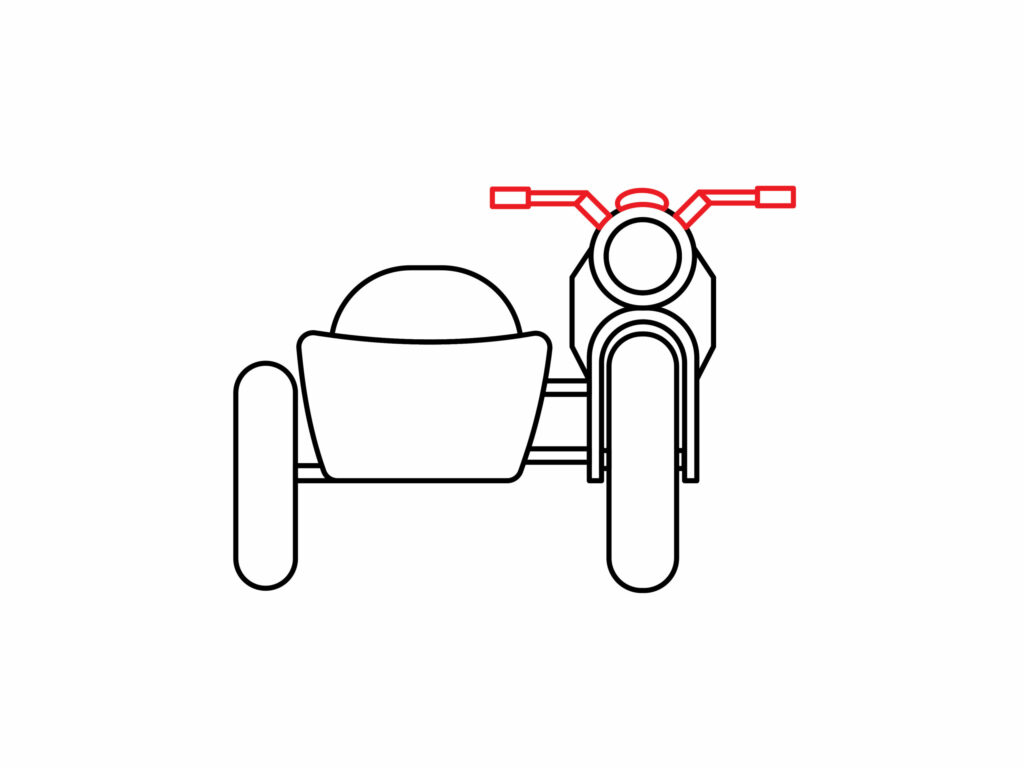
Step 7: Draw the handlebars
Reverting to the motorcycle, we’re now going to add the handlebars.
Start by drawing a small semicircle above the center of the headlight.
Then, draw a series of thin rectangles starting from the upper-left circumference of the headlight.
First, draw an upward-running diagonal rectangle, then a longer horizontal one, before adding a wider horizontal rectangle on the end.
Complete the same process on the right side of the headlight, ensuring that the series of rectangles are symmetrical, and you should have an image resembling two handlebars!
- Begin by drawing a small semicircle above the center of the headlight
- Add a series of rectangles to the upper side of the headlight for the handlebar
- Ensure that both handlebars are symmetrical
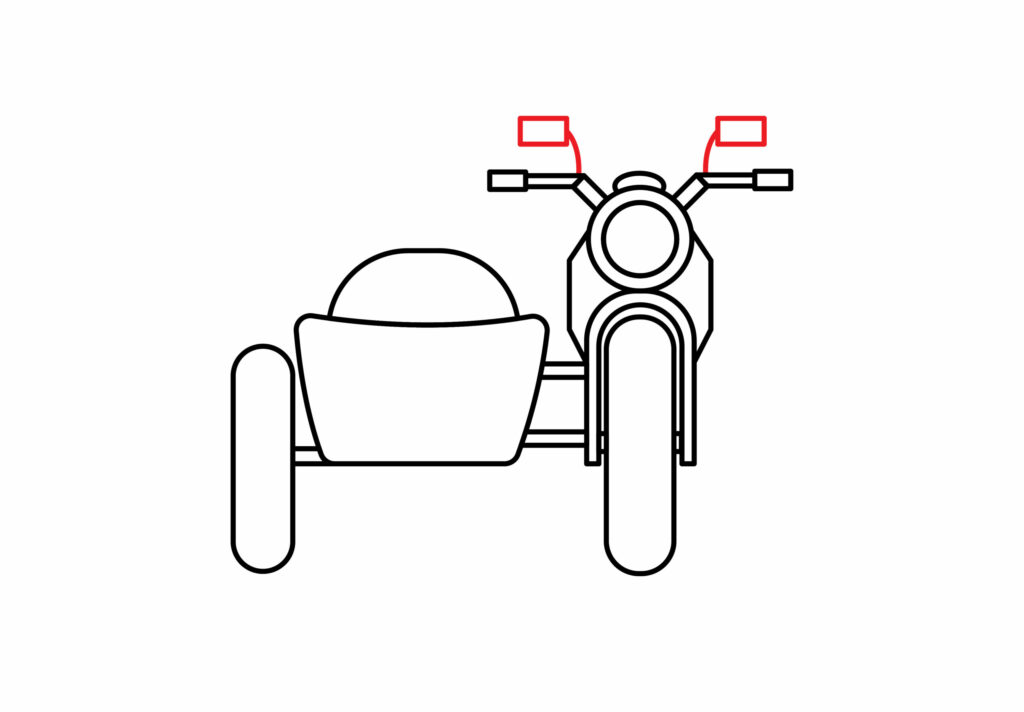
Step 8: Draw the convex mirrors
Convex mirrors improve safety by providing a wider field of view and reducing blind spots, particularly in parking lots, driveways, and tight road conditions.
To complete this step, draw a short curved vertical line starting from the upper center of the handlebar.
Attach a small rectangle to the end of the line, and you should have a structure resembling a small mirror.
Complete the same process on the remaining side while being mindful that both mirrors should be symmetrical.
- Draw a curved vertical line starting from the upper center of the handlebar
- Add a rectangle to the end of the line to resemble a small mirror
- Create the same shape, symmetrically, on the remaining side
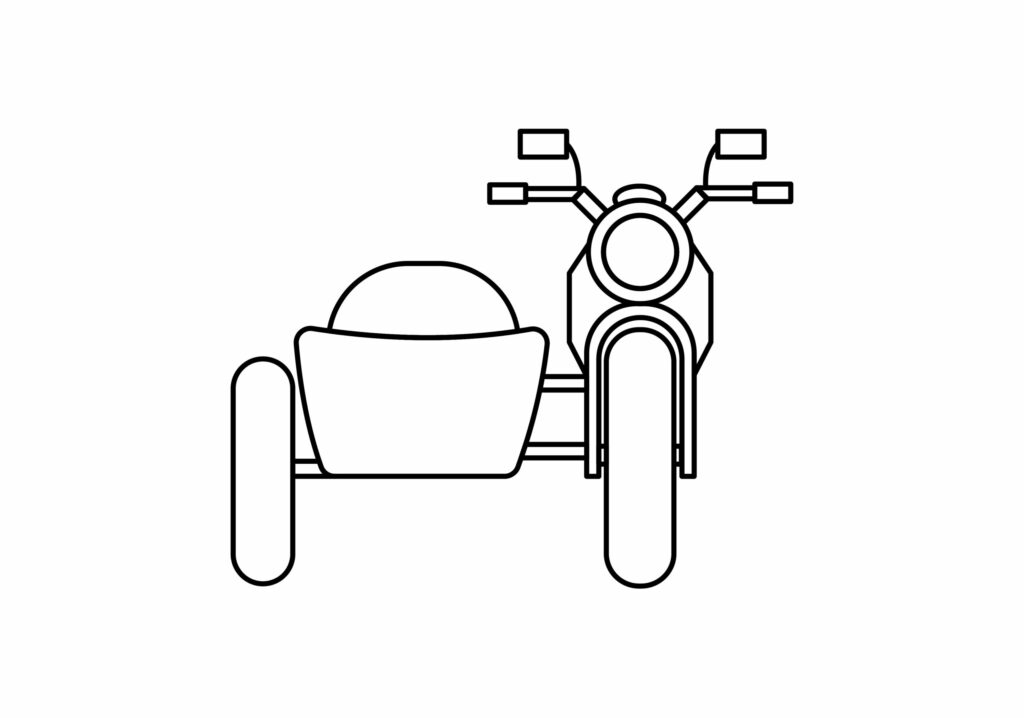
Congratulations! your Motorcycle with a Sidecar Drawing is Complete
Take a well-deserved break and assess the outcome of your drawing. If there’s anything you would like to adjust, do so now before completing the remaining steps.
Taking your Drawing to the Next Level
Taking your drawing to the next level means adding details to your drawing, such as backgrounds and colors. Backgrounds, textures, and colors can bring your art to life.
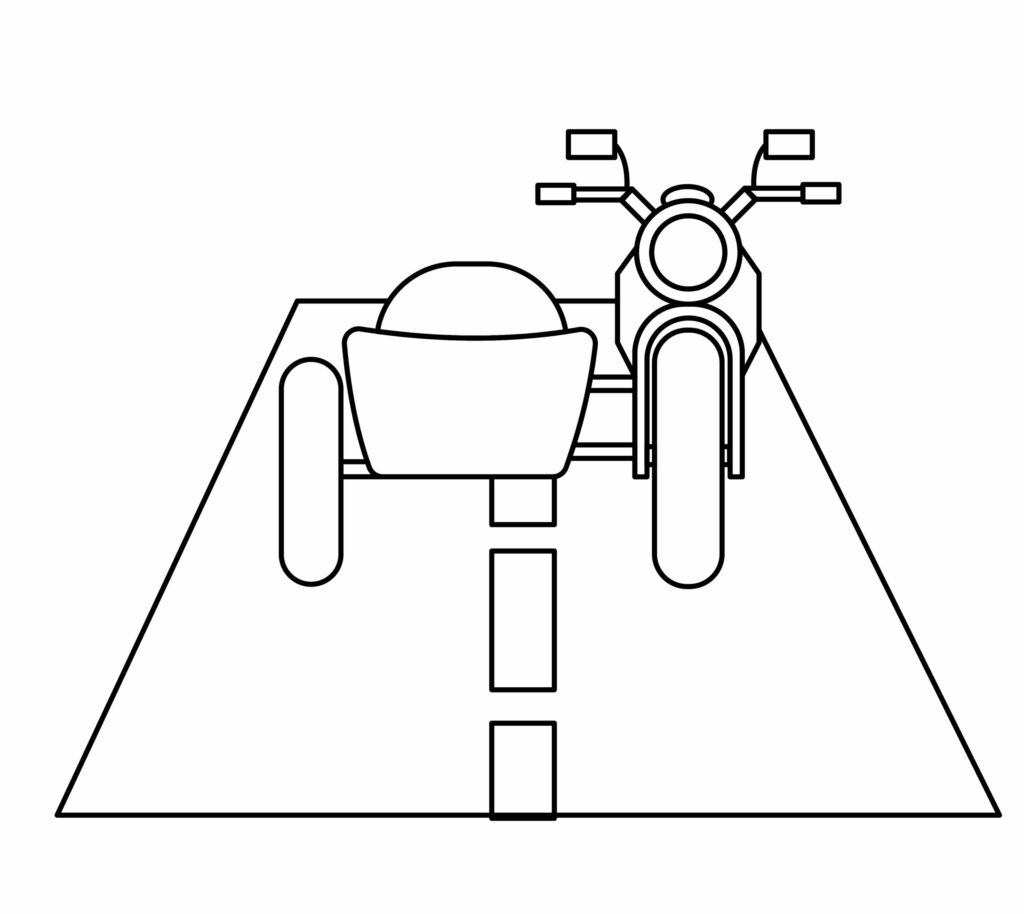
Step 9: Adding a Background
When selecting a background for your artwork, choosing the mood and theme you want to draw is essential.
For example, if you are creating a landscape drawing, including a road can add both depth and dimension to your sketch.
You can also add elements like trees and buildings surrounding your motorcycle with a sidecar to elevate the realism of it.
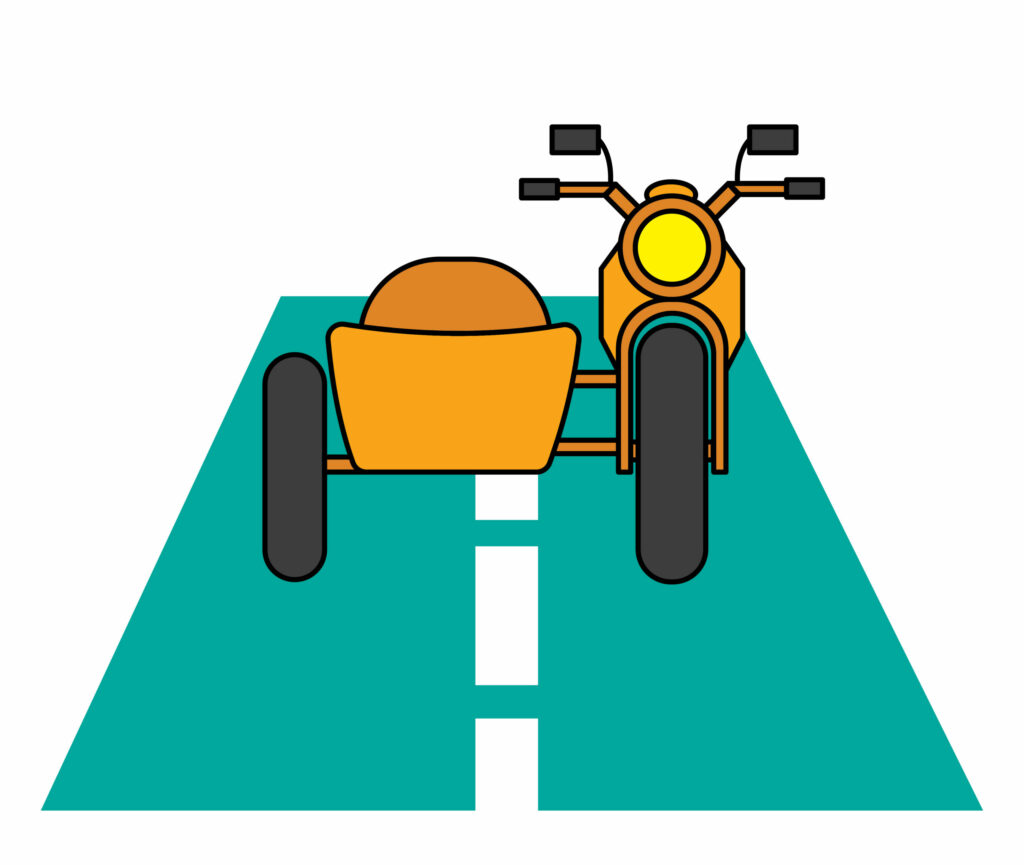
Step 10: Adding Colors
After selecting the background of your drawing, include some vibrant colors to make your drawing stand out and capture attention.
If you like the way we have colored in our drawing, you’re welcome to use similar colors for yours.
Use light blue to indicate the general outline of the road, white for the median strips, black for the wheels, handlebar edges and convex mirrors.
Yellow for the headlight’s bulb, and varying shades of orange/brown for the body of the motorcycle and sidecar.
Additionally, feel free to use any color combinations you have in mind, though be sure to use different colors for different elements as we have done with our drawing. This will definitely highlight each part.
Bonus Tips
Add unique customizations to the motorcycle and sidecar that showcase your personality.
Explore different color supplies like pencils, crayons, pens, markers, or digital drawing software.
Check out other photographs, and videos, to observe real motorcycles with sidecars.
Complete each step in the drawing tutorial to ensure the final product is the best possible outcome.
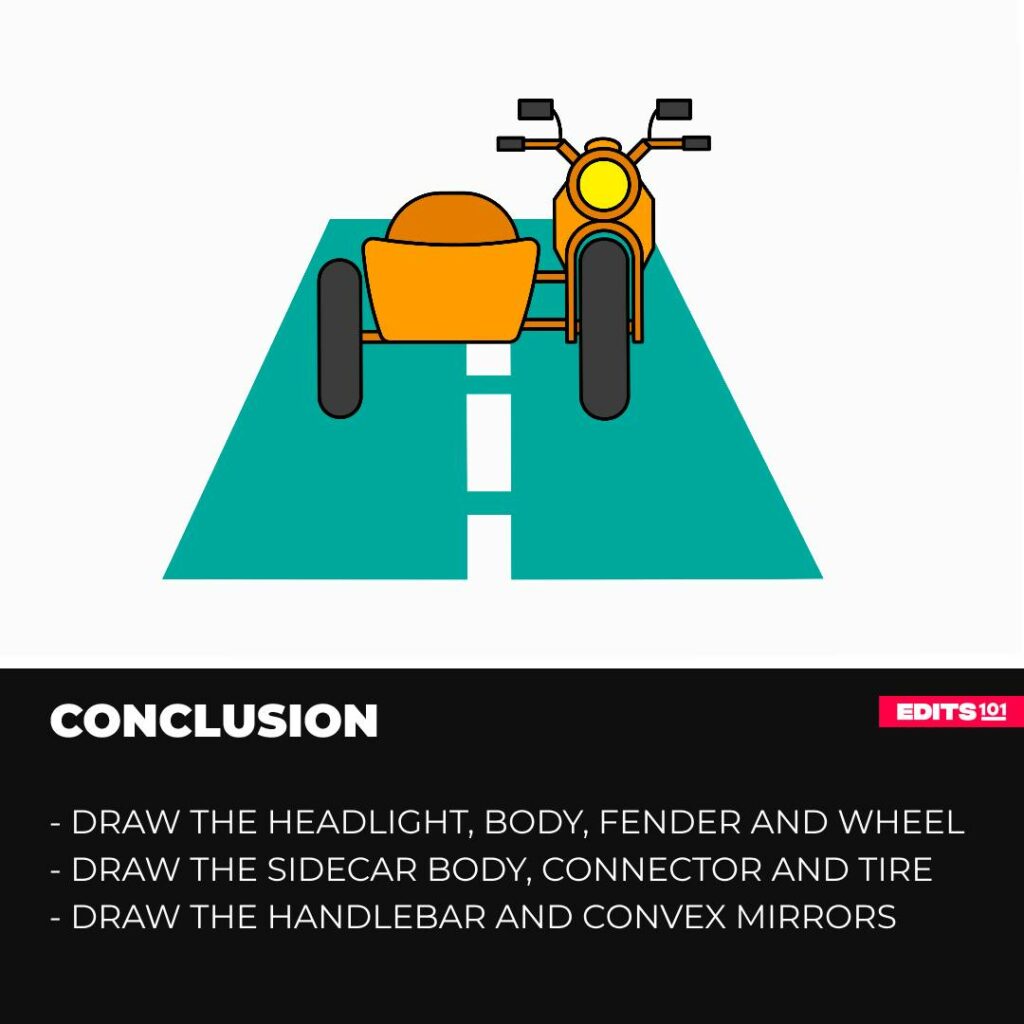
Conclusion
This drawing tutorial encompasses a lot: like how to accurately draw a motorcycle with a sidecar, some tips and tricks to improve the final design, and some fun facts about the functionality of motorcycles with a sidecar, as well.
If you’ve managed to complete your motorcycle sketch, well done on transforming a blank page into something new.
Remember, persistence in your artistic endeavors will ultimately reflect your results, so practice regularly and trust in your progress over time.
Thanks for reading & feel free to check out more of our articles!
Author Rating
Overall Rating
Summary
This tutorial will effectively teach you how to draw a motorcycle with a sidecar in 10 simple steps, and how to make use of background elements and color to boost your drawing’s quality.