How to Draw a Quad Bike in 10 Simple Steps
Quad bikes are amazing 4-wheel motorcycles. They were traditionally used for off-roading and sports. Today, these vehicles are popular as hobby vehicles. There are even smaller versions available for kids! Whether you are a seasoned veteran or a first-time rider, there are a lot of things you can do on a quad bike.
In this guide, we will be looking at how you can draw your own beautiful quad bike in simple steps. You will also learn more about the various parts that a quad bike has.
| Step | Complexity Level |
| Drawing the Body | 3 |
| Drawing the Chassis | 1 |
| Drawing the Wheels | 2 |
| Adding the Seat | 1 |
| Drawing the Headlights | 1 |
| Drawing the Handlebars | 3 |
| Drawing the Front Fender | 1 |
| Adding a Background | 2 |
| Coloring | 1 |
What You Will Need
- A pencil
- An eraser
- A ruler
- A drawing paper
- Coloring supplies
- At least 30 minutes
How to Draw a Quad Bike
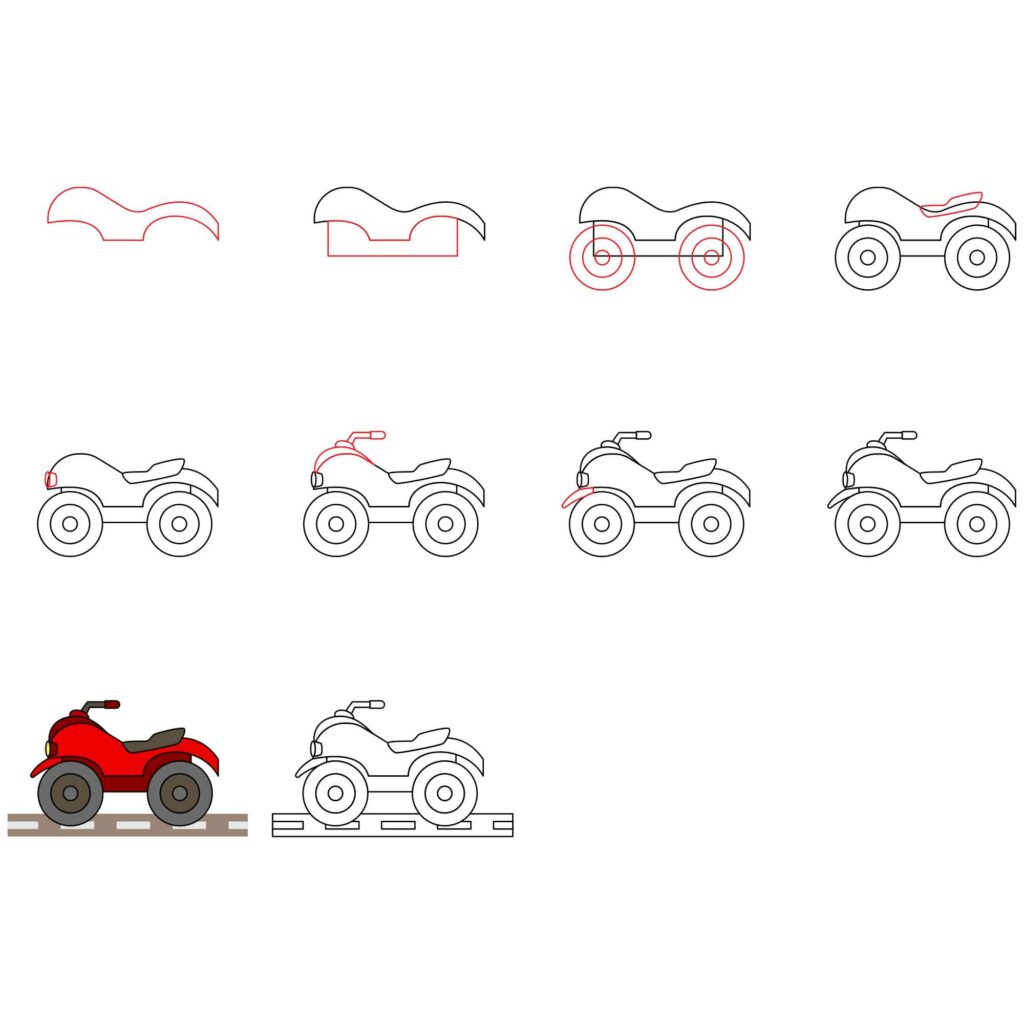
Drawing a quad bike is quite easy. You just need to be patient and be forgiving of yourself when you make mistakes. In our tutorial, here are the steps we will follow. Study the below image so that you are prepared for each step.
Step 1: Draw the Body of the Quad Bike
To make better use of your drawing paper, the first thing you should do when drawing any vehicle is draw the biggest part. That way you will be able to manage your drawing space better. Just like a motorcycle, the biggest part of a quad bike is its body.
Before you start drawing, keep in mind that the body of the quad bike should take up at least three-quarters of the width of your drawing space. Do not make it too big. You need space for other components. The body should also not be so small that you have trouble adding the other features.
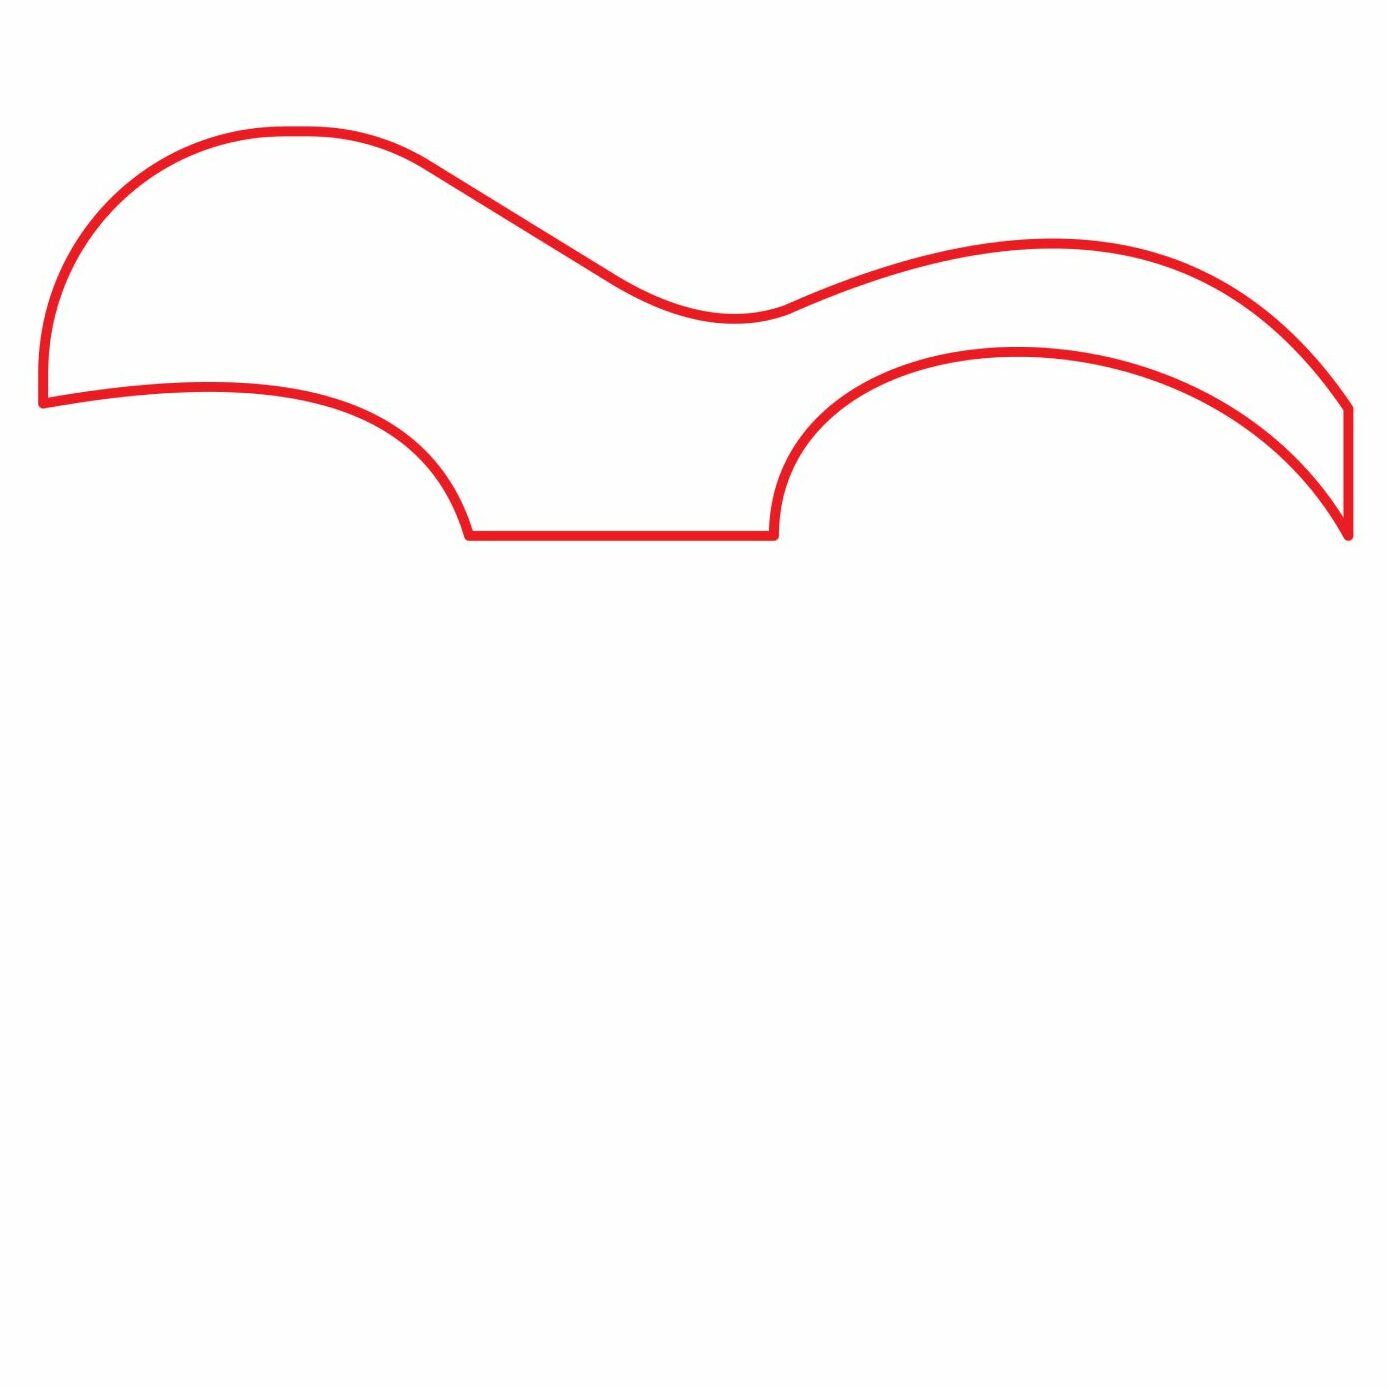
To draw the body, start by drawing the top part using a wavy line like the one shown in our illustration below. Start from the left towards the right.
Next, we need to draw the bottom part. From our illustration, the grooves are meant to fit the wheels of the quad bike. You should thus make them as big as ours because quad bikes have large wheels which enable them to move easily on rough terrain.
- Use wavy lines to draw the top part
- Draw the bottom using wavy lines to leave grooves for the wheels
Step 2: Draw the Chassis of the Bike
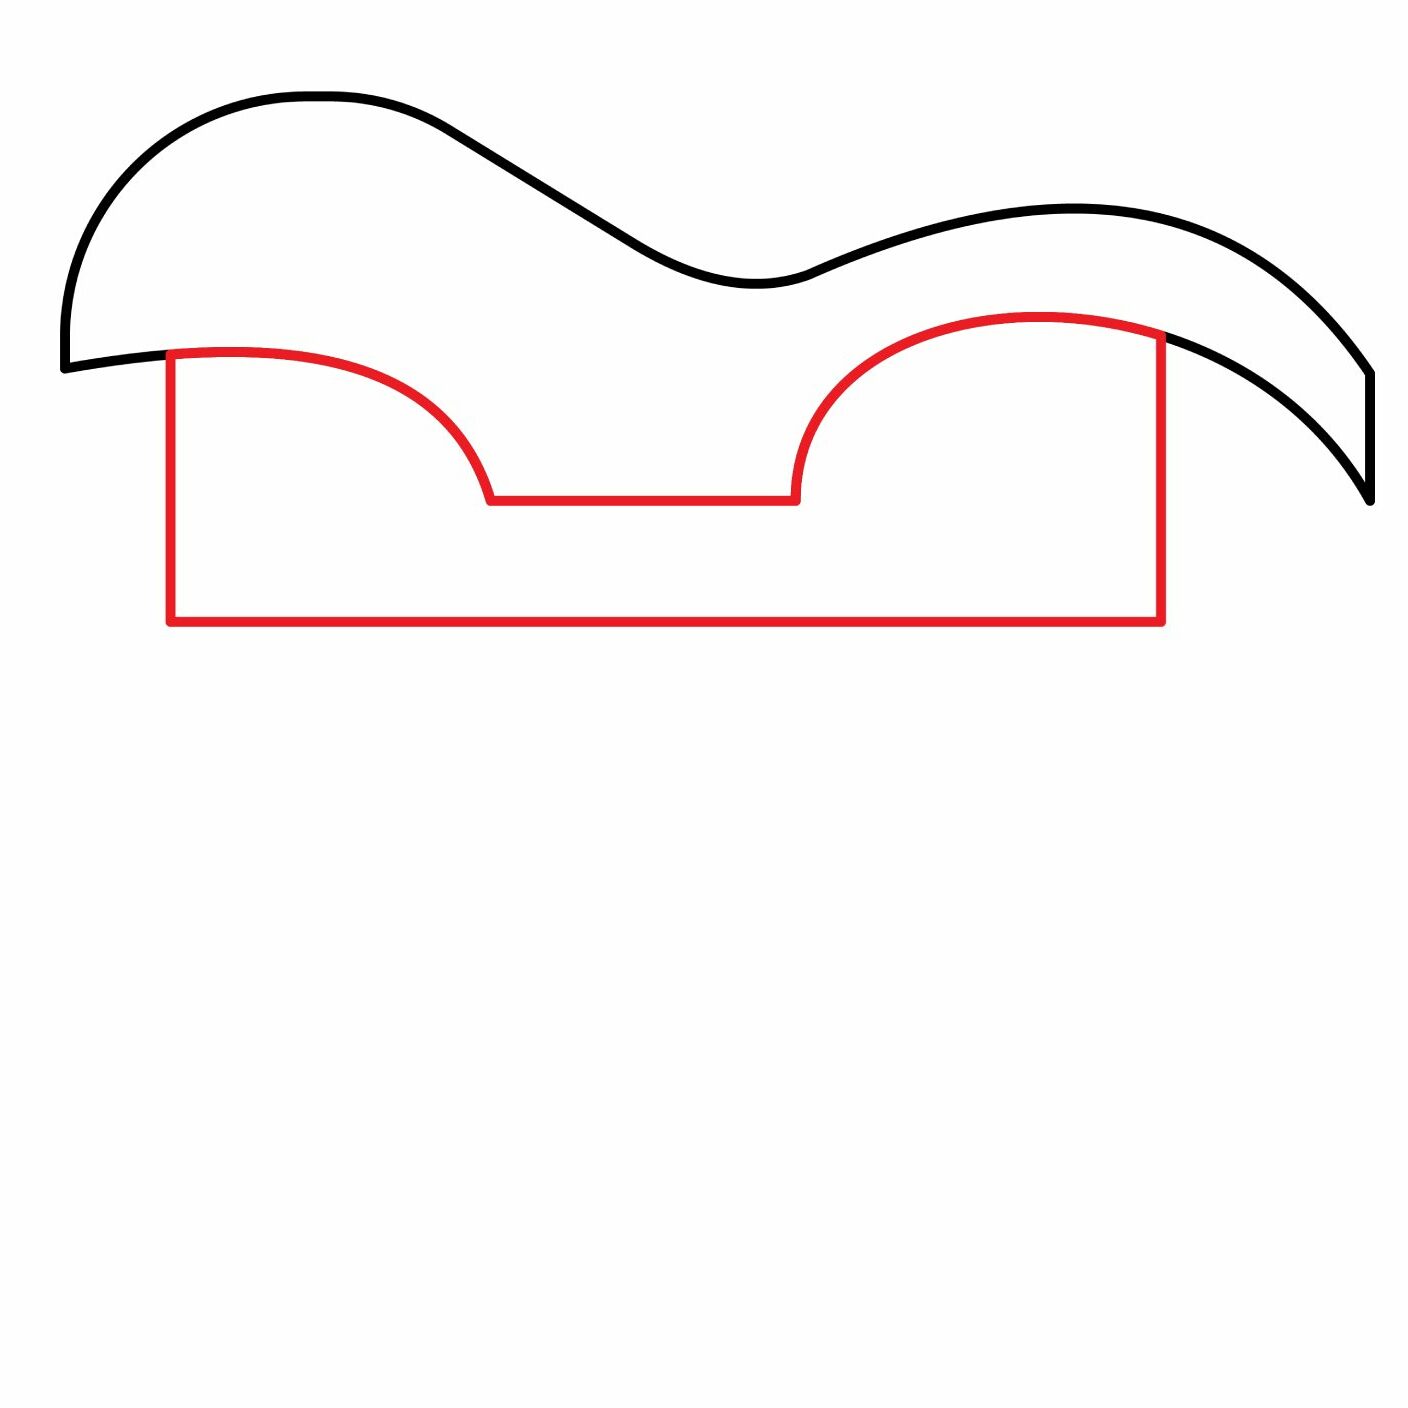
The chassis is the base frame on which the body, engine, wheels, and other components are mounted. The chassis sits below the body.
Use your ruler to draw a vertical straight line below the body starting from the front groove and extend the line slightly past the lowest point of the body. Next, draw another vertical line from the rear groove and make it the same length as the first one.
To complete the drawing of the chassis, connect the two vertical lines with a horizontal line at the bottom. Use your eraser to remove any of the lines that spill onto the body of the quad bike or that cross each other.
- Draw two vertical lines starting from the groove for the wheel
- Connect the two lines with a horizontal line at the bottom
- Erase any lines that overlap
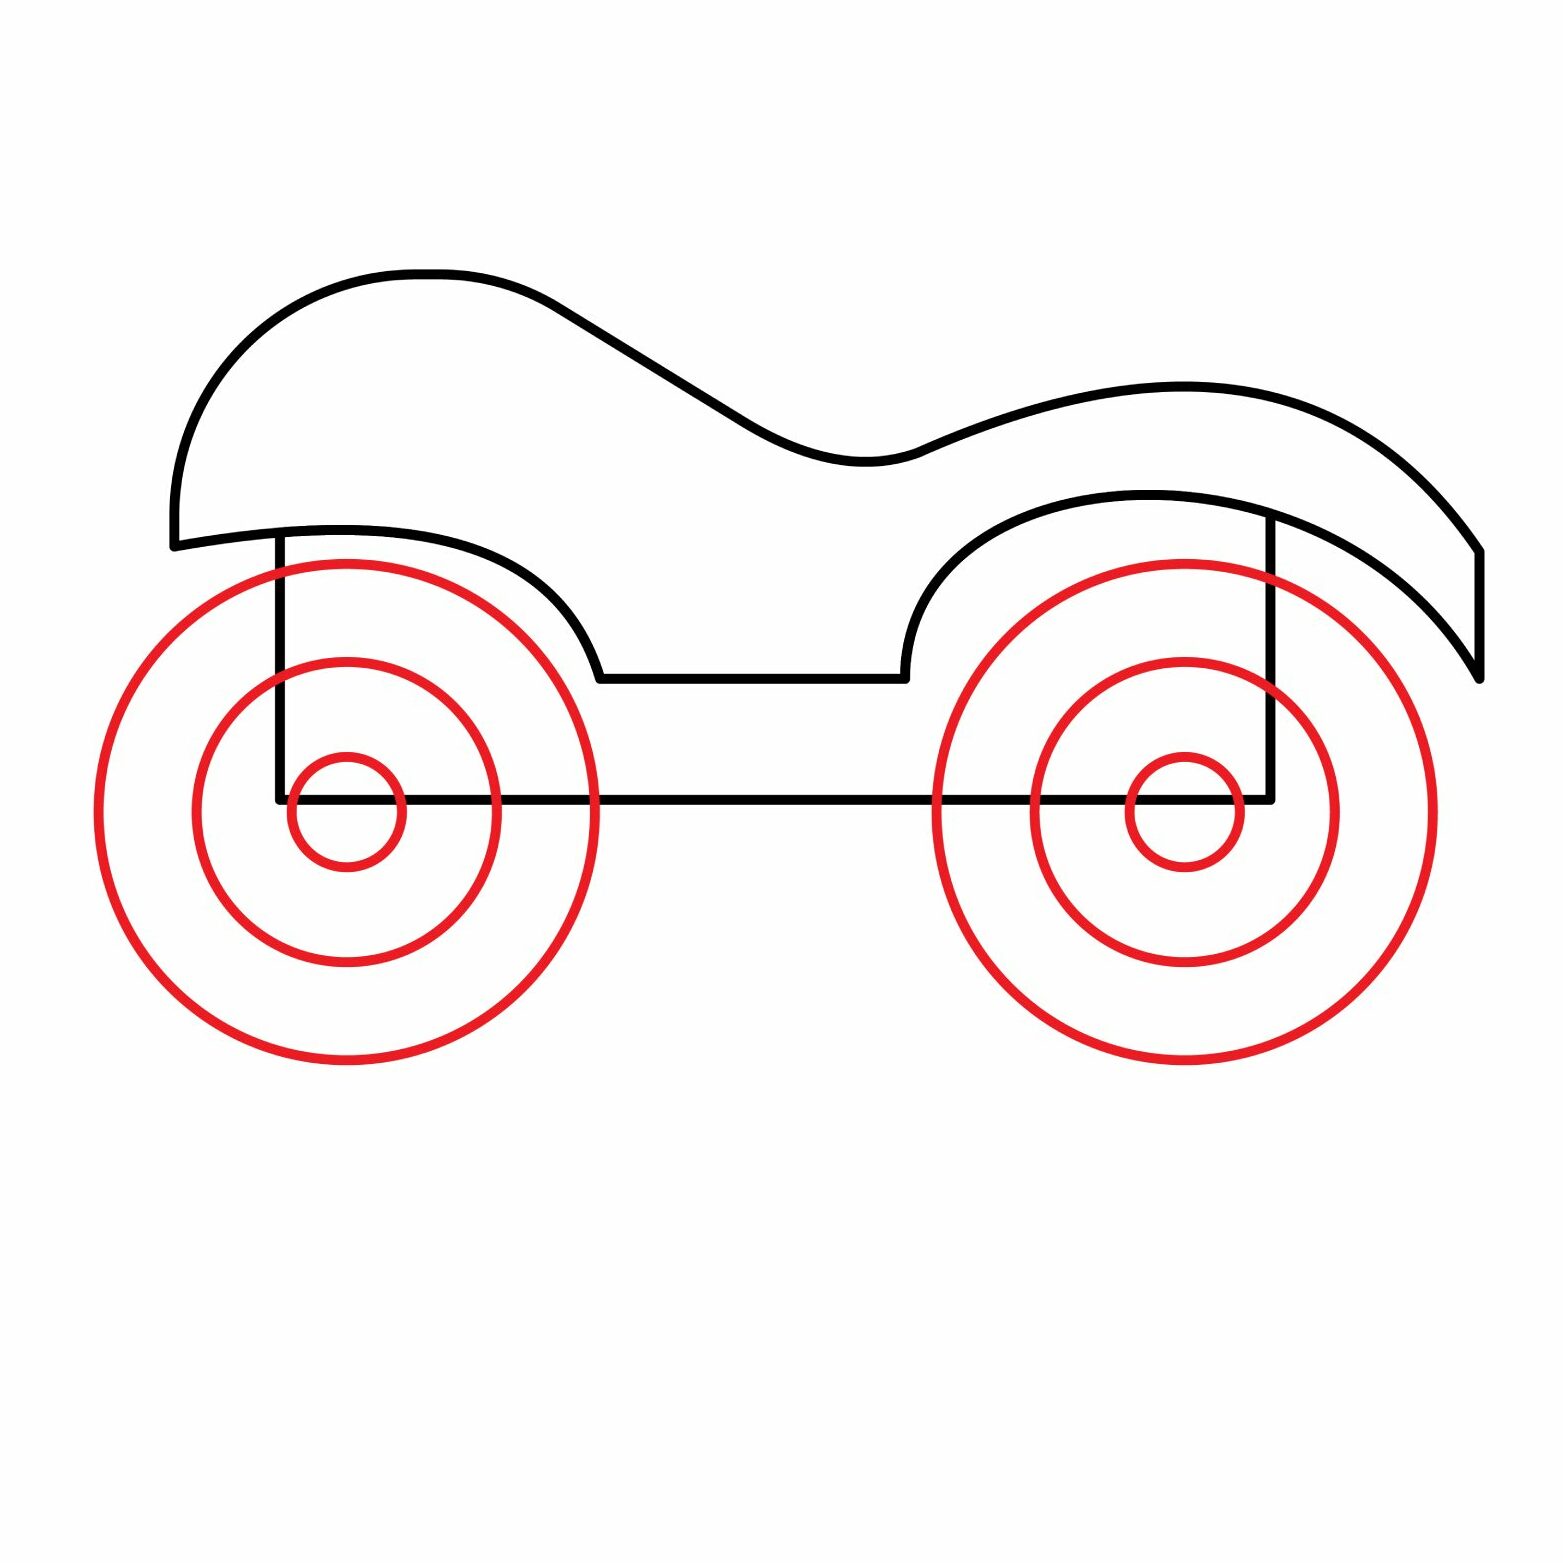
Step 3: Draw the Wheels
Unlike a car, a quad bike has larger wheels to help it move easily over rough terrain. We will be adding the wheels in the grooves we left on the bottom part of the body. The wheels you add to your quad bike should fit in those grooves.
Start by adding a small circle on each corner of the chassis. The small circle will serve as the wheel hub. The wheel hub is the component that connects the rim to the hub. It contains the brake pads, rotors, and calipers.
Next, add a slightly larger circle over the small circle. The larger circle will serve as the rim for our quad bike’s wheel. You should then add another larger circle over the two circles to represent the tires.
Make sure the larger circle doesn’t go through the body of the quad bike. You should then repeat the process to draw the second wheel.
To refine your drawing, use your eraser to remove all the lines that cut through the circles we just drew.
- Draw a small circle on the corner of the chassis to form the hub
- Add a slightly larger circle over the first circle to form the rim
- Draw a larger circle over the second circle to form the wheel
- Repeat the process to create the second wheel
- Erase the lines that cut through the wheel
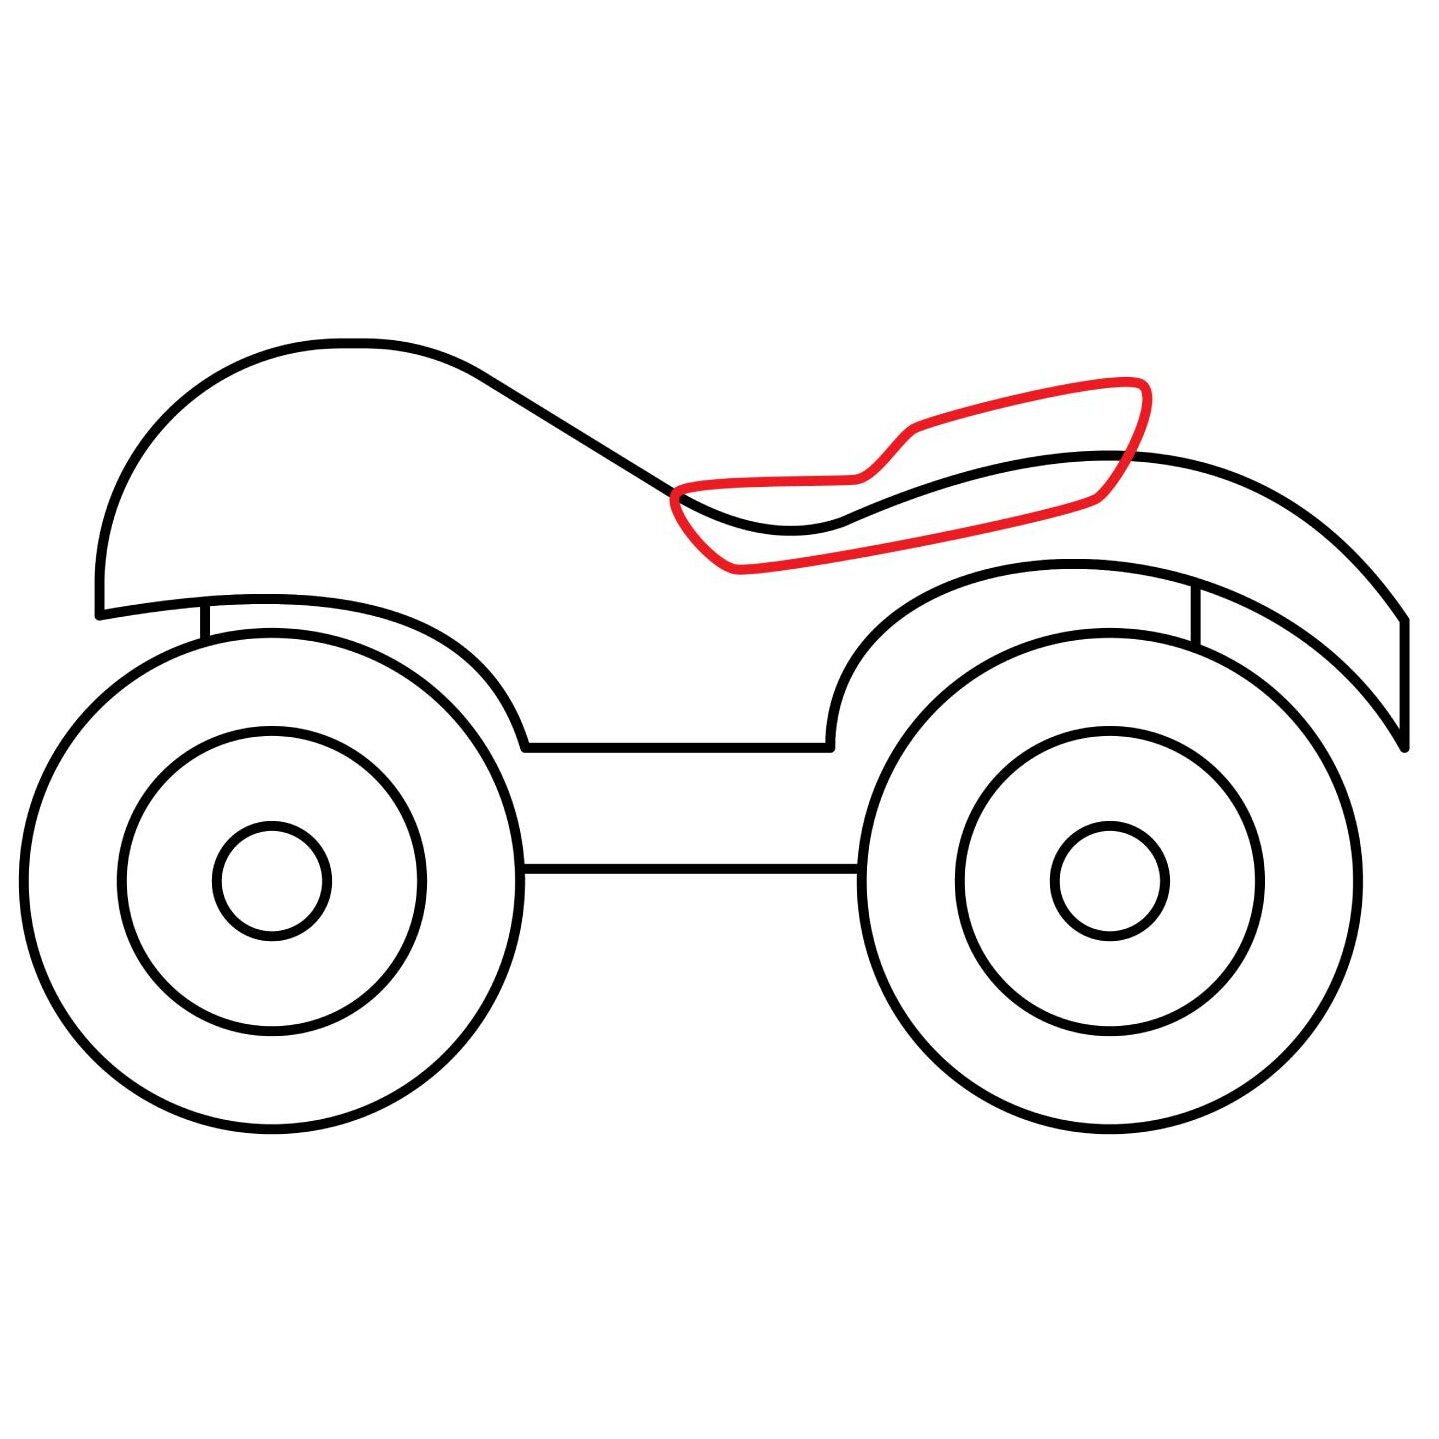
Step 4: Draw the Seat
The rider needs a comfortable seat in order to ride the quad bike confidently and comfortably. The seat goes on the body of the quad bike. To draw the seat, add a shape similar to the one we have below at the area where the body has a depression.
Don’t forget to remove the lines that pass through the shape you added for the seat using your eraser. The seat should not be too big because we need room for other components on the body.
- Draw a rectangle with rounded corners and curved sides on the body to form the seat
- Erase the lines that cut through the seat
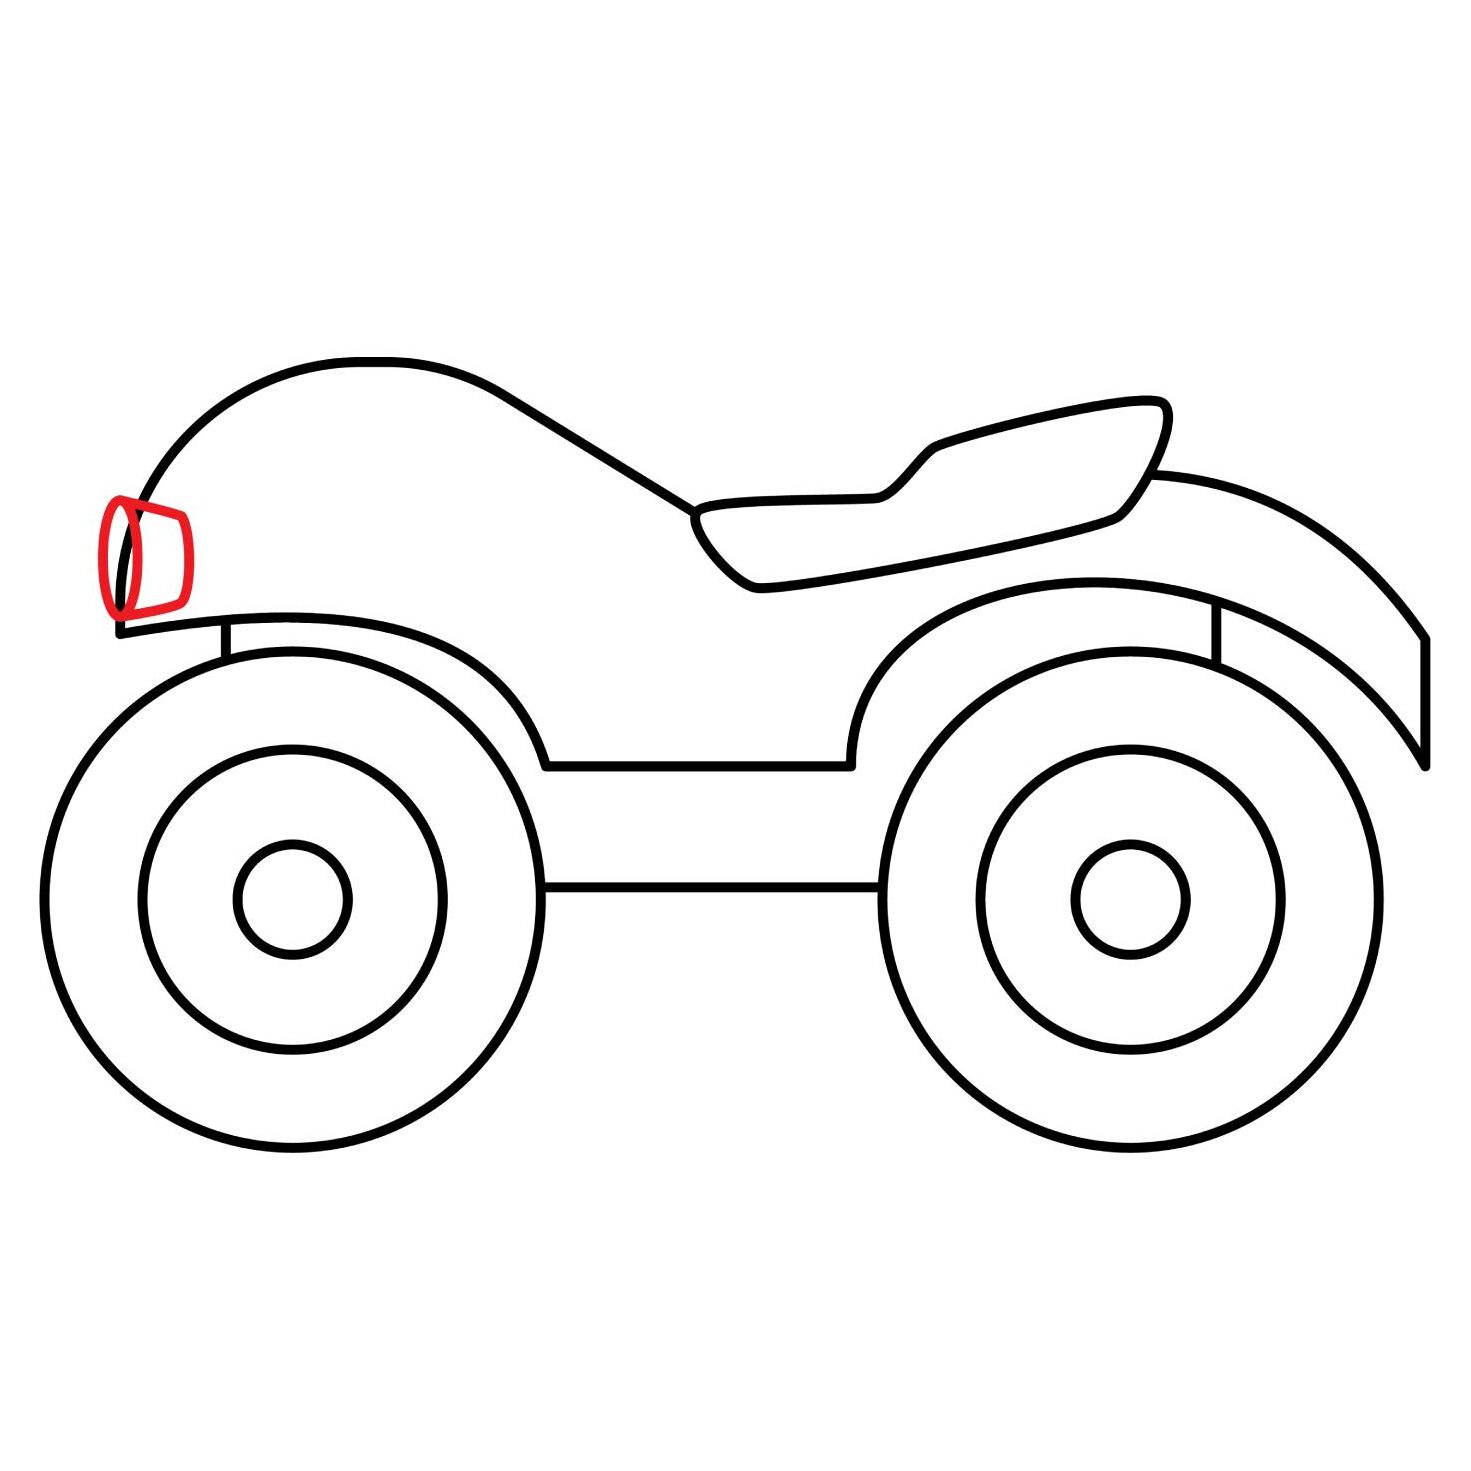
Step 5: Draw the Headlights
Just like a racing motorcycle, a quad bike can be used at night or in areas with limited light. For this reason, the vehicle needs headlights to illuminate the way.
Add an oval shape at the front end of the quad bike. This should be on the body and preferably at the point just above the front wheel as shown in our illustration. Erase any lines that pass through the shape you added for the headlight.
While some quad bikes may have a pair of headlights, we will not be able to add two headlights because of the perspective of our drawing. The second headlight would be hidden behind the first one.
- Add an oval shape on the front end of the quad bike to form the headlight
- Erase lines that cut through the headlight
Step 6: Draw the Handlebars and the handles
As aforementioned, a quad bike is just a motorcycle but with four wheels. Just like a motorcycle, the speed of a quad bike is controlled by a mechanism in the handles. The handles are also used for steering.
The first thing we will do is elevate the front end a bit by adding a curved line over the body. This will serve as the housing for such components as the speedometer. Next, we will add a small curved line to serve as the mounting for the handlebars.
To draw the handlebars, add a curved tube similar to the one we added in our illustration. You should then add a line towards the end of the tube to represent the handles. The handlebars should not be too long nor should they be too short.
- Draw a curved shape to elevate the body on the front end
- Add another smaller curved shape to serve as mounting for the handlebars
- Draw a bent, tube-like structure starting from the mounting and bending to the right. This will form the handlebars
- Add a wider tube-like structure on the end of the handlebars to form the handles

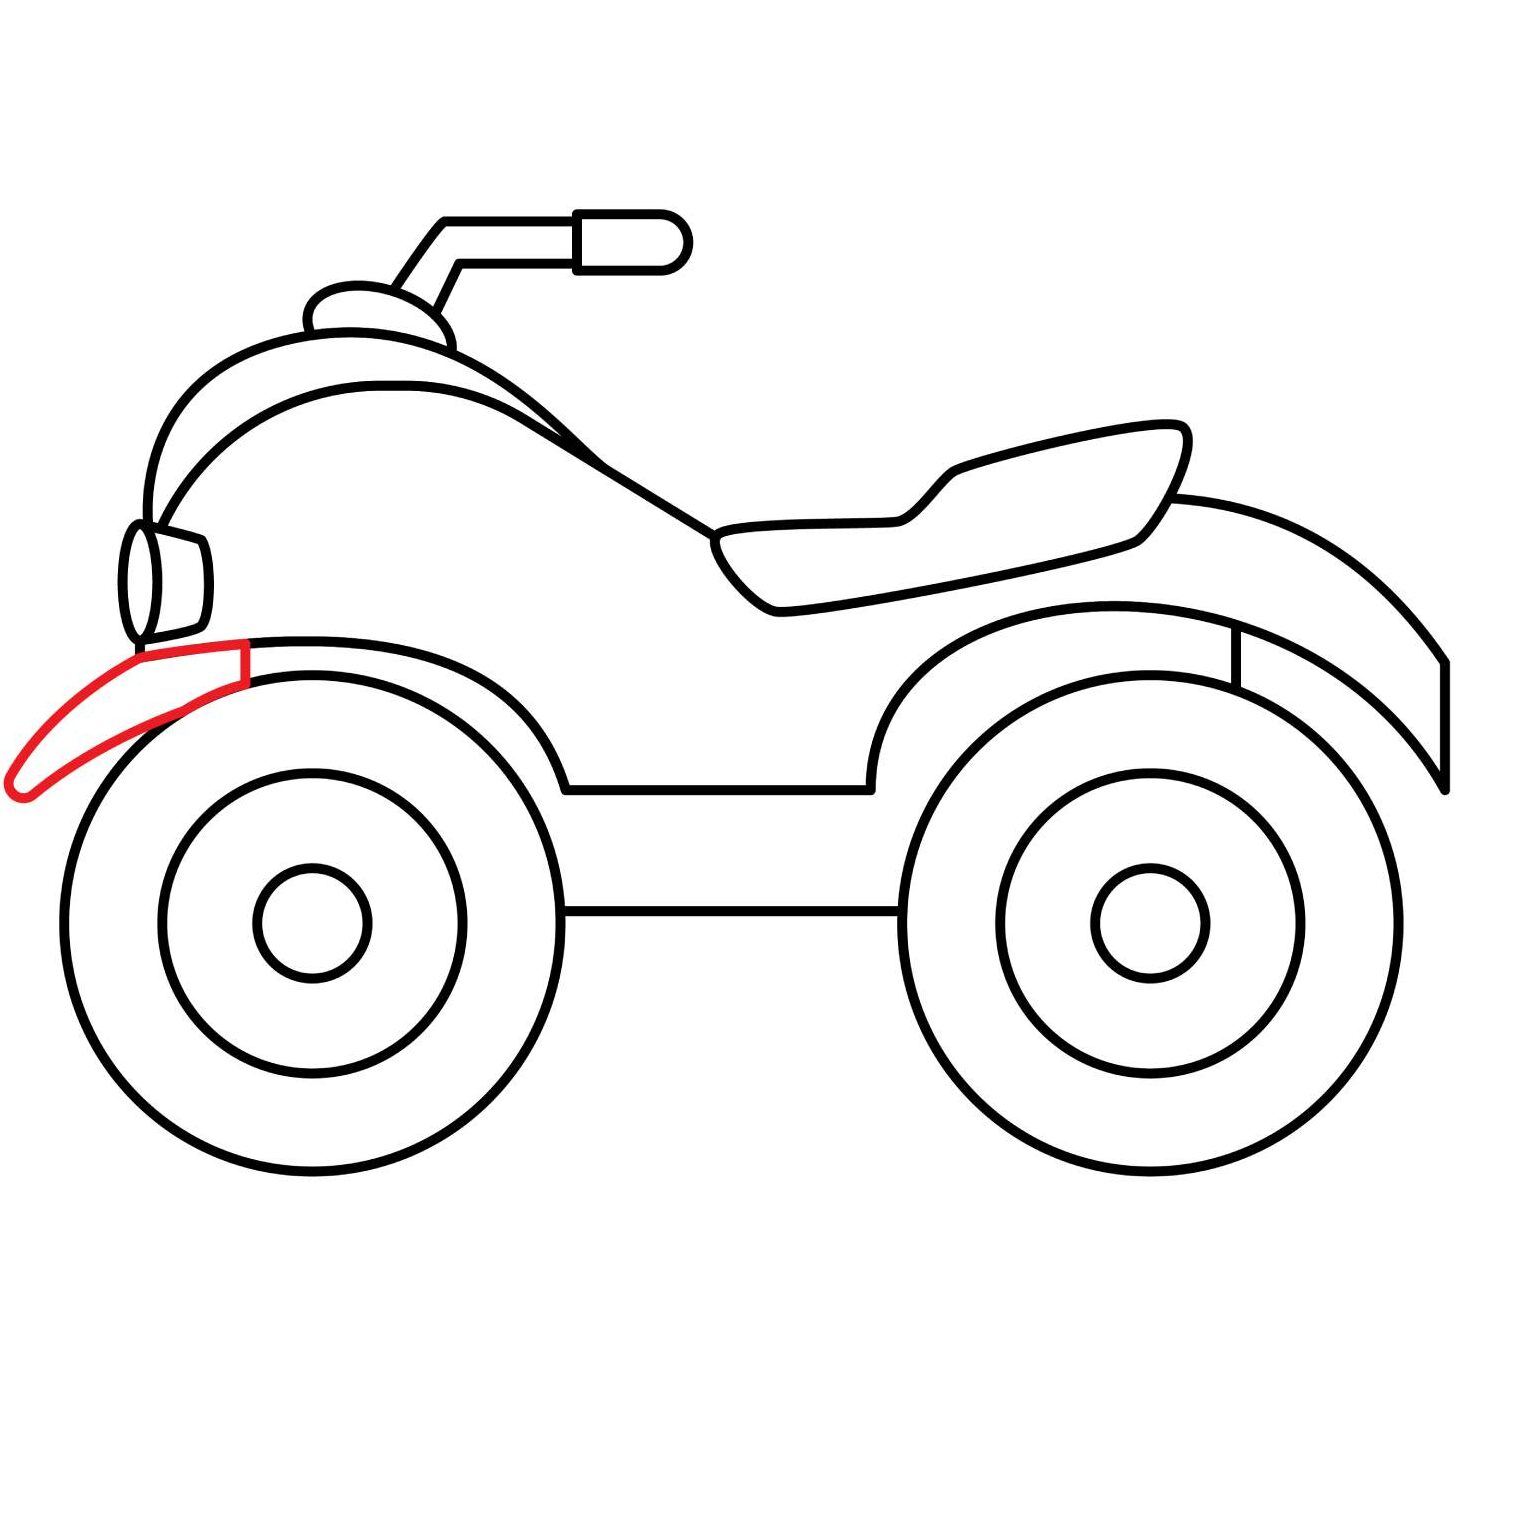
Step 7: Draw the Fender
Considering quad bikes are driven on rough terrains, a lot of debris is pushed back by the wheels. To keep debris from splashing on the rider and the bike, we need to add a fender.
Draw a curved shape, similar to the one in our illustration, at the front end of the front wheel. That will serve as the fender.
Step 8: The Quad Bike is Ready
If you followed all the steps, your quad bike should be ready and look similar to ours, or even better. Take some time to admire your work.
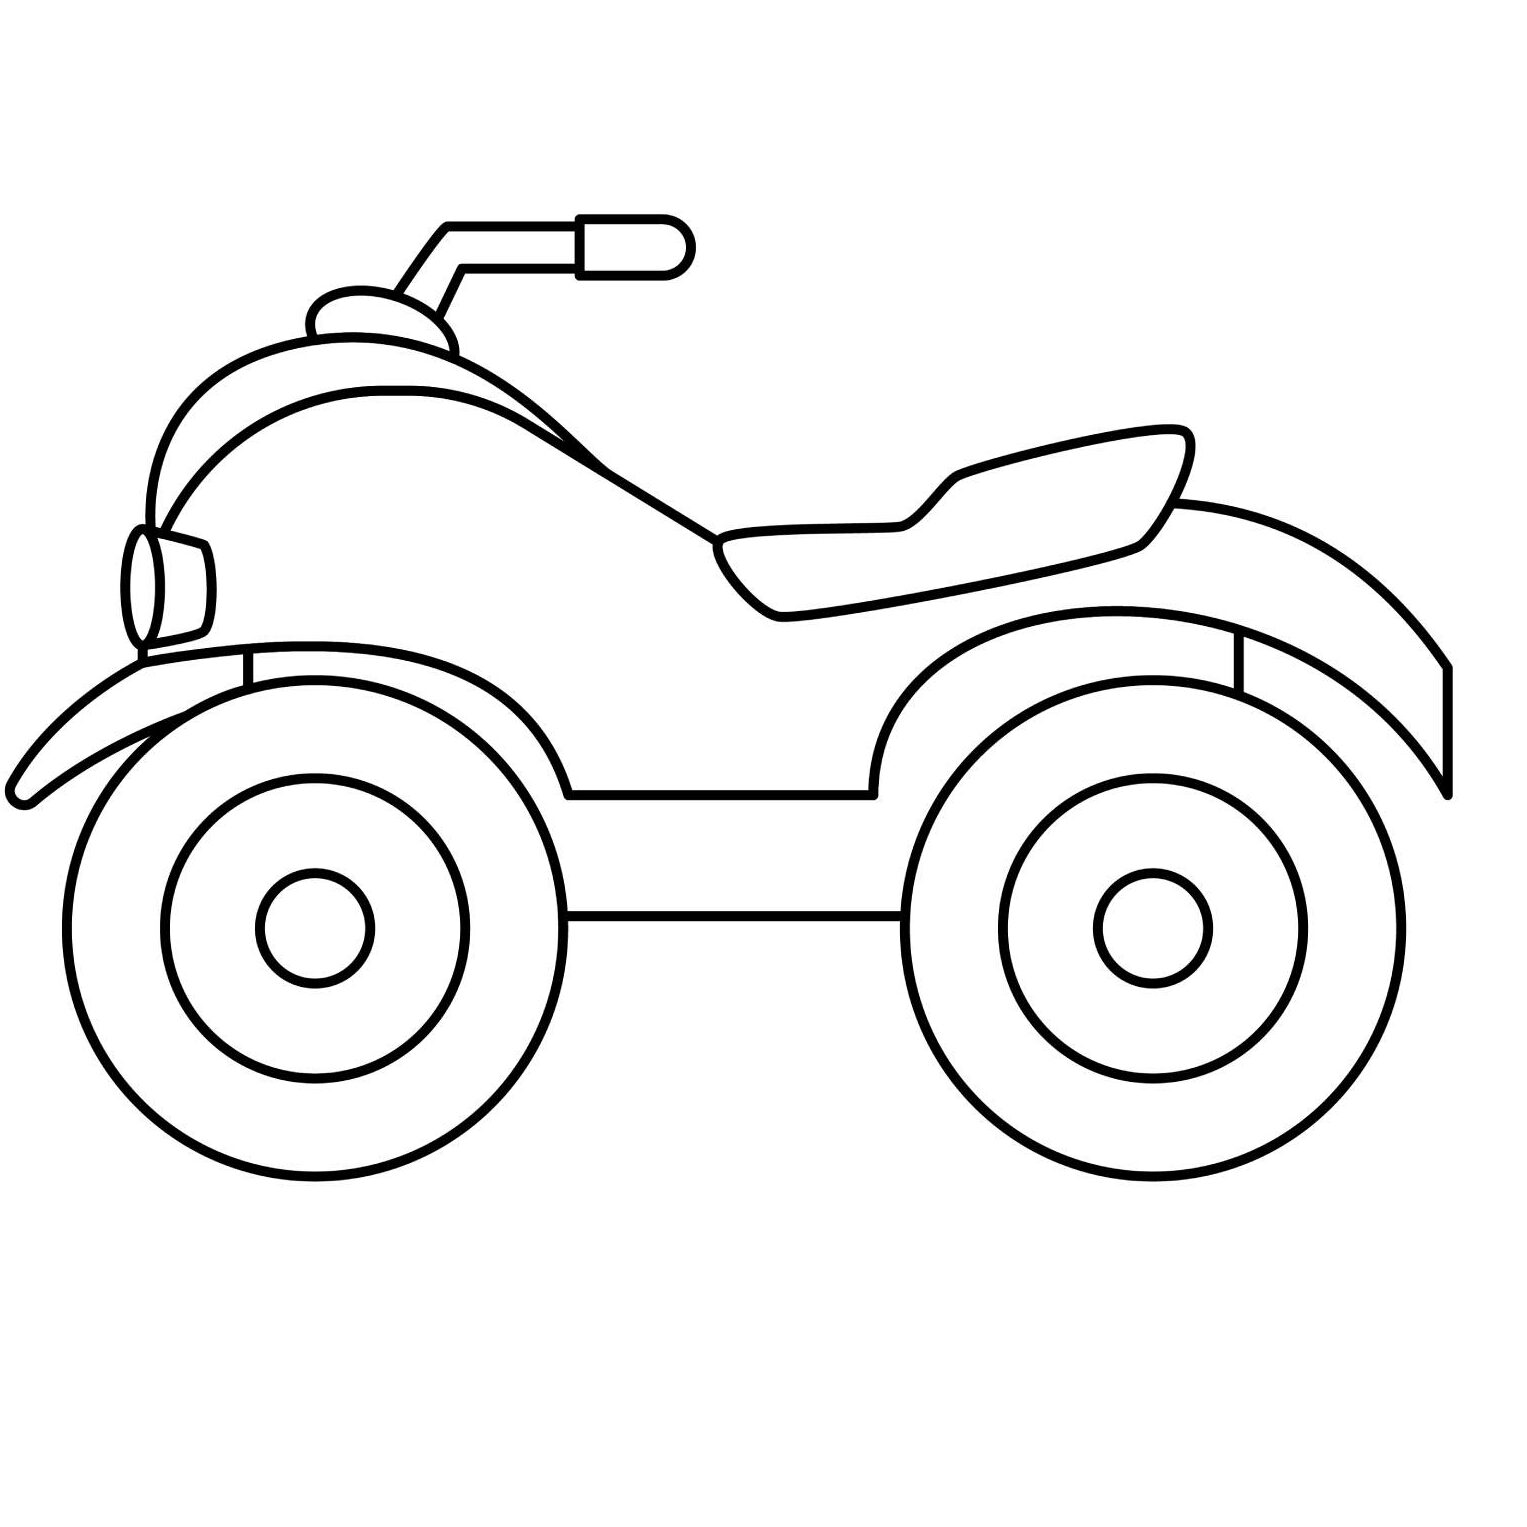
If it doesn’t look as great, don’t be frustrated. You will do a better job on your second attempt. You can also try making some improvements. Use the eraser to remove the areas that don’t look too good and try redoing them.
Take the Drawing to the Next Level
We are not done with our drawing just yet. To make it stand out, we need to add some details.
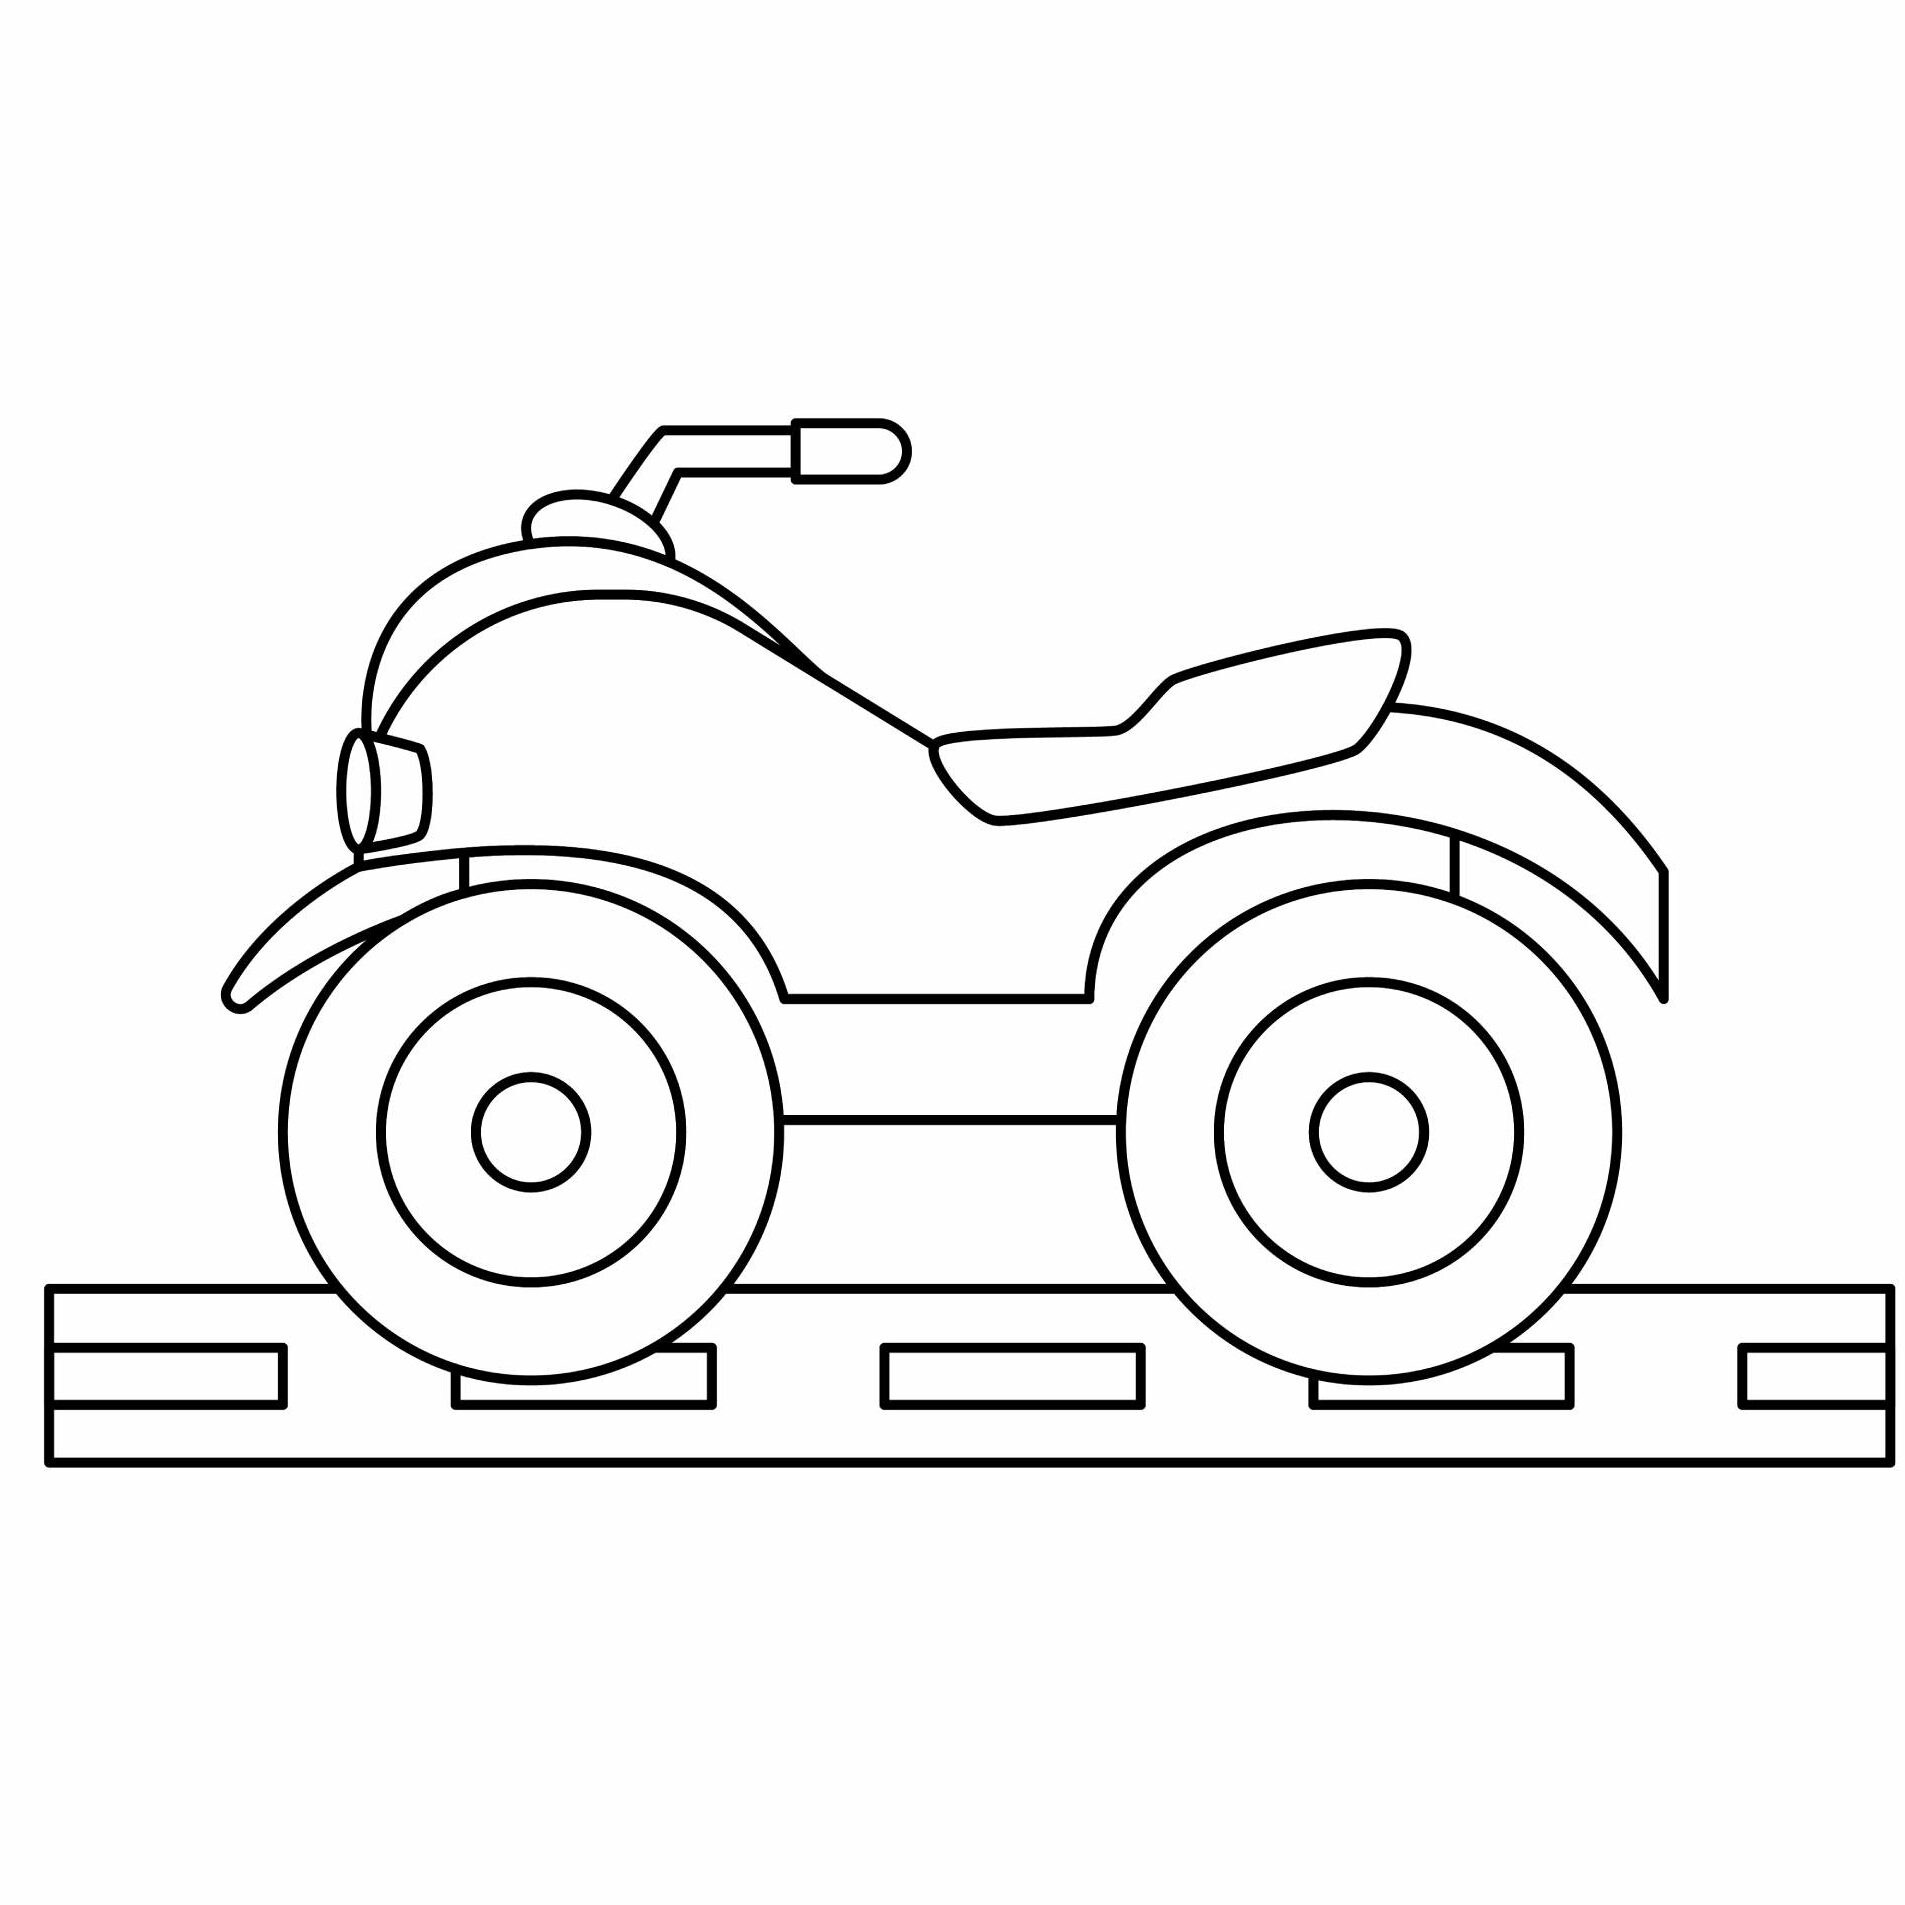
Step 9: Add a Background
You don’t want to leave your quad bike floating, do you? Draw a rectangle below the bike to serve as the road. You also need to add small rectangles along the road to serve as road markings.
If you are confident with your drawing skills, you can add more details around the quad bike such as electric poles, trees, or a bush. You should, however, not overdo things so as not to ruin your drawing.
- Use a horizontal rectangle to draw a road below the quad bike
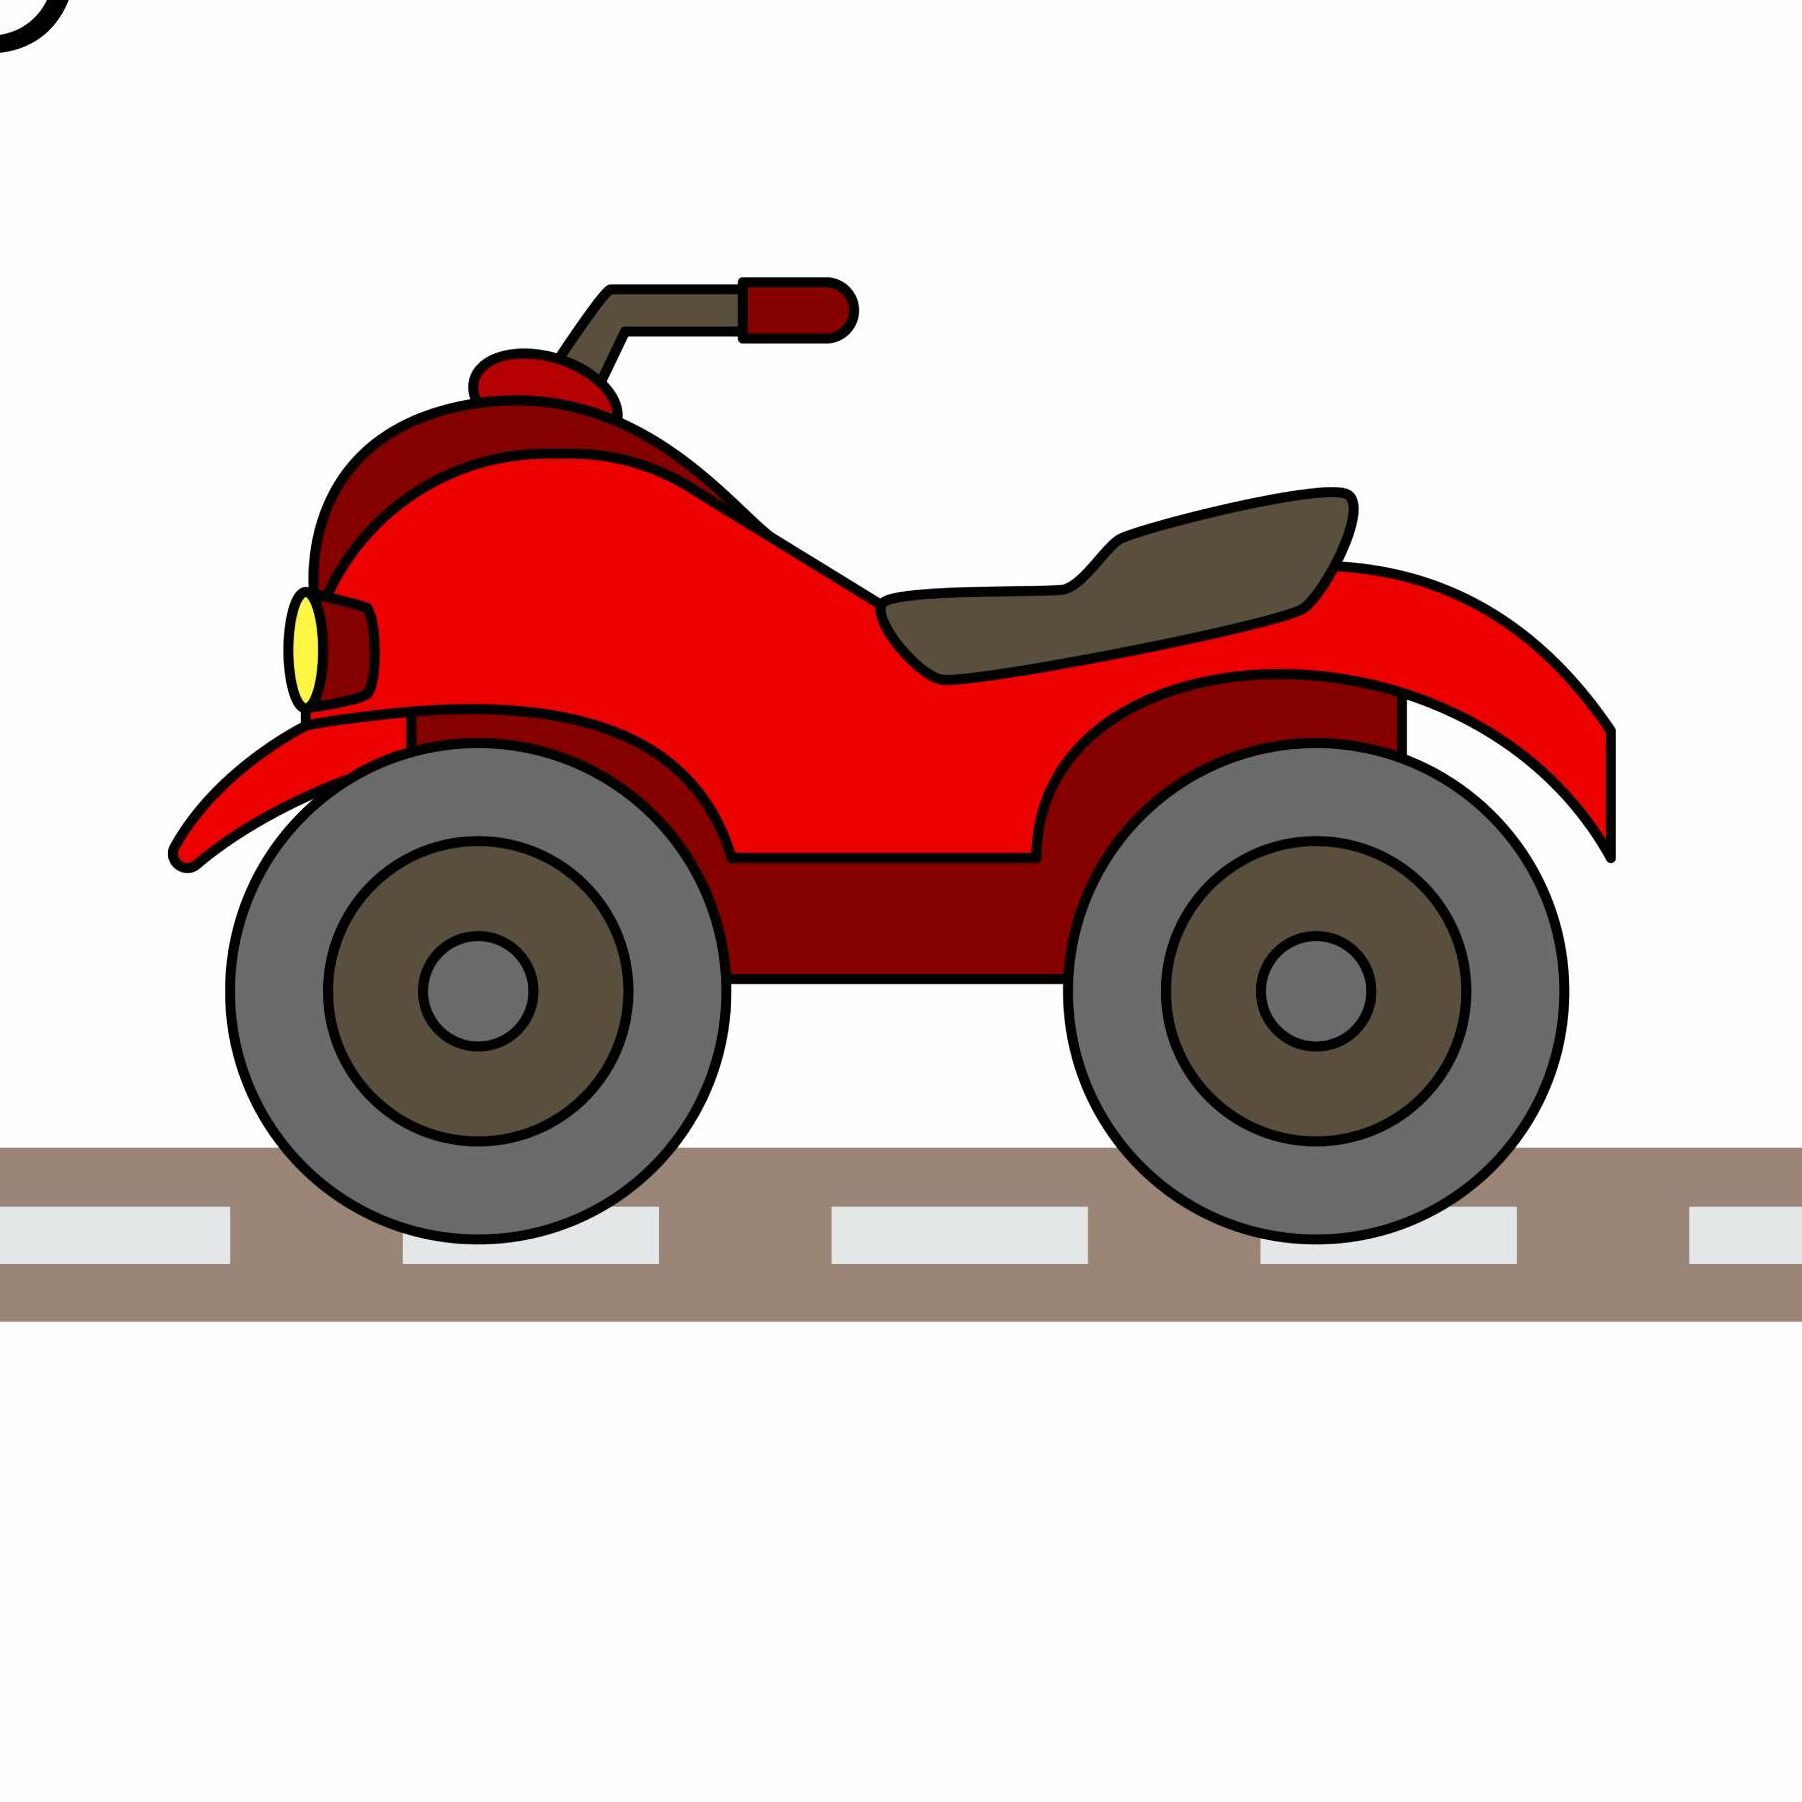
Step 10: Color Your Drawing
Now is the time to demonstrate your coloring skills. Take out your coloring supplies and add color to the quad bike. Here is what we did to our quad bike.
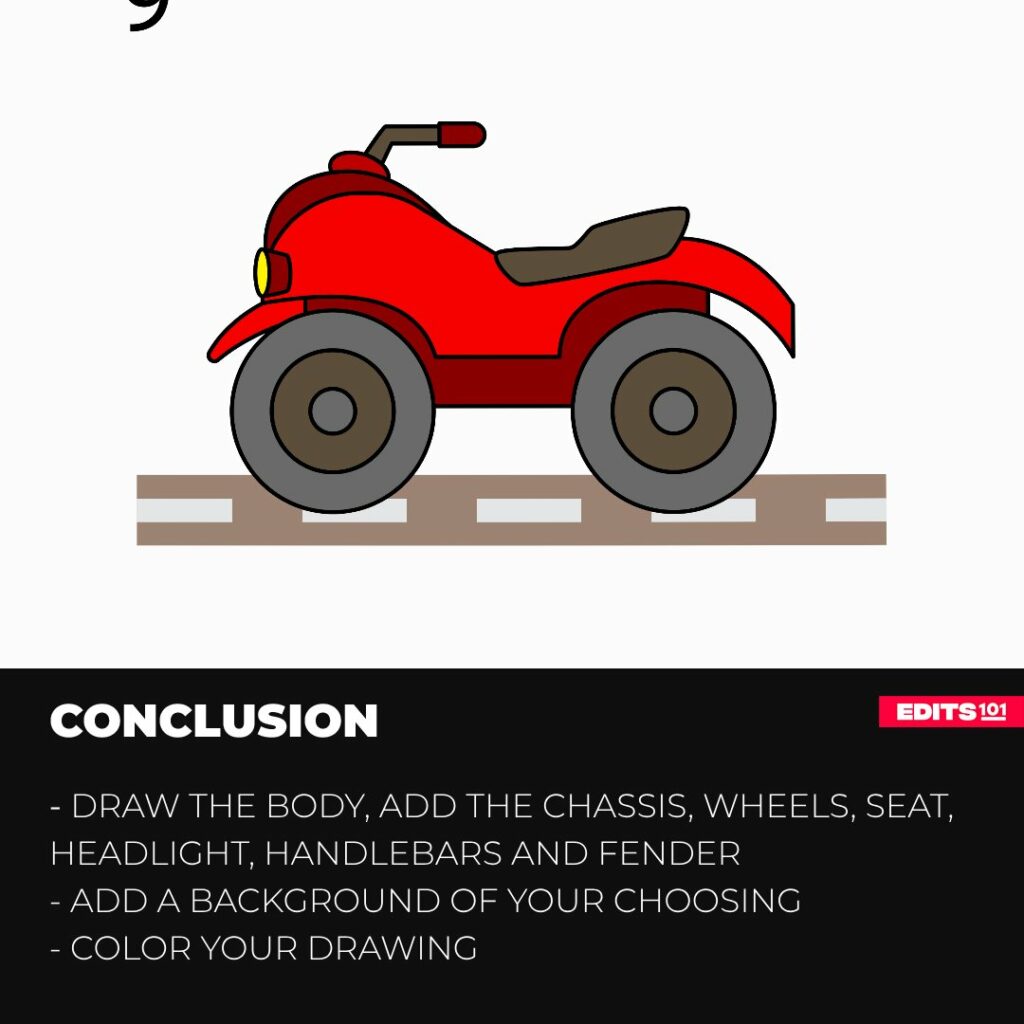
Conclusion
Our steps will not only help you draw a quad bike on paper but also draw on any of your preferred software. The key is to start by drawing the body of the quad bike then add the chassis, wheels, seat, headlight, handlebars and handles, and then the fender.
To take your drawing to the next level, add some background. In our case we simply added a road. You can do more if you want. Coloring your drawing should come last. Color is what brings a drawing to life.
Hopefully, you have learned quite a lot not just about how to draw but also about quad bikes. To improve your drawing skills, try drawing the quad bike again and if you want, add details of your own such as an exhaust pipe and footrest.
Thanks for reading & feel free to check out more of our articles!
Author Rating
Overall Rating
Summary
The post will help you learn what a quad bike is, names of its different components as well as how to draw an amazing quad bike.