How To Draw A Hang Glider | A Step-By-Step Guide
Hang gliding is a recreational sport where an individual flies through the air using a lightweight, non-motorized aircraft called a hang glider.
The pilot is suspended from the glider’s frame while controlling their direction and altitude by shifting their body weight.
While you may not expect it, hang gliders can stay in the air for hours at a time, with some record-breaking flights lasting over 10 hours!
In this tutorial, we’re going to be covering all you need to know in order to draw your very own hang glider in 8 easy steps.
| Steps | Complexity Table |
| The Leading Edge Tubes | 2 |
| The Sail | 2 |
| The Control Bar | 3 |
| The Hang Strap | 3 |
| The Side Wires | 3 |
| The Extra Details | 2 |
What You Will Need
- Drawing paper or sketchbook
- Pencils (2b, 3b or 5b)
- An eraser
- A ruler
- Color Supplies
- 30-35 minutes
How to Draw a Hang Glider
While it may seem daunting, drawing a hang glider can be a fun and easy activity because it only involves sketching six elements: the leading edge tubes, the sail, the control bar, the hang strap, side wires and some extra details.
Whether you’re a beginner artist or just looking for a new project, this guide will help you create your hang glider with ease! Grab all of your drawing tools, check out the outline below to prepare yourself, and without any further ado, dive right in.
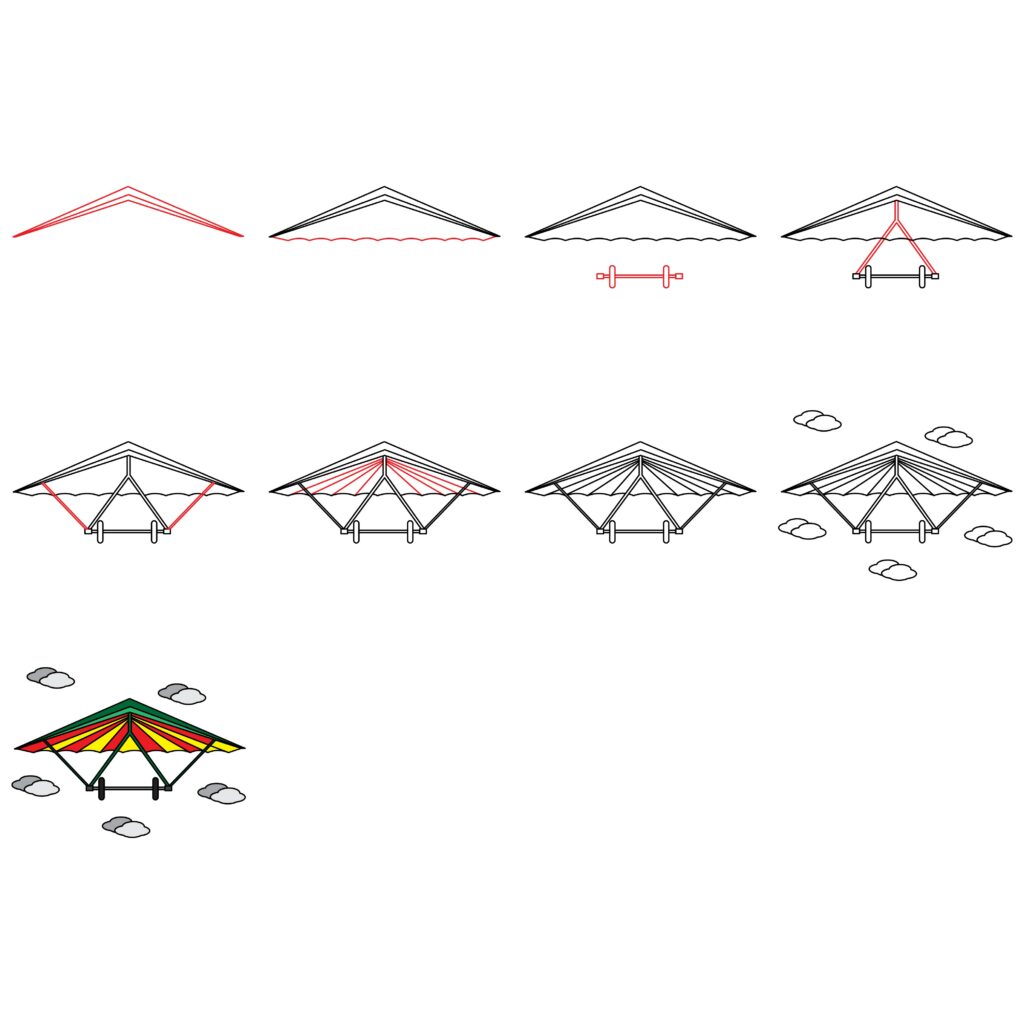
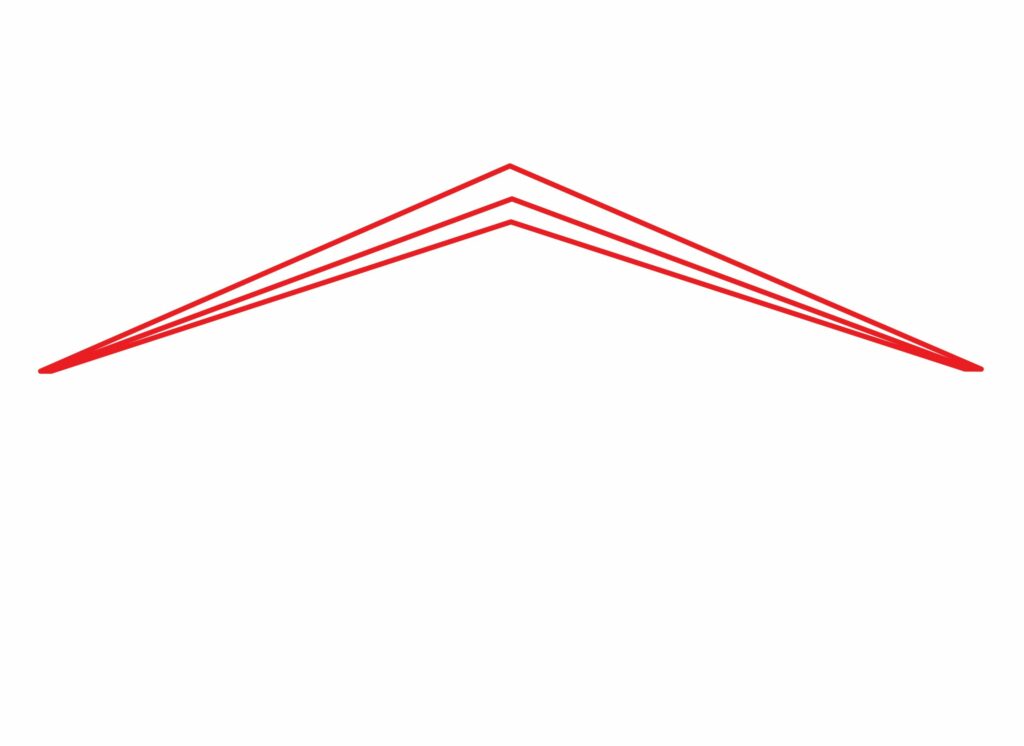
Step 1: Draw the Leading Edge Tubes
The leading edge tubes are the primary structural elements that form the front edge of the wing and help maintain its aerodynamic shape.
To complete this step, first angle your drawing paper in a landscape orientation to ensure you have more drawing room.
Then, begin by drawing a large triangle in the center of your page. Erase the horizontal line of your triangle and make sure the two upper diagonal lines are wide in nature as opposed to pointed upward.
Next, add two similar shapes above the triangle you have just completed. Ensure the sides are connected, and the center point is a little sharper than the one beneath. Make use of a ruler as you draw throughout this step to ensure smooth lines.
- Draw three wide triangular shapes in the center of your page
- Use a ruler for straight lines, if necessary
- Ensure each shape is neatly connected on the sides
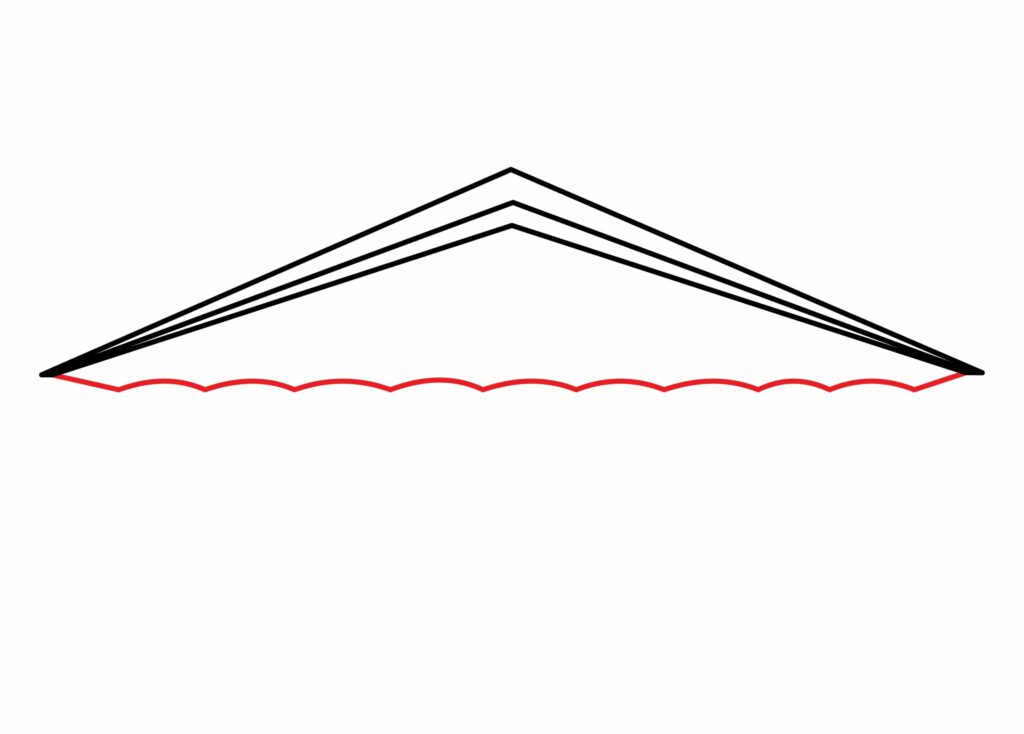
Step 2: Draw the Sail
The sail is a lightweight fabric stretched over the frame to catch and harness air currents for flight.
Seeing as we’re drawing the hang glider from a front elevation, we’re only going to add the outline of the sail.
In order to do this, start by drawing a series of bumpy lines from the bottom left-corner of your leading edge tube, and ensure it neatly connects to the opposite corner: i.e., right.
- Draw a series of bumpy lines to resemble the hang glider’s sail
- Keep your drawing hand nice and loose for smooth curves
- Ensure the sail smoothly connects to the bottom sides of the leading edge tubes
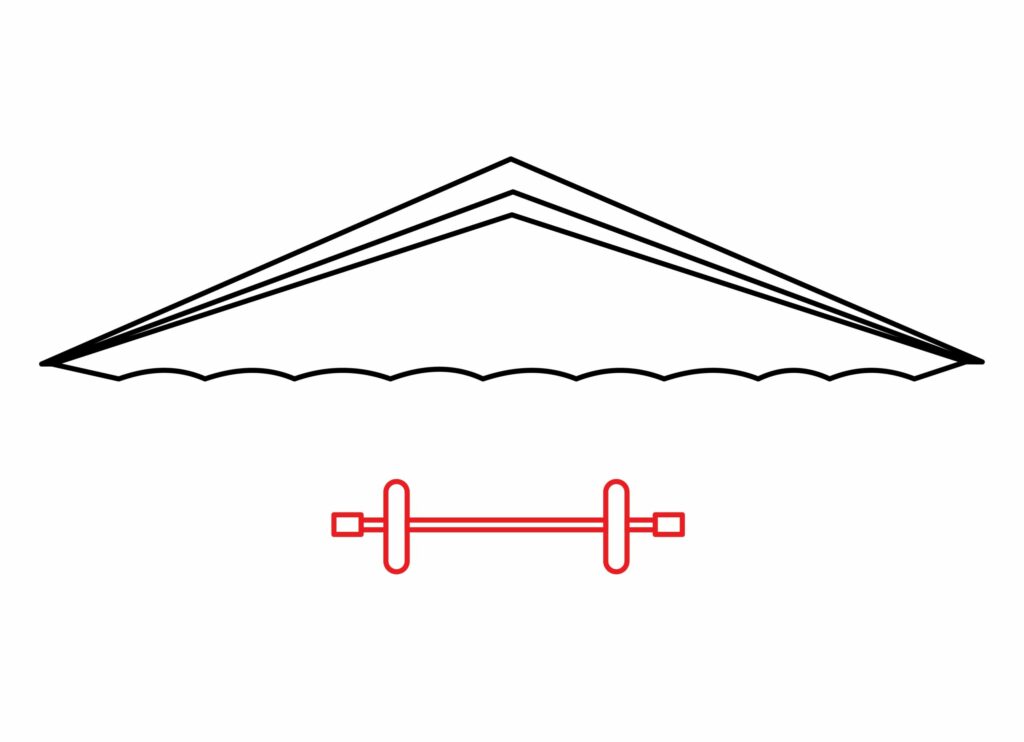
Step 3: Draw the Control Bar
Now that we’ve outlined the upper part of the hang glider, let’s move on to the objects below. The control bar is situated beneath the sail and is used for steering and controlling the aircraft.
In order to complete this step, you first need to visualize where you are going to place the bar. You can go ahead and freehand it, or you could place your ruler directly beneath the bumpy line of the sail and start drawing the control bar below.
Draw a thin horizontal rectangle, and add two small squares on each corner to resemble the bolts.
Next, draw a small vertical rectangle on each side of the bar. These upright rectangles provide hang gliding pilots with a secure grip as they maneuver the glider.
- Draw a thin horizontal rectangle beneath your hang glider’s sail
- Draw a square on both corners of the horizontal rectangle
- Add small vertical rectangles on each side of the control bar
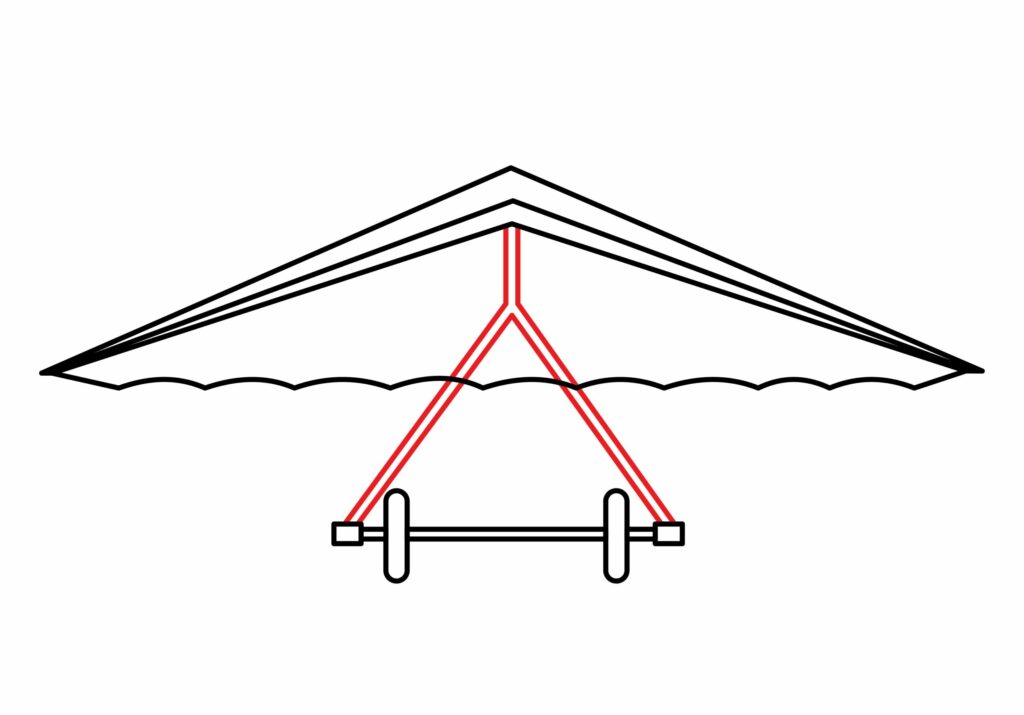
Step 4: Draw The Hang Strap
Adding the hang strap is essential because it’s ultimately going to connect your control bar to the rest of your hang glider. To draw the hang strap, first envision the control bar as the horizontal line of a triangle.
Then, add the upper part of the triangle by drawing two diagonal rectangles starting from the inner side of each square on the control bar and connecting them to each other in the center.
Once complete, finish off this step by adding a thin vertical rectangle from the center tip of the triangle that connects to the center point of the leading edge tube.
- Draw two diagonal rectangles starting from the sides of the control bar
- Ensure the rectangles connect to each other in the center
- Add a small vertical rectangle on the center tip that connects to the leading edge tube
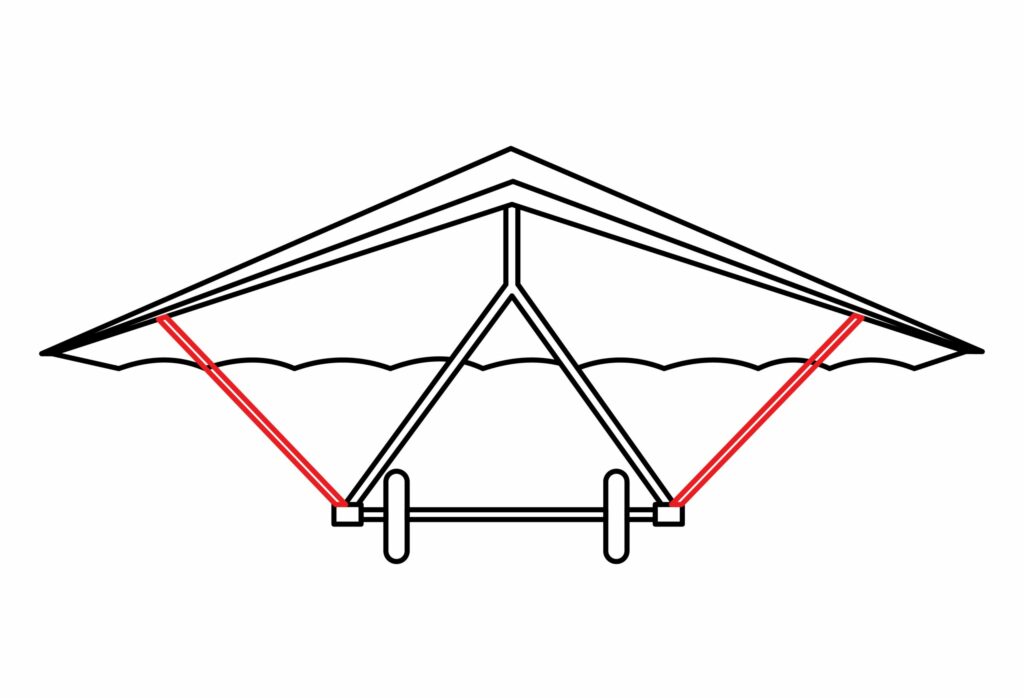
Step 5: Draw the Side Wires
The side wires are used to control and stabilize the sail during flight. They also help distribute weight evenly and prevent twisting or bending as pilots operate the hang glider through the air.
To complete this step, start by drawing a thin diagonal rectangle from the outer side of the square on the control bar that extends to the side of the leading edge tube.
Then, repeat the same process on the other side of the hang glider, bearing in mind that the diagonal rectangle should be symmetrical. Ensure the width of the rectangles are similar to that of the rectangles drawn in step four.
- Draw a diagonal rectangle extending from the square on the control bar
- Connect the rectangle to the side of the leading edge tube
- Repeat the same process on the other side of the hang glider
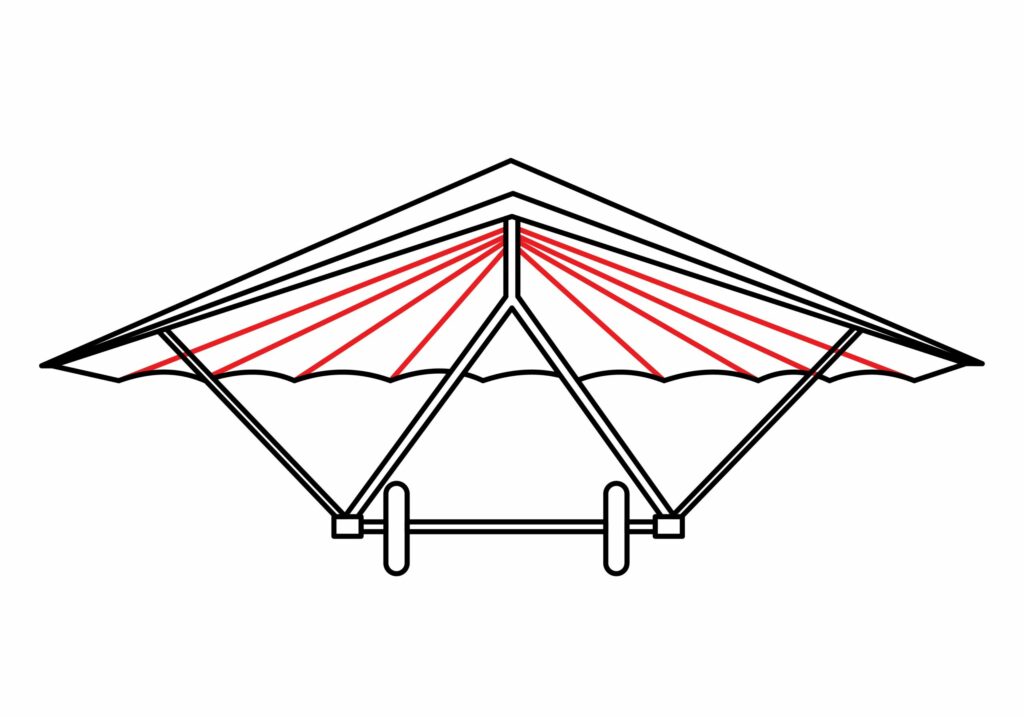
Step 6: Add Some Details
Adding extra details such as a few panel lines on the sail will make your drawing appear more realistic, so be sure to include this step as you draw your hang glider.
Start by drawing a series of diagonal lines from the sides of the vertical bar on the hang strap, and connect each line to the indent found on the bumpy line drawn when creating the sail.
Once you’re finished, you should have four diagonal lines on the left-side of the hang strap and four diagonal lines on the right-side.
Ensure your lines are straight and symmetrical for a neat finish. Additionally, check out the image below periodically to ensure you’re on the right track.
- Draw a series of eight panel lines on the sail for added detail
- Ensure each lines connects to the indent found on the bumpy line of the sail
- Use a ruler to ascertain that each line is straight and symmetrical
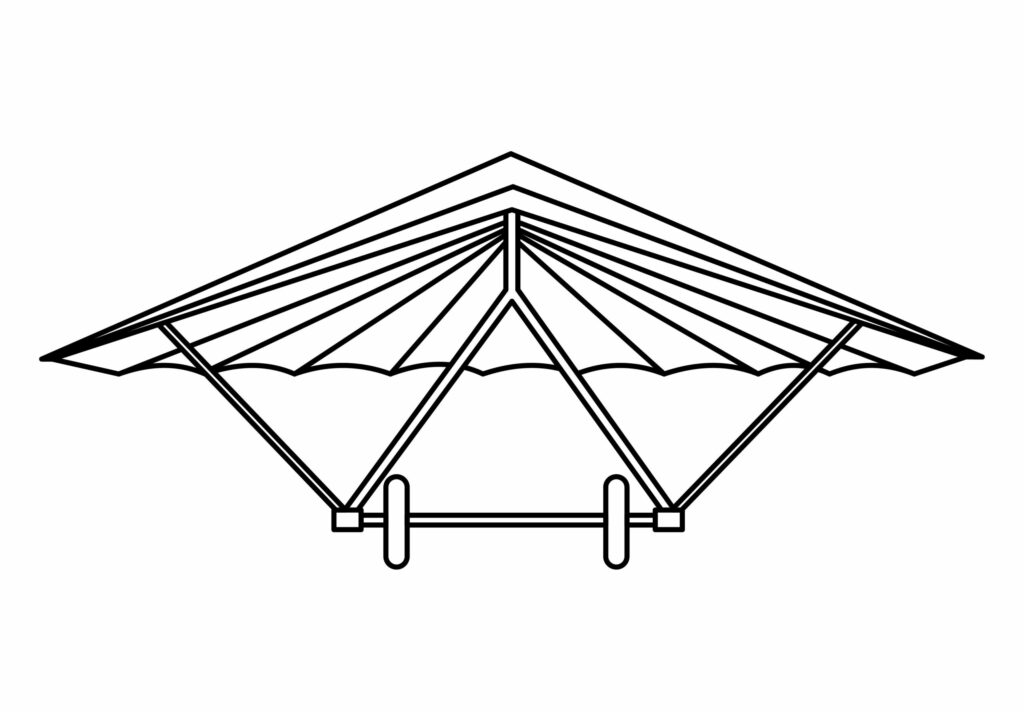
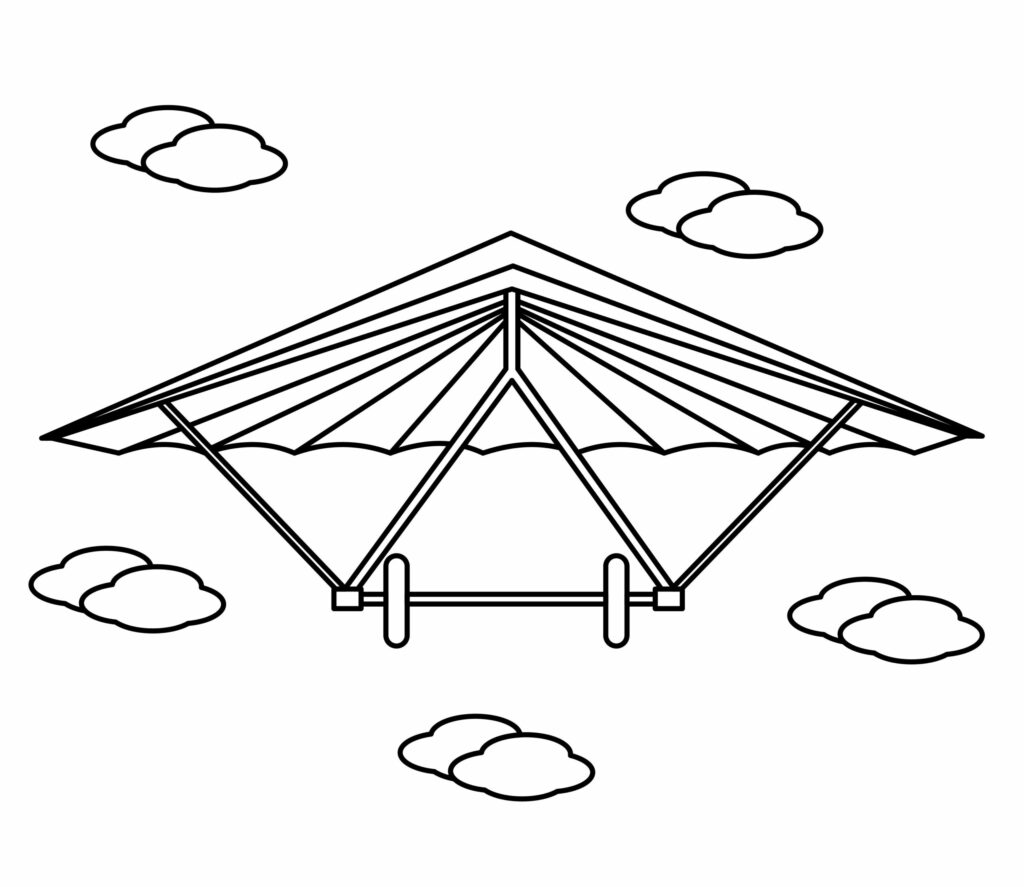
Congratulations! Your Hand Glider Drawing is Complete
Now that all the elements are added to your drawing, take a moment to review your work. Make sure that every step you have drawn blends together nicely. If necessary, use your eraser and pencil to make any corrections before you continue on with the rest of the tutorial.
Taking Your Drawing To The Next Level
Now that all of the technical work is done, it’s time to have some fun and incorporate a background and some color onto your sketch! These elements can elevate your hang glider drawing by instantly turning it into something eye-catching and providing your sketch with a bit more depth.
Step 7: Adding a Background
Adding a background plays an important role in setting the scene of the whole drawing. When selecting a background, you first need to decide where you would like to place your hang glider. Is it on the grass, having just been used? Or is it currently soaring in the air?
Hang gliding usually takes place over scenic terrain, so you may be enticed to add an open field, some trees, mountains, and a sunny sky in your background.
Some people also love to hang glide over the ocean! In this case, a body of water with waves and a few birds could liven up the state of your drawing.
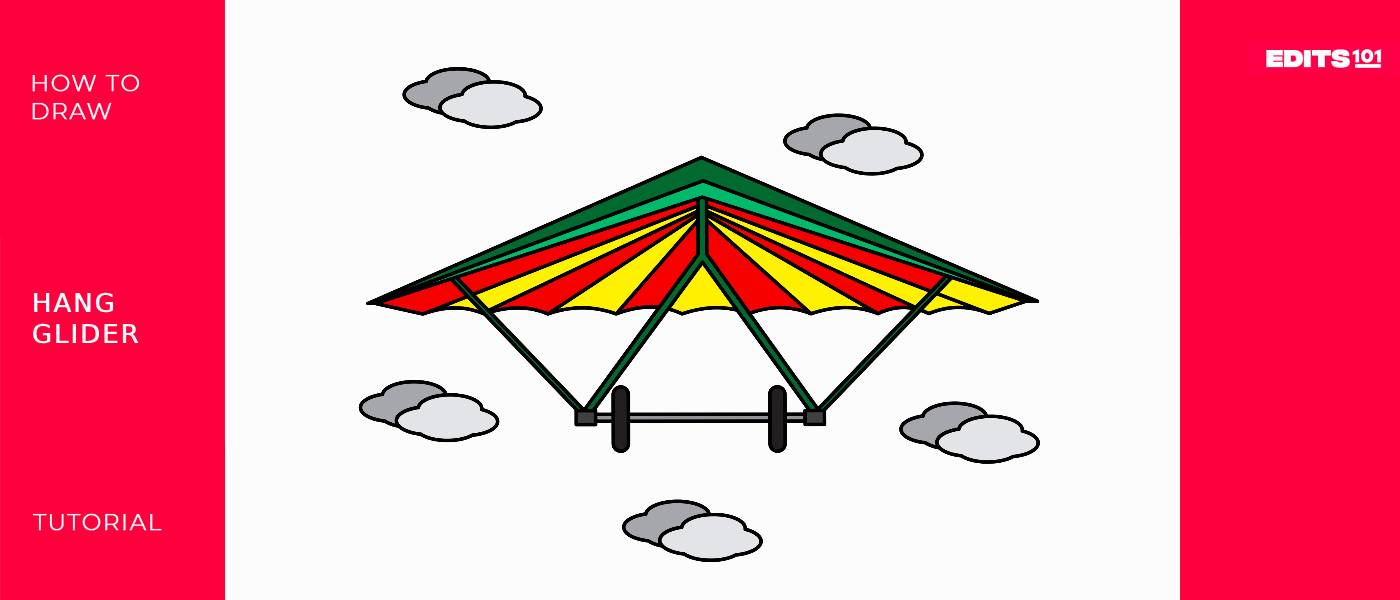
In our sketch, we have decided to keep things minimalistic with a few clouds. If you like the way this looks, you’re welcome to incorporate the same background for your drawing!
Step 8: Adding Color
As aforementioned, adding some color can instantly bring your drawing to life. This step is where you can let your imagination and creativity soar.
Since real-life hang gliders are often bright in color, be sure to make use of some vibrant colors for your drawing.
You’re encouraged to incorporate your unique personality and use whatever colors you prefer while remaining mindful of coloring within the borders of your sketch, and using different colors for different steps to highlight each part.

Bonus Tips
Watch a few YouTube videos on how to draw a hang glider that will provide you with extra insight and a comfortable space to connect with other budding artists.
Use references such as photographs, sketches, or models of hang gliders to improve accuracy in your drawings.
Practice shading techniques to add depth and realism to your hang glider drawing.
Pay attention to small details like the side wires, hang strap, and other components that make up the hang glider for added authenticity.
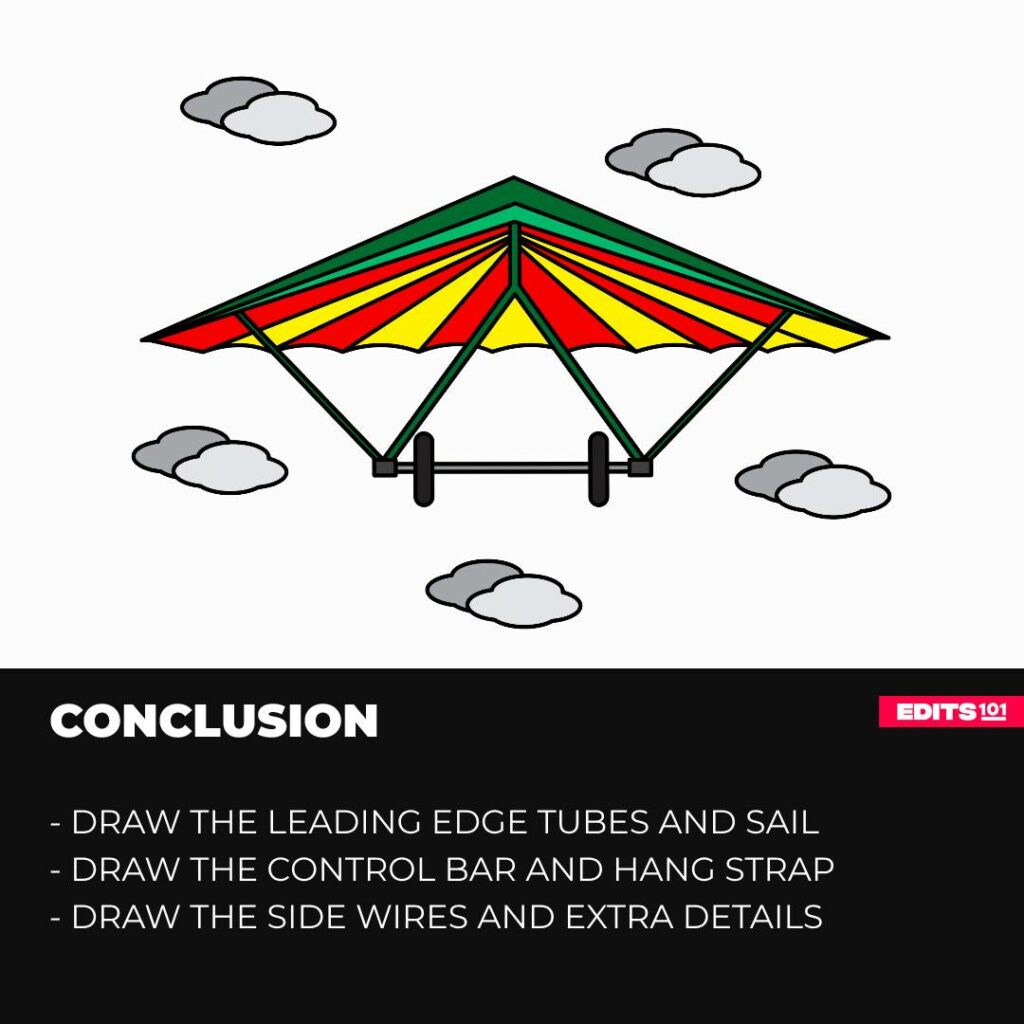
Conclusion
Congratulations on making it to this part of the tutorial! You have read and hopefully learned a few new things today.
You’ve not only drawn each vital component of a hang glider, but you have also incorporated a background and color in your drawing. For that, give yourself a huge pat on the back.
Always remember, your artistic skills will only improve with constant practice and dedication, so from Edits101 to you, see you next time in another informative drawing tutorial!
Thanks for reading & feel free to check out more of our articles!
Author Rating
Overall Rating
Summary
This guide effectively shares instructions on how to draw a hang glider and incorporate a background and some color in 8 steps.