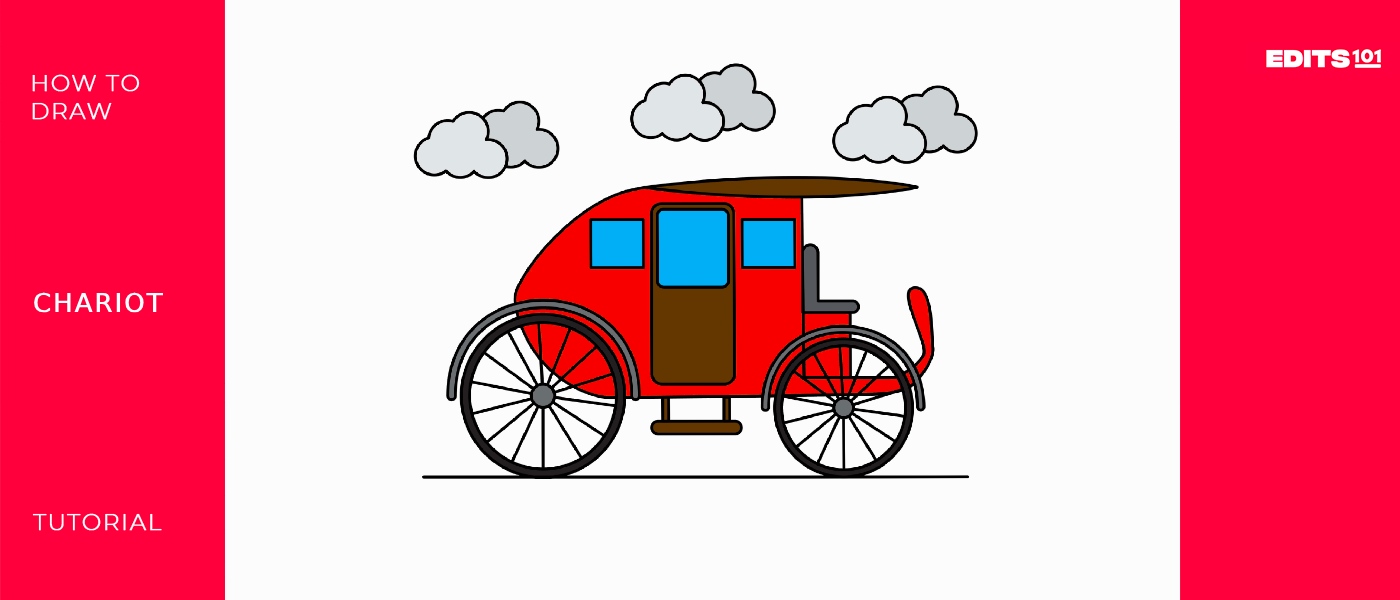
How to Draw a Chariot | 8 Easy Steps
Today, we will draw a chariot and learn a few things about it.
The Latin word carrus, a Gaulish loanword, is where the word “chariot” originates. In ancient Rome, a biga, or two horses, triga three, and quadriga four were all needed to pull a chariot. A chariot is a specific kind of wagon that is steered by a charioteer and typically propelled quickly by horses. The earliest known chariots are shown on cylinder seals from Central Anatolia in Kültepe, which date to around 1900 BCE, and were discovered in burials of the Sintashta culture in modern-day Chelyabinsk Oblast, Russia, between 1950 and 1880 BCE. The spoked wheel was a key invention that made it possible to build lightweight, horse-drawn chariots.
What you will need
- A pencil
- An eraser
- A sheet of paper
- Coloring kit
- Ruler
- 30 minutes
How To Draw a Chariot
Now, we will start drawing our chariot. All you have to do is follow each step carefully. By doing that, you will have a perfect drawing.
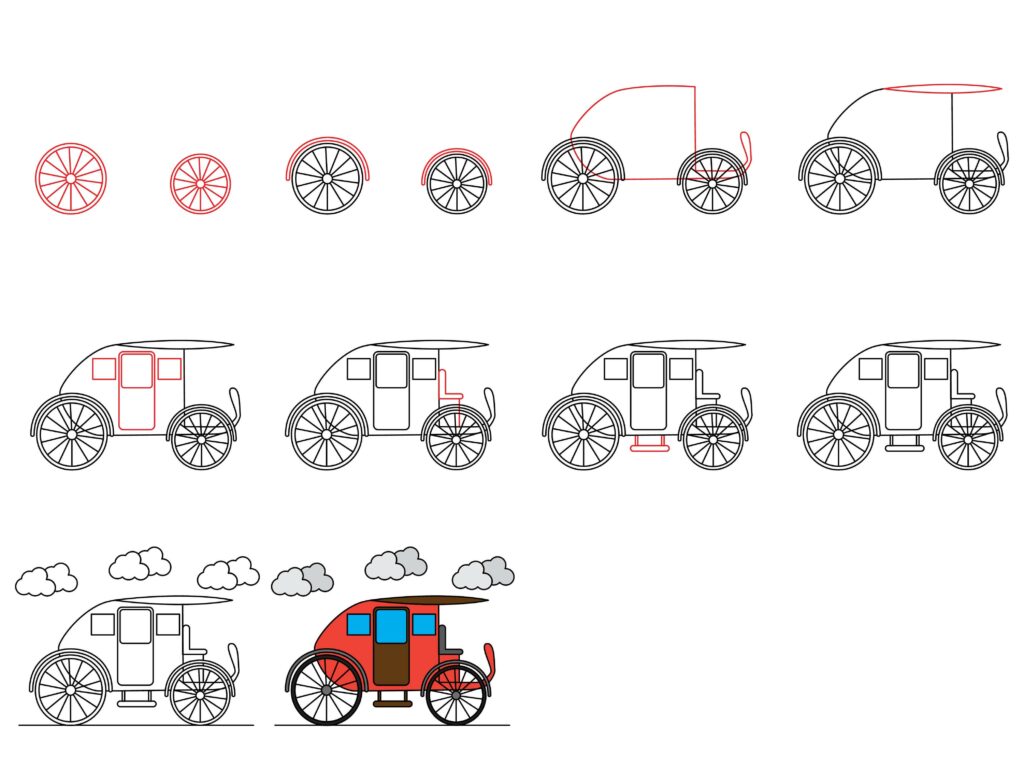
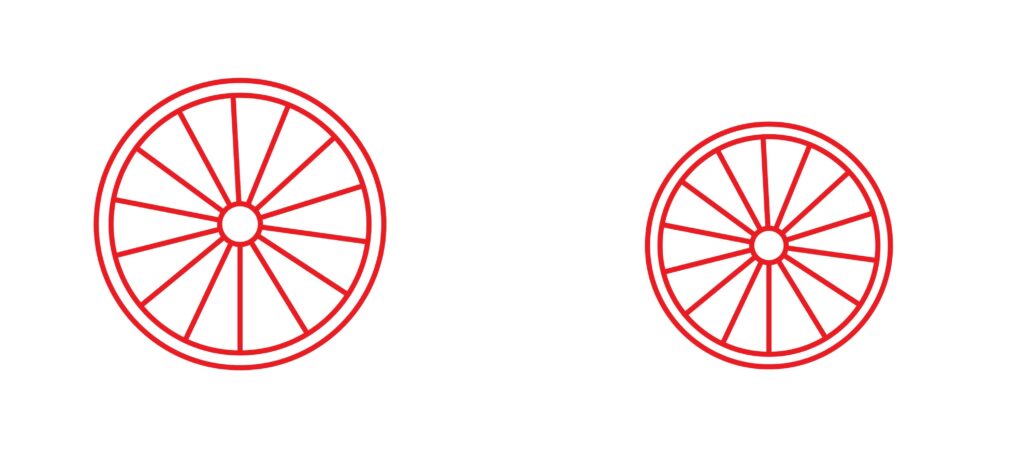
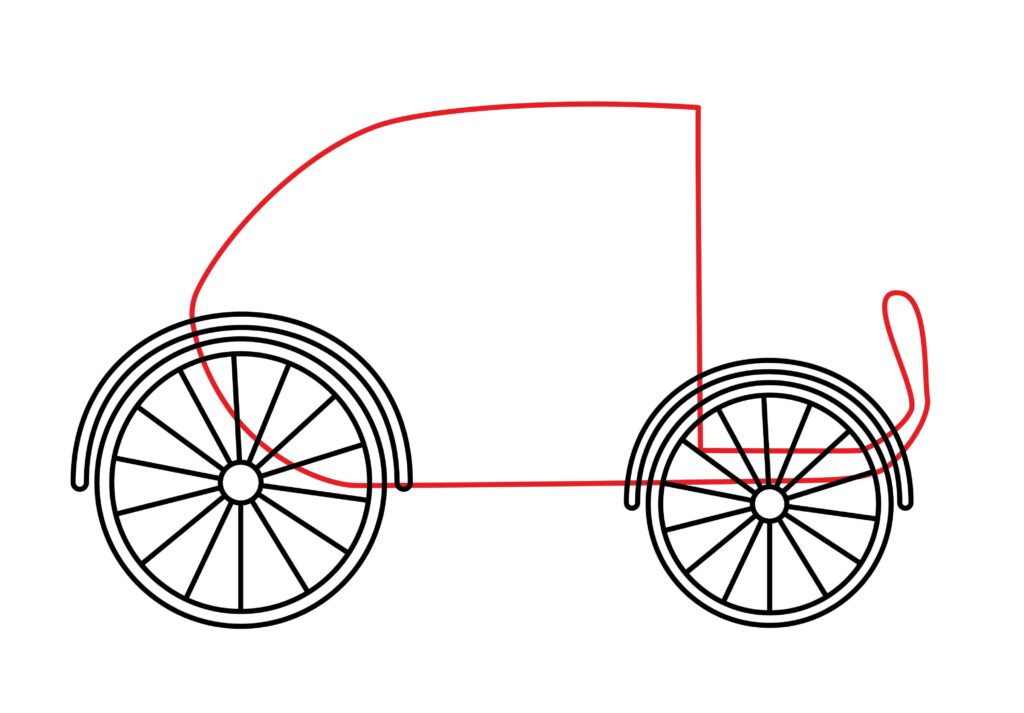
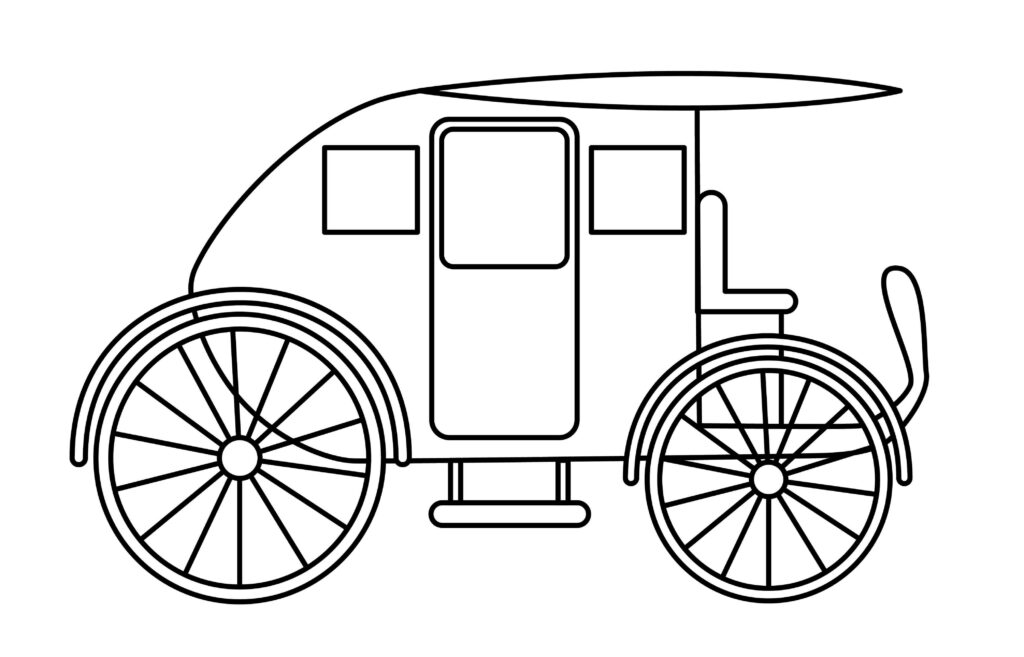
Step1: Draw the wheels
As always, we will start our drawing our vehicle by making the wheel. The wheels of a chariot are different from other vehicles. Its rim is made of wood, and the tire might be of leather or cloth. To make the wheels, draw two wheels on both sides of the paper. In a chariot, both wheels are of different sizes. So, we will make our left wheel bigger than the left wheel.
You can use a compass or a round object like a bottle cap to make good-looking circles. You can draw circles freehand if you don’t have these supplies. Place a dot in the center where you want to make your wheel. Then, put four more dots around it (top, bottom, left, right). All these dots will be equidistant from our reference dot. Now, connect all four dots with curved lines. And there you have it, a perfect circle. You can double-line these circles for detailing. Make a concentric circle inside the first circle, as shown in the image. This circle will be much smaller than the first circle. Now, connect these circles with angular lines.
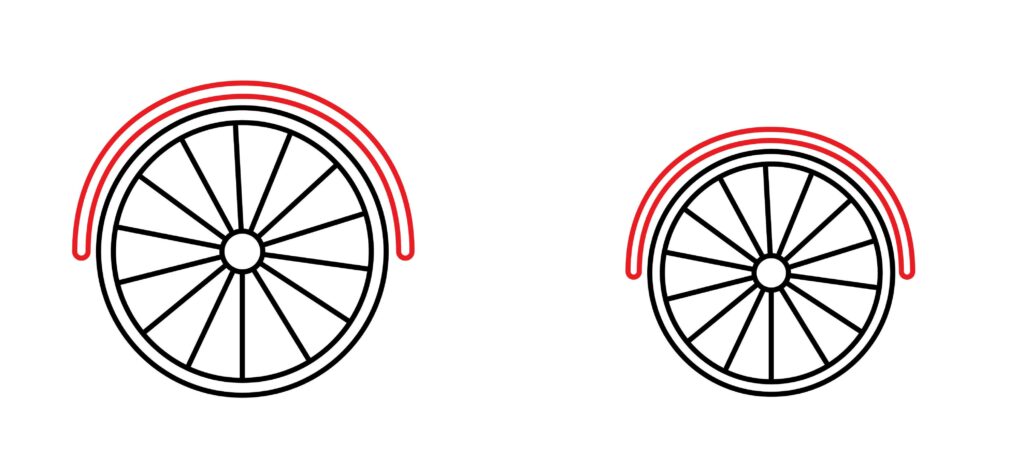
Step 2: Draw both fenders
A fender is a mudguard or splashboard on a horse-drawn vehicle. Draw two curved lines on the top of both wheels to make the fender like the image. These curved lines will move along the curvature of the wheels.
Keep going! You are doing great.
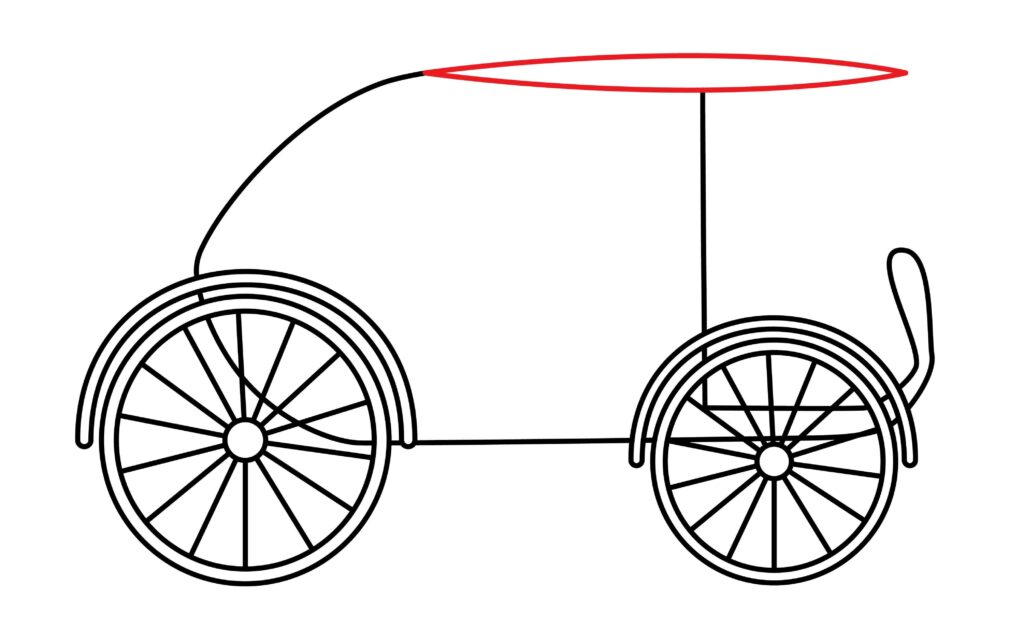
Step 3: Draw the main body
The main body of the chariot is the part where people sit. So, in this step, we will draw the main body of the chariot. First, draw an oval as a reference shape over the wheels in the middle of the page. Now, erase the right part of the oval and extend a tube from the lower right part of the oval. This extended tube or curved line will move upward. Draw the main body with the wheels using several lines like the image. Erase the overlapping lines for neatness.
Step 4: Draw the roof
In our fourth step, we will draw the roof of the chariot, which is a shelter for the driver. To make the roof, draw an oval over the top right side of the body. This oval will have pointed ends like in the image.
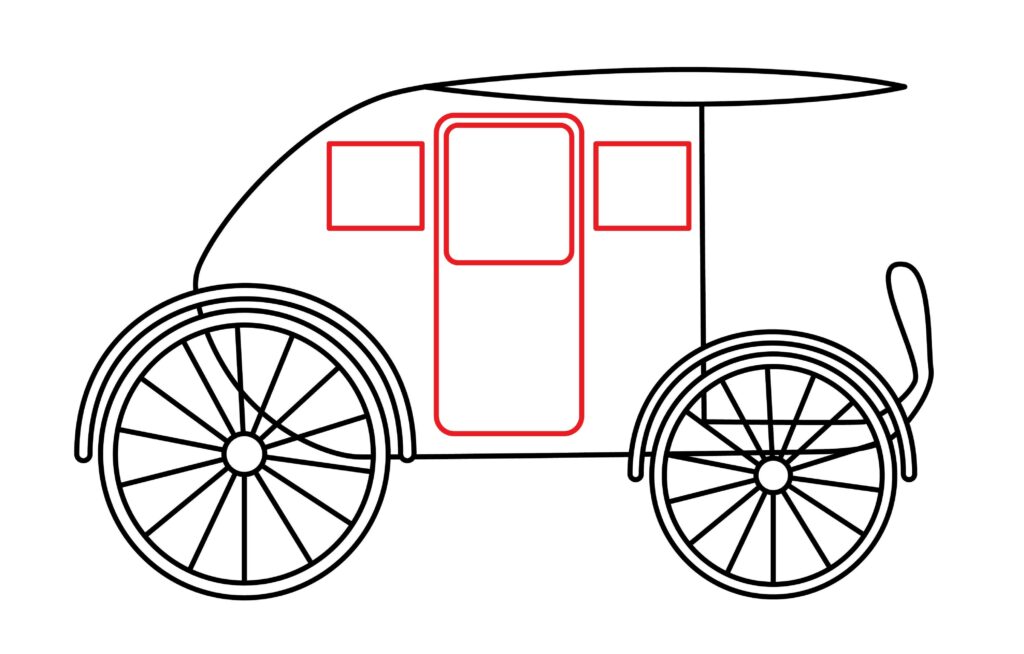
Step 5: Draw the door and windows
We will draw the door in the center of the body. To make the door, draw a vertical rectangle. The rectangle can be drawn by using two parallel vertical lines and then joining their ends with horizontal lines. Then, draw a square on the top part of the rectangle to make the window of the door.
For the windows, draw squares on both sides of the door.
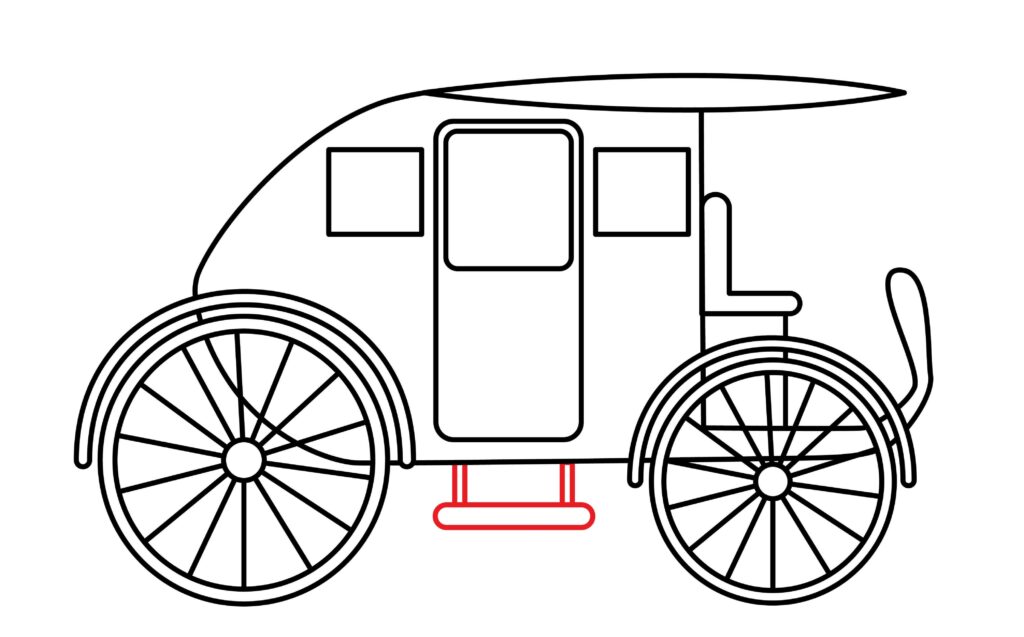
Step 6: Draw the driver’s seat
To make the driver seat, extend a vertical line from the base of the main body. Now, draw an L-shape over that line to make the seat. One more step, and you’ll be done with the sketching part.

Step 7: Draw the stairs
The chariot is at a height from the ground due to its large wheels. So, it will need stairs to climb a chariot. In this step, we will draw the stairs. To make the stairs, draw a narrow oval below the main body of the chariot between the wheels. Then, join this shape with a pair of vertical lines.
Step 8: Your chariot is ready
Excellent! Your drawing is finished. Praise yourself for creating a fantastic drawing. As the instructions state, we are extremely happy and optimistic that you produced an outstanding image. Making mistakes when drawing is possible, so check it again when you’re done. If it doesn’t look correct, go back and fix it. Then, use an outliner to improve the appearance.
Wait, grab your belongings. The true magic is just getting started. We’ll transform your chariot from a crude sketch into a beautiful painting.
Taking your Chariot drawing to the next level
You need to develop your talents, attempt new things, and experiment with different styles if you want to get better at drawing. Keep in mind that improving as an artist is a journey rather than a destination. Be kind to yourself, and keep testing and questioning yourself. Enjoy the process of making art and expressing yourself through it. To make an image more distinctive, you may always add your ideas to it. Your improved willingness to produce more original work will also boost your mental clarity and self-assurance. The actions that follow entail giving our drawing color and background.
Adding background to your drawing
The composition of the drawing can be balanced with a well-designed background. It can serve as a point of reference for the spectator and foster harmony between the subject and its surroundings. Background information is essential to a good narrative. They can include further details about the story, including the day of the week, the time of year, or a specific location. It may enable the audience to receive a more thorough report. A complete and precise backdrop is necessary for realistic or representational art to convey the illusion of reality successfully. It aids in placing the subject in a plausible setting.
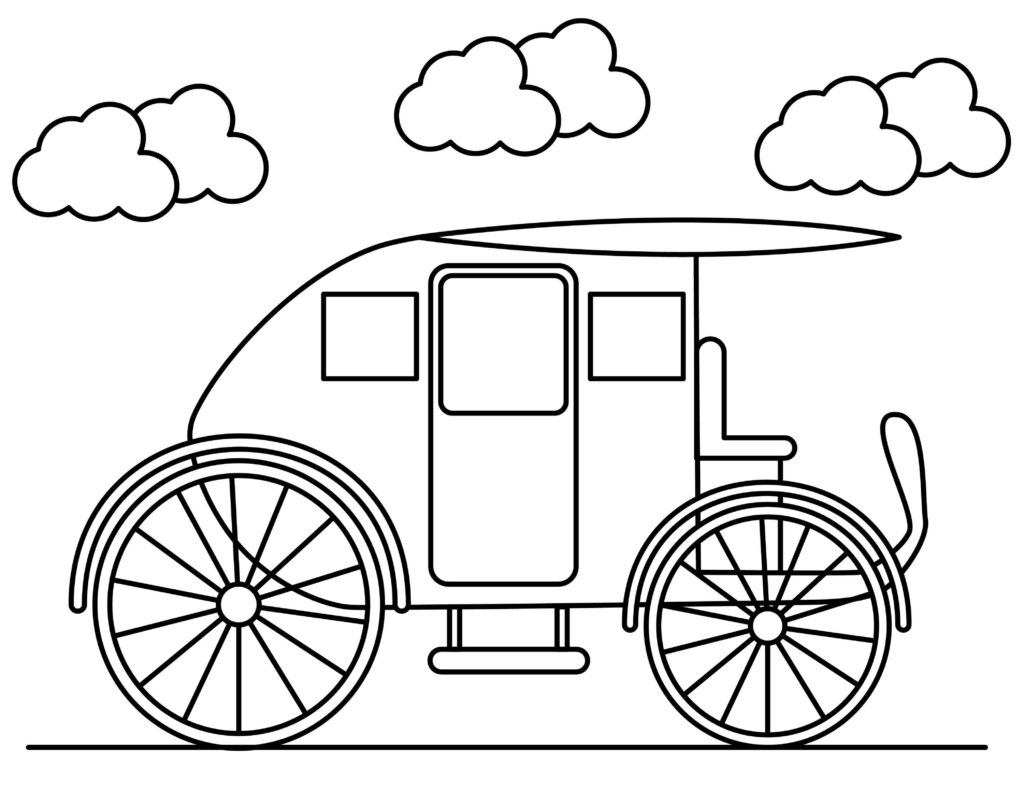
You can draw a road track if you want your chariot to be going somewhere or make a background look like a parking area. You can also draw some plants and bushes on the roadside. You can also make a beautiful starry night sky.
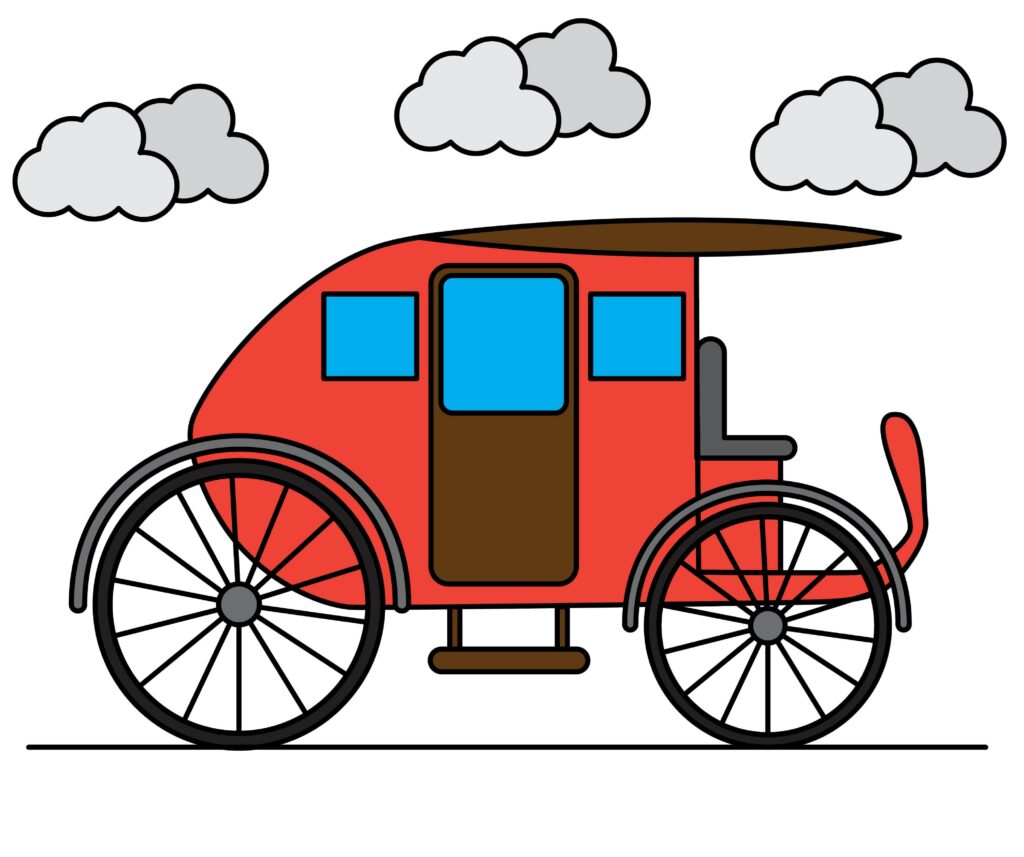
Adding color to your drawing
Now is the time for you to express your creative side. Utilize your artistic talents to the fullest when coloring your drawing. Including color in your picture will make it more vibrant and alive. With color, the image seems full of life and exciting. We need to color it so it looks lively and new.
You should use any color you want for your chariot. You can color it bright colors like red, blue, or brown. You can also use different combinations of colors. You can use blue for the windows and dark blue for the sky. You can use shades of green for bushes and plants. You can color the tires black and use grey color for shading. By merging and mixing, you can use different shades of colors to give an artistic effect to your drawing.
P.S. Bonus Tips
We’ve finished our drawing, and we hope you liked it as much as we did. There are no restrictions on one’s imagination, as was previously said. Any improvement can be made to the drawing. Although we provided a background and some colors, there is still more you can do.
You can make designs or patterns on the main body of the chariot. You can draw a moon in the sky. You make the plants present at the roadside. You can also draw some clouds in the sky. These are very few ideas, but as we know, we can do anything, so don’t limit yourself to ideas.
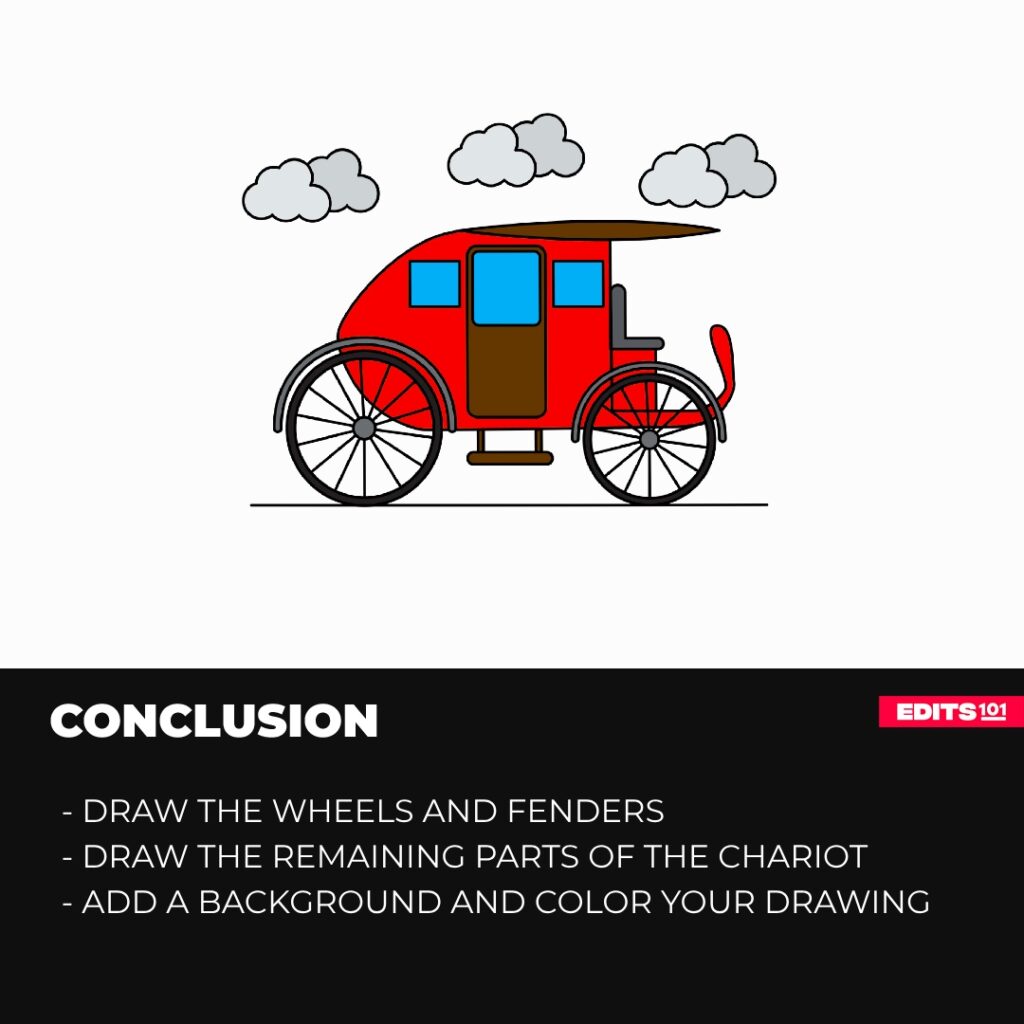
Conclusion
Our chariot is all ready now. It was a fun and easy process. We’re sure you followed each step without skipping and made a fantastic drawing. This guide explained each step most easily. We made the wheels, fenders, main body, roof, doors, windows, and stairs.
The more you sketch, the better you’ll get, and the more ideas will come to you. Remember that drawing is a smart and creative approach to expressing yourself. Keeping them in mind will be quite beneficial in ensuring that the artwork is yours. You should always keep going, so if you’re unhappy with the outcomes, you can try again.
Thanks for reading & feel free to check out more of our articles!
Author Rating
Overall Rating
Summary
This guide explains how to draw a chariot. You will also learn a few interesting facts about this vehicle.