How To Draw An Army Tank | Step-by-Step Guide
Army tanks were first introduced in the early 20th century as armored vehicles used for mobility and support during various operations.
Designed to provide strong defense and transportation capabilities, tanks are equipped with heavy armor, powerful engines, and sophisticated technology to navigate numerous terrains.
Their functions include aiding in disaster relief efforts by clearing debris and transporting supplies – similar to bulldozers and excavators – providing assistance in humanitarian missions by reaching remote areas with essential resources, and supporting research expeditions in harsh environments with their durable construction.
In this tutorial, we’ll cover how to draw an army tank illustration using 9 steps! We’ll also discuss a few methods used to improve a sketch’s overall composition.
| Steps | Complexity Level |
| The Turret | 2 |
| The Barrel | 2 |
| The Base | 1 |
| The Chassis | 2 |
| The Chain Line | 3 |
| The Caterpillar Thread | 1 |
| The Wheels & Nuts | 3 |
What You Will Need
- Drawing paper
- Pencils (2b, 3b or 5b)
- An eraser
- A ruler
- Coloring kit
- 15-20 minutes
How to Draw an Army Tank
Drawing an army tank may seem challenging at first glance, but if you follow this step-by-step guide and exercise a little practice and patience, we are sure you’ll find yourself gliding through the process.
Each step is different in complexity, with some being more difficult to complete than others. However, all of them are achievable.
Make sure you have the required drawing tools ready and thoroughly peruse the outline provided below for an insight on all the steps before you begin.

Step 1: Draw the Turret
The part just above the wheels of an army tank is called a turret. Using your ruler, start by drawing a small horizontal line in the middle of your page.
Then, above your line, draw a curved line that connects one edge of your line with the other. There should be a small space in between your curved line and your straight line.
Once you’re finished, draw three vertical lines within that space. These lines should be spaced apart, like the image below suggests.
Then complete your turret by drawing an egg-like semi-oval shape at the bottom. This will be the starting point of your drawing, so be sure to take your time and enjoy drawing this part.
- Start by drawing a small horizontal line on the middle of your page
- Draw a curved line above the horizontal line
- Add three lines within the space between your horizontal and curved line
- Draw an egg-like semi-oval attached to the bottom of your drawing

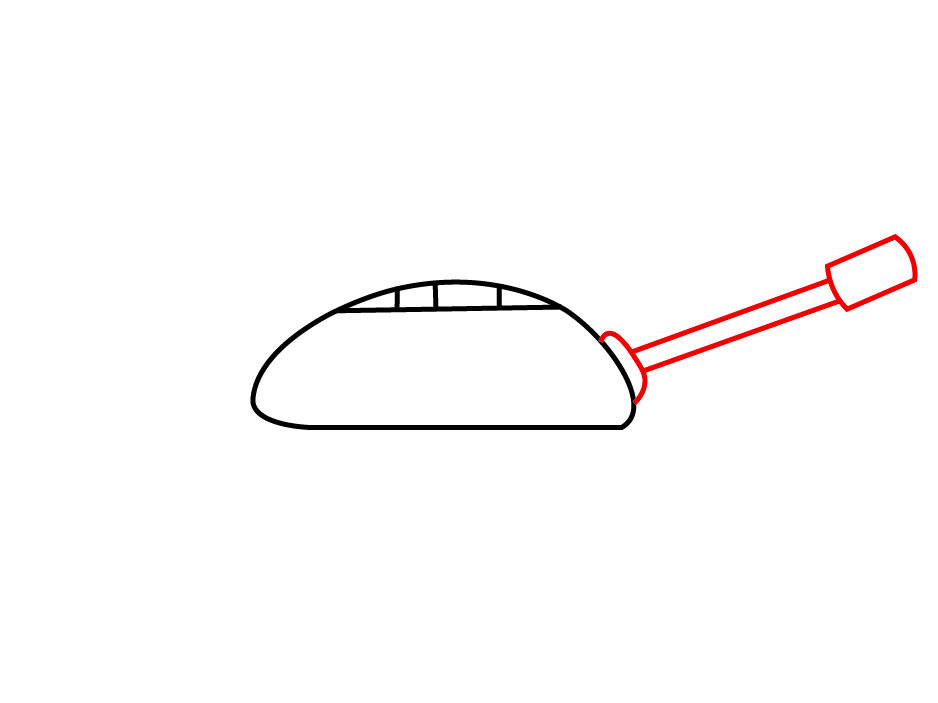
Step 2: Add the Barrel
A barrel can swivel around an army tank in 360 degrees while being attached to it, in whichever way the passengers inside want it to. It’s one of the most interesting components of an army tank.
To complete this step, start by drawing a small tube on top of the turret, which is known as the barrel of an army tank.
The barrel should be pointing to the right side, away from your turret, and it should be slightly raised; i.e, diagonal.
You may need your ruler for this part as well, though if you’ve got a steady hand, you’re good to go.
- Draw a small oval against the upper right side of the turret
- Add a thin tune that extends from the oval and runs upward
- Add a small rectangle on the edge of the tube
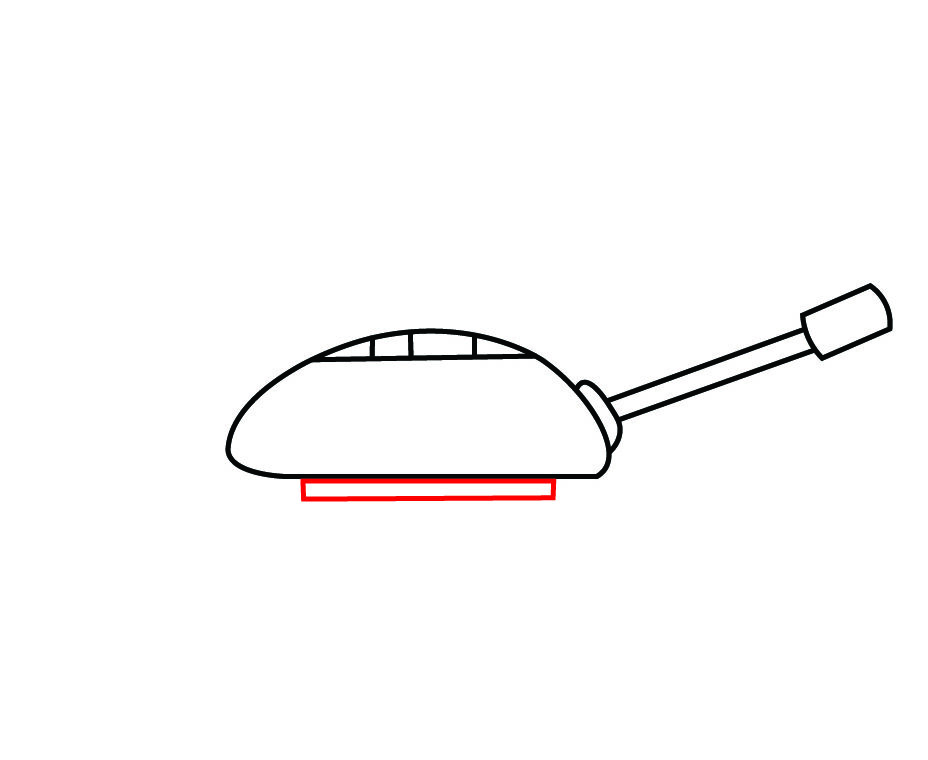
Step 3: Draw the Base
Now, your turret needs a sturdy base that connects to the rest of the tank.
So just below the turret, draw a small horizontal line. Connect this line to the bottom of your turret using small vertical lines. When you’re finished, it should look like a small rectangular base.
- Draw a small horizontal line beneath the turret
- Ensure there’s a little space between the line and the bottom of the turret
- Connect the line with the turret using vertical lines at each end
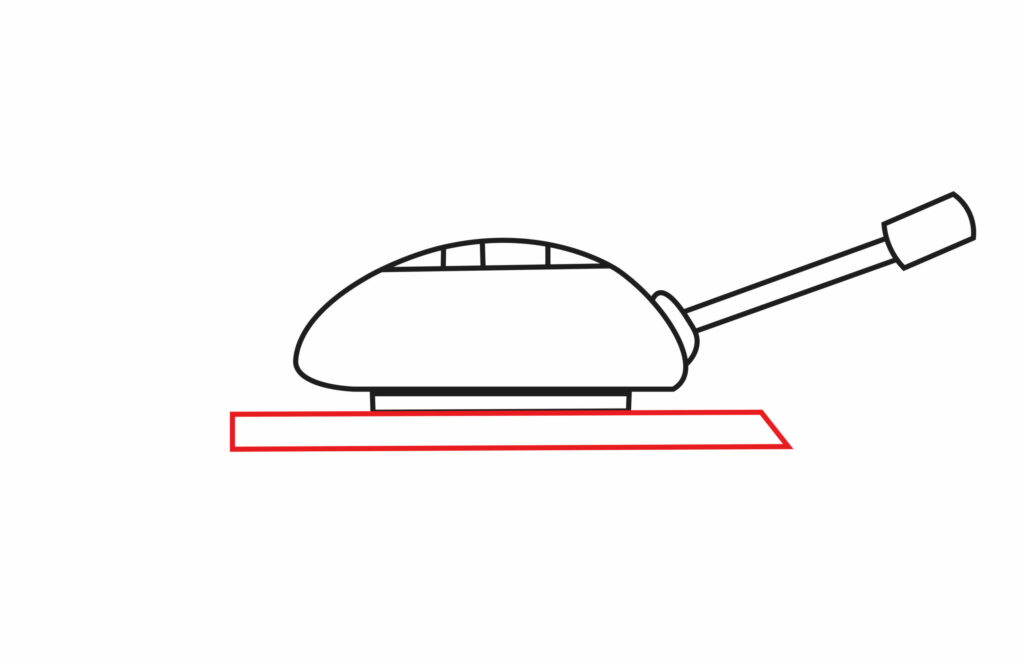
Step 4: Draw the Chassis
A chassis is the load-bearing framework of the army tank. Think of the chassis as the glue and bulk that connects different parts of an army tank together. The turret and the barrel both links to this very essential part of an army tank.
First, draw a slightly larger rectangle underneath the base completed in step three. Erase the right side of the rectangle, and replace it with a diagonal line instead.
Next, draw a longer and wider rectangle beneath the one you just completed. While it’s not visible in the picture below, this is a critical element in your army tank sketch, so be sure to add it onto your page!
Erase both sides of your newly added rectangle, and add smooth curves there instead. Both of these shapes together represent the chassis.
- Start by drawing a slightly bigger rectangle below the base
- Add another rectangle below, this one longer and wider, with curved sides
- Reference the image in step five to view the result of both shapes
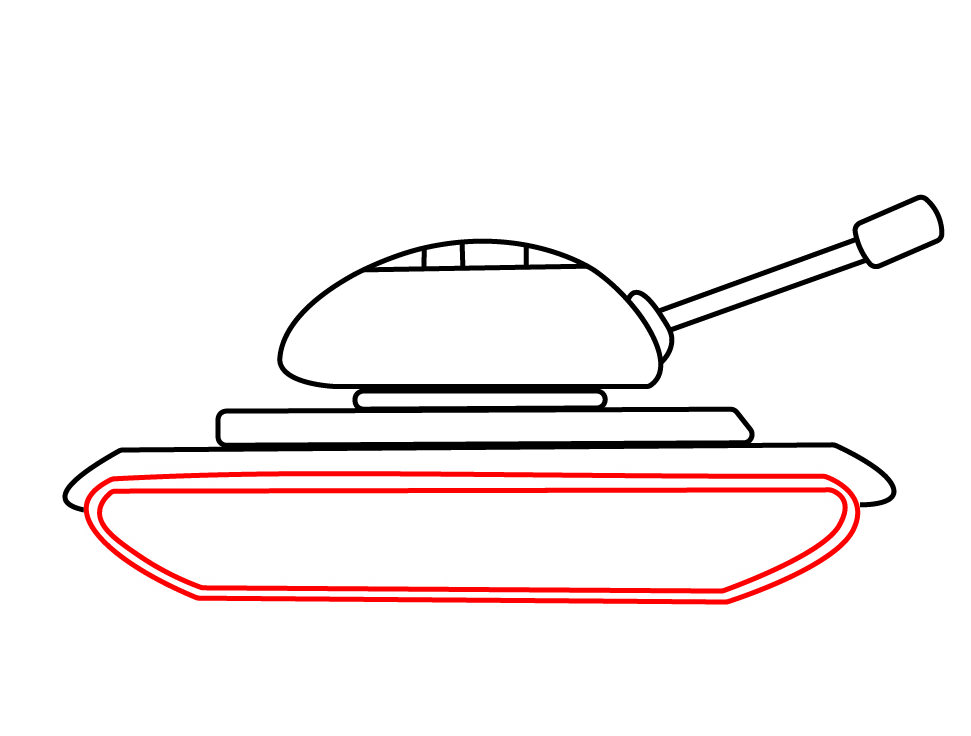
Step 5: Add the Chain Line
The chain line of an army tank is used to help guide the tracks in a straight path, ensuring smooth movement over various terrains. It helps maintain alignment and prevents the tracks from slipping or becoming misaligned during operation.
Underneath your third and largest rectangular base, a.k.a chassis, we now need to add the chain line.
In order to complete this step, draw a wide oval below the chassis. The sides of the oval should be diagonal, meaning that they’re wider along the upper corners and narrower along the bottom corners.
Once complete, draw another wide oval within the first one drawn that follows the same curves and has a small space in between.
These two ovals drawn together represent the army tank’s chain line.
- Draw a large oval beneath the chassis
- Ensure the sides over the oval are diagonally drawn
- Draw another oval within the first one
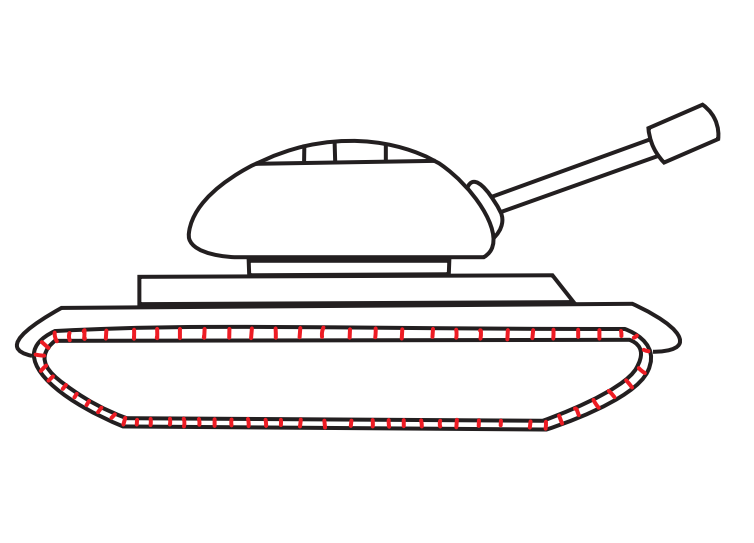
Step 6: Add the Caterpillar Thread
The tracks on the chain line of an army tank are called caterpillar thread, or tank thread. Remember how one cool function of an army tank is travelling over rough terrain? Well, this is mostly possible because of the catepillar thread.
Besides trekking over bumpy grounds, the caterpillar thread also makes it easier for army tanks to drive on soft surfaces too, because the grooves on them stops the weight of army tanks from sinking into the ground.
For this section, you need to draw vertical lines within the chain line. This is because army tanks have multiple tracks that are made up of interconnected links.
For an extra touch, you can also lightly shade the background within the chain line. This could add some depth to your drawing.
- Draw a series of small vertical lines within the chain line
- For added depth, you’re encouraged to shade the background of the thread
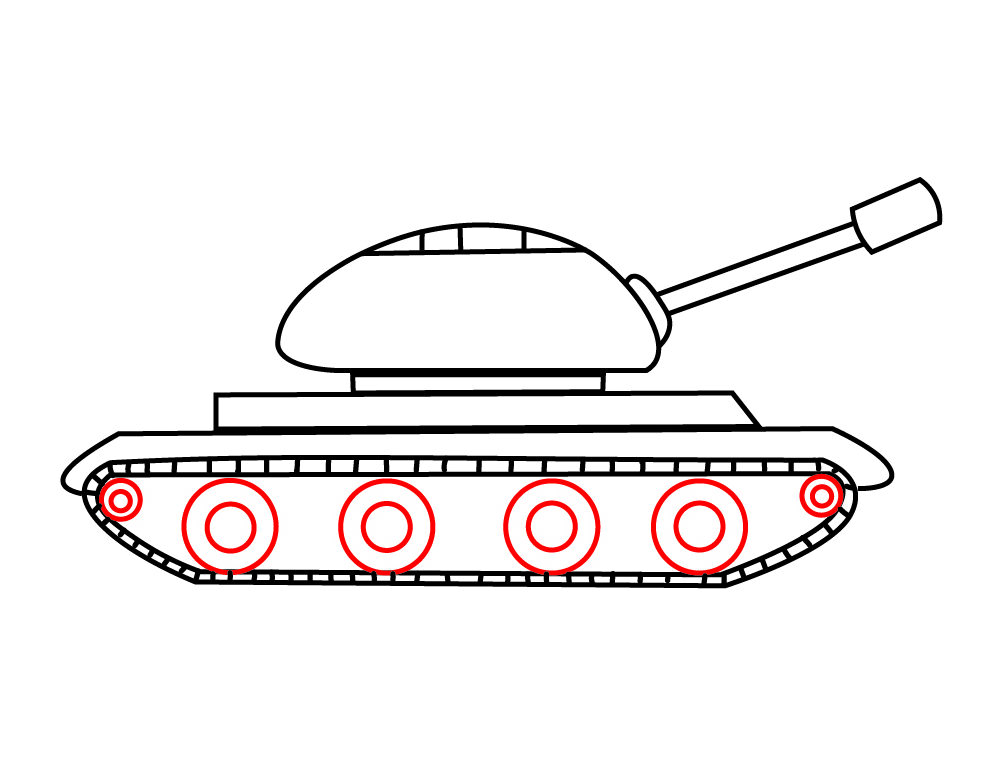
Step 7: Add the Wheels and Nuts
This might very well be the most crucial component of an army tank. Without the wheels and nuts, an army tank would not be able to move!
So for this step, draw four circles in the middle of the chain line, and then two smaller circles in the upper corners.
These circles represent the wheels of the army tank, therefore, draw smaller circles inside the ones you’ve just drawn to make them look like wheels.
- Draw four circles in the center of the chain line
- Draw two smaller circles in the upper corners of the chain line
- Add small circles within each circle drawn to resemble wheels
Congratulations! Your army Tank Drawing is Complete
Take a little break and assess the outcome of your drawing. You’ve gone from a blank page to something else entirely, so big props to you! Once you’re ready, make sure you cover all of your bases by correcting anything that may require a few tweaks.
Taking your Drawing to the Next Level
Here comes the fun part. To make your drawing really stand out among the rest, add a detailed background and some color!
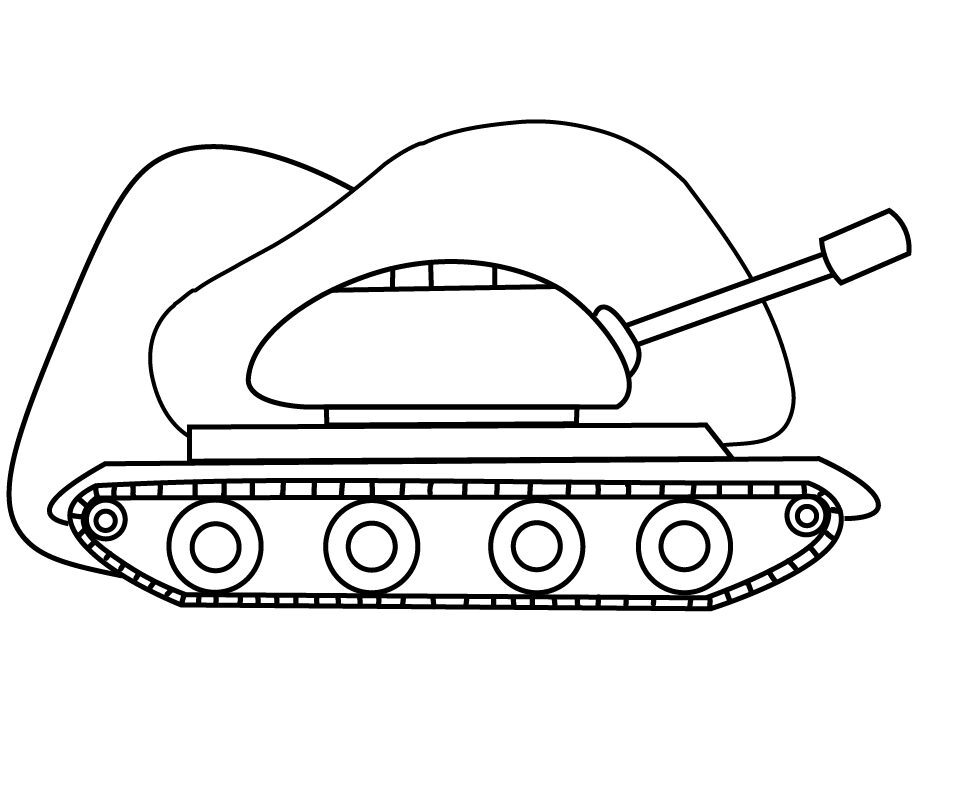
Step 8: Adding a Background
You can do whatever you’d like with this section. You could either create a minimal background using some shading, or you could draw a flat surface below the chain line to represent the ground your army tank is standing on.
Additionally, you can draw whatever landscape you prefer, such as a cement road, gravel road or even a desert.
You could add rocks in the background, a sunny sky with some clouds, or maybe you even have a rainy day in mind.
Whatever the case may be, go for it. Remember, it’s your drawing. Have fun with this part, be creative and enjoy the process.
Step 9: Adding Color
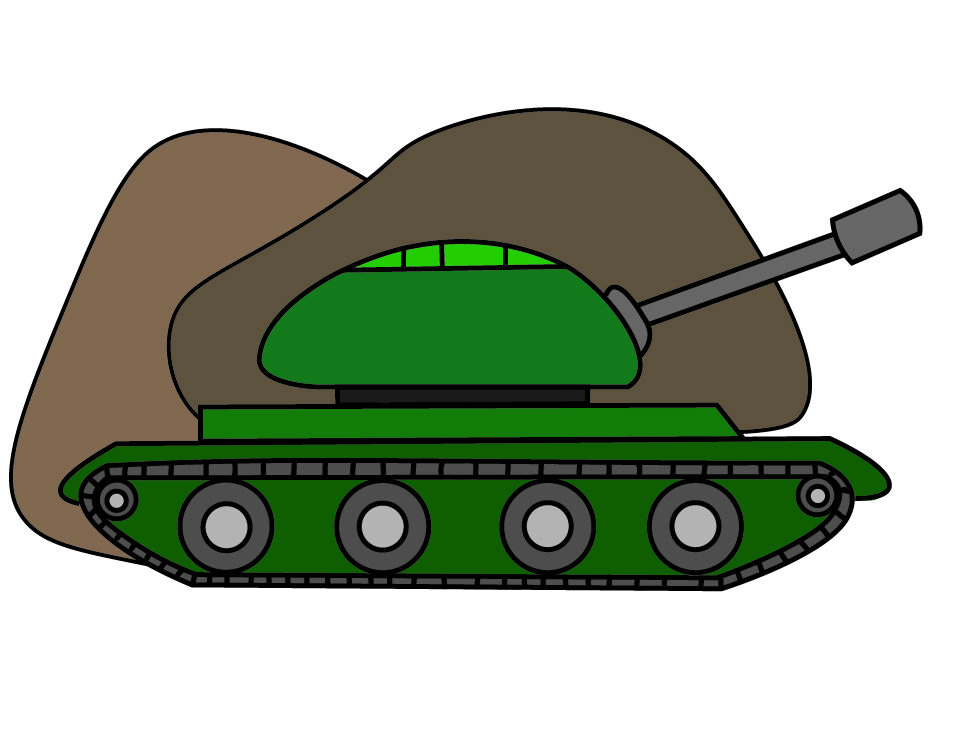
Army tanks are usually green in color, so you might want to use a green color for the tank.
Use black or gray for the turret to make it stand out from the rest of your tank.
Add some shading and highlights to create depth and make your drawing look more interesting.
For the background, use brown for the earth or ground, and add any additional colors or details you’d like to complete the scene.
Depending on the background you choose, you can use different greens for your tank and then for your background (grass, shrubs, etc).
Bonus Tips
Make sure to include some distinctive features of an army tank to take your drawing to the next level, like a muzzle on your barrel, lines and detailing on the side of your chassis to represent the side skirts or side armor.
Research different types of tanks for some inspiration and accuracy. You might even find some inspiration looking at other drawing tutorials of similar vehicles on our site.
Experiment with shading and perspective to make the tank look more three-dimensional.
And lastly, always remember, don’t be afraid to add your own creative touches or modifications to the design. Part of what makes art so much fun is that it’s not all the same, and some people even believe that it shouldn’t be. Sometimes what makes a drawing really good is the personalised creative touches, so go for it!
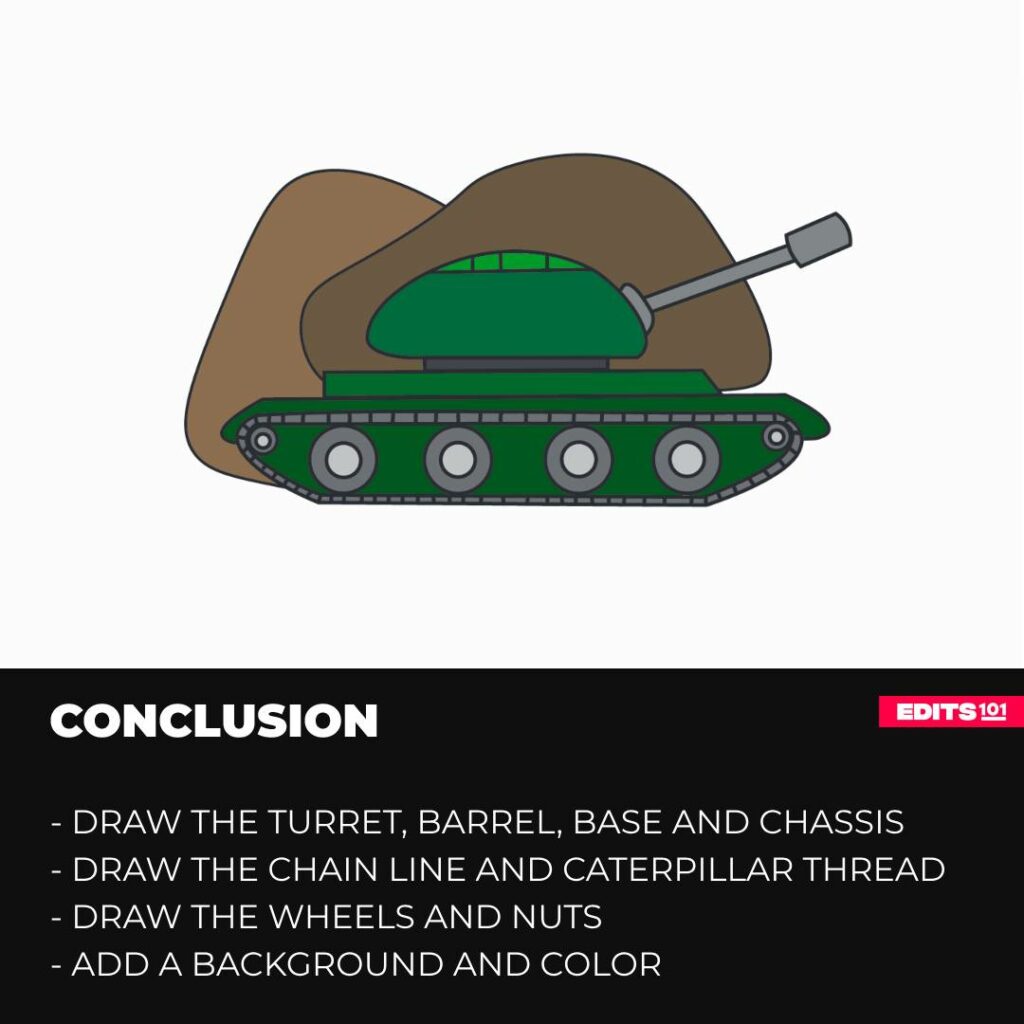
Conclusion
By following the steps and tips we’ve provided above, you have hopefully just completed your new and improved illustration of an army tank. If your drawing doesn’t immediately resemble ours, don’t sweat it. Remember, practice makes perfect.
Stay inspired by the progress you make along the way and remember that with dedication and perseverance, you can achieve anything you set your mind to. Keep drawing, keep learning, and watch yourself grow into an artist full of potential and promise!
Thanks for reading & feel free to check out more of our articles!
Author Rating
Overall Rating
Summary
This tutorial will teach you how to draw an army tank with easy-to-follow steps. You will also learn how to improve the quality of your drawing with background details and experimental colors.