

We’ll be going over on how to quickly and easily recolour anything using different Adjustments. We will discuss some of the best ways to use this feature for your own projects.
Getting Started – Recolour in Affinity Photo iPad!
Adjustments are key when recolouring. You are able to selectively change the hue, saturation and lightness of an image. This gives you a lot of control over how the final image will look.
As some examples, we will be going over on how to change the colour of hair, eyes and more. The possibilities are endless!
Let us start with an example straight away!
How to change hair colour in Affinity Photo iPad
We’ll go over a step-by-step process on how to change hair colour! It quite easy, however, you’d need to use different masking and colouring techniques along the way. Let’s get started!
Step 1:
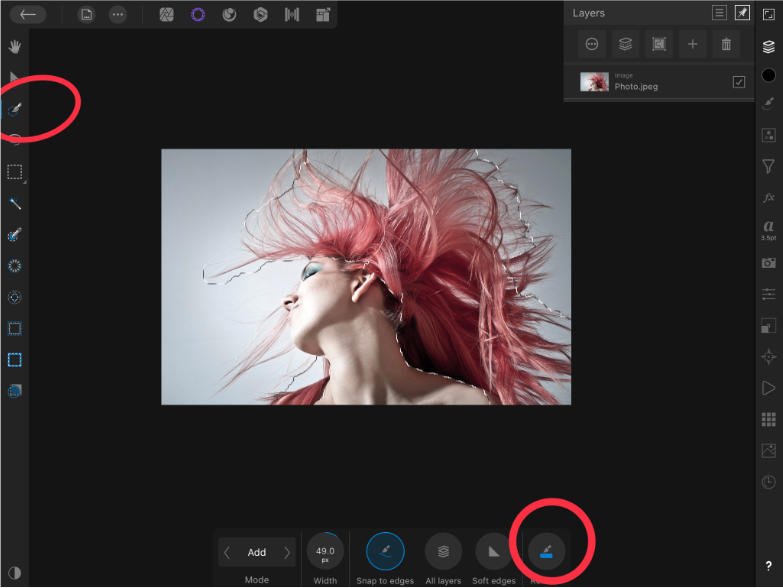
Open up the image, and go to the Selection persona. We’ll be selecting and masking the hair so we only change the hair colour.

We’ll be using the smart selection brush tool to make a quick selection around the area. Do not worry if its a bit messy, we’ll be making it better as we go along!
Step 2:
After finishing the selection, we will be refining it. In the bottom of the screen you’ll see the tool bar – select refine. The will open up the Refine Selection Tool.
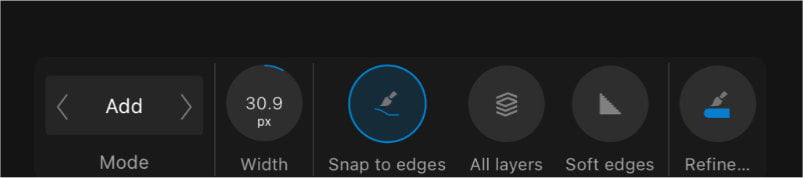
Use a small brush to go around the edges. The program will automatically find out the edges and select the areas that you do not want selected.
The pink area is the deselected part. When you’re happy with the selection, click apply.
Step 3:
Now we’ll be recolouring. With the selection still around the area, let’s go to the photo persona.

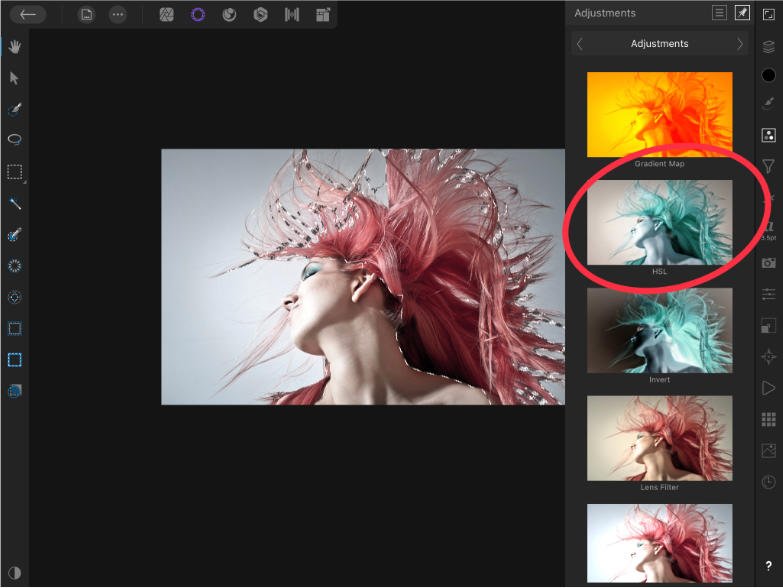
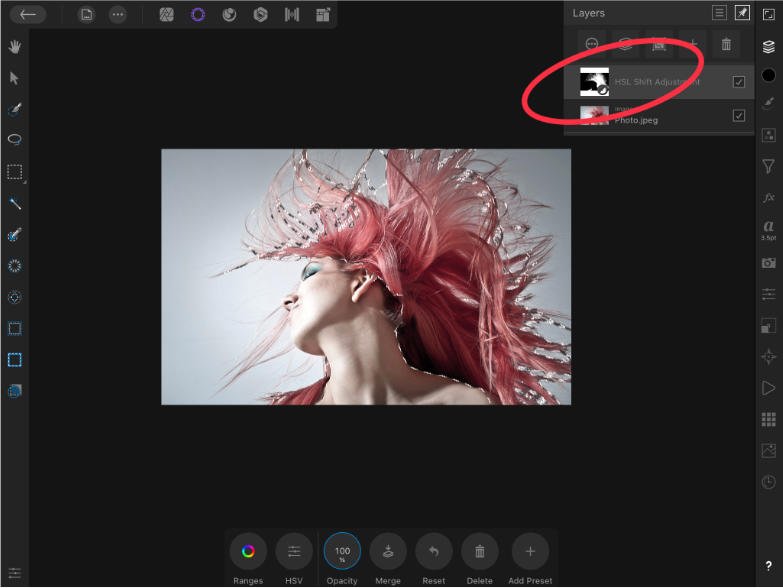
Select the adjustments layer and click on the HSL Adjustment (Hue, Saturation, Lightness). You could use other adjustment layers, however, the recommended one is an HSL.
The selected area will now become a mask on the HSL layer. This means that only the hair will be targeted.
Step 4:
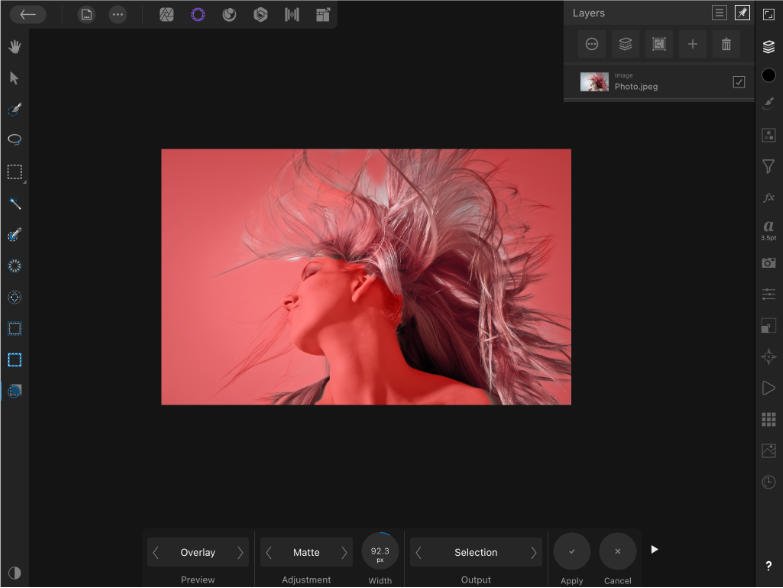
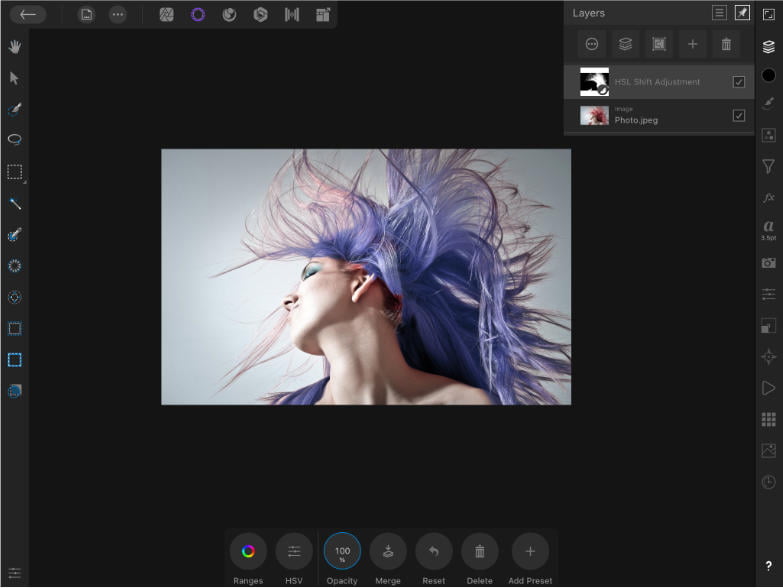
Now you can change the hair colour by altering the “Ranges” from the tool bar at the bottom. If you cannot see the tool bar at the bottom, make sure you’re selecting the layer.
If you’d like to refine the selection even more, go ahead and select the mask on the HSL adjustment layer & paint on it with a brush. Black to hide & white to reveal.
If you’d like to change the hair colour again you simply change the ranges in the tool bar panel at the bottom of the HSL Adjustment.
That’s all, now lets learn how to change eye colour!
How to change EYE colour in Affinity Photo iPad
This is practically the same process as changing hair colour! It requires a similar process with a slightly more steps. However, with the same techniques – selecting, masking and adding adjustments.
Though for this example, we’ll do it differently. We’ll be adding the adjustment first, then adding the mask.
This way, you’ll have multiple ways on how you could approach your design!
Step 1
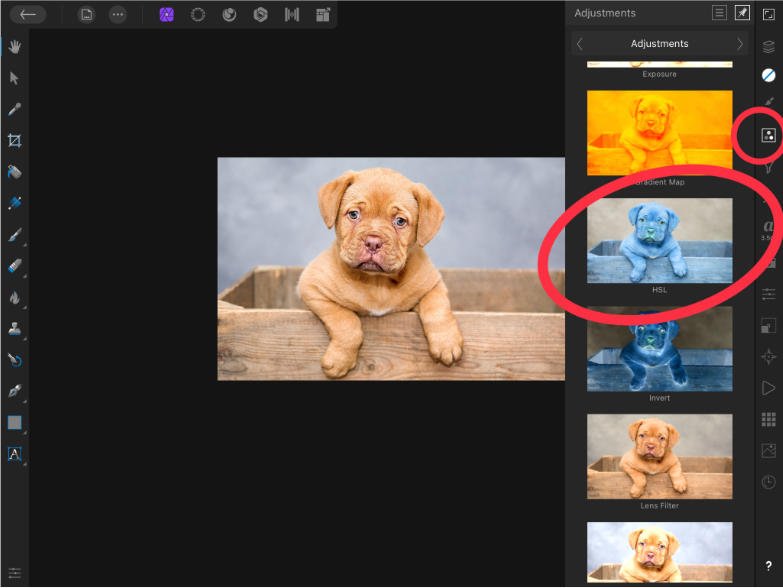
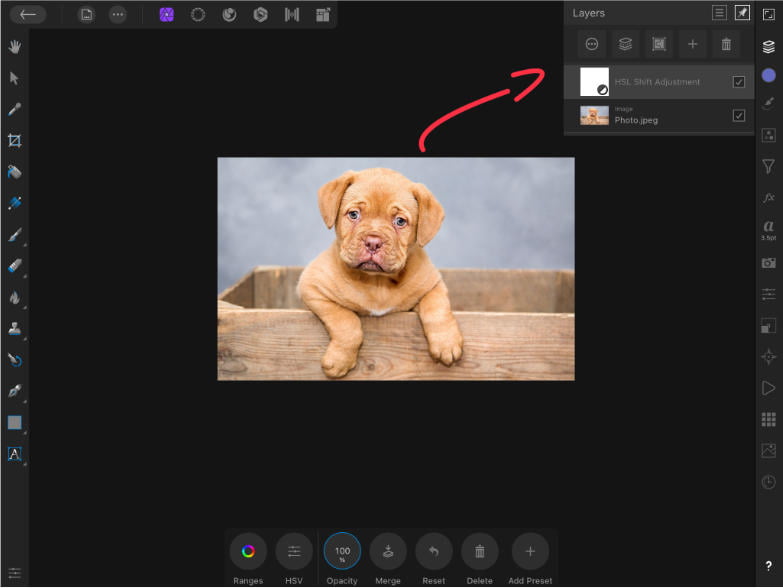
Firstly, let’s add an HSL Adjustment. You can find this on the right side of the screen and scroll down towards the middle.
This will create an adjustment with a mask already added to it.
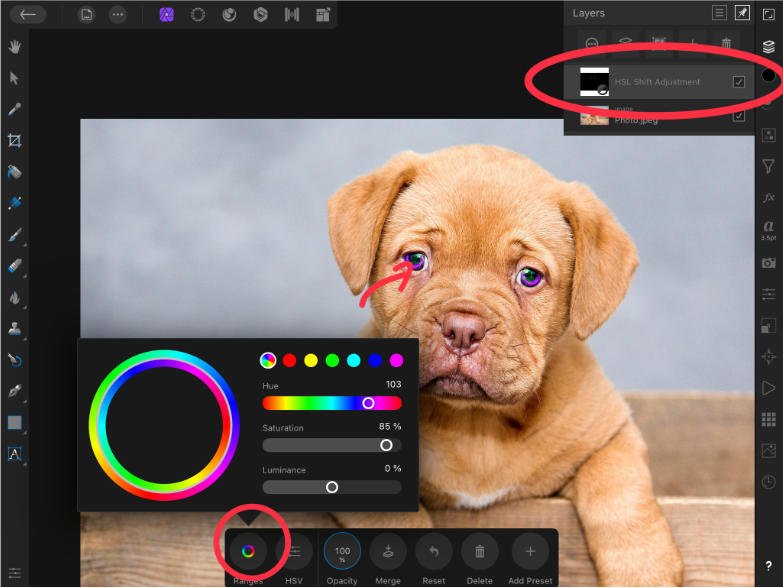
Step 2
Let’s focus on the eyes for a minute. If we’d like to change the colours of the eyes to purple, we simply change the range of the values to match it as best as possible.
We will be adding adding a targeted selection in the next step!

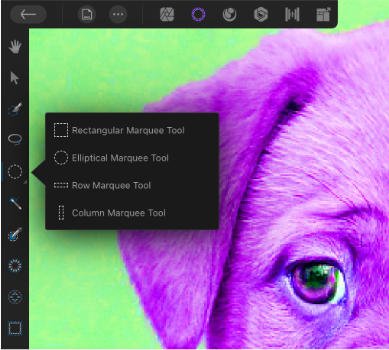
Step 3
Go to the Selection persona. We’ll be selecting and masking the eyes so we only change the eye colour.
We’ll be using the Elliptical Marquee selection brush tool to make a selection around the eyes. If its a bit messy, we’ll be cleaning it up later with the mask!
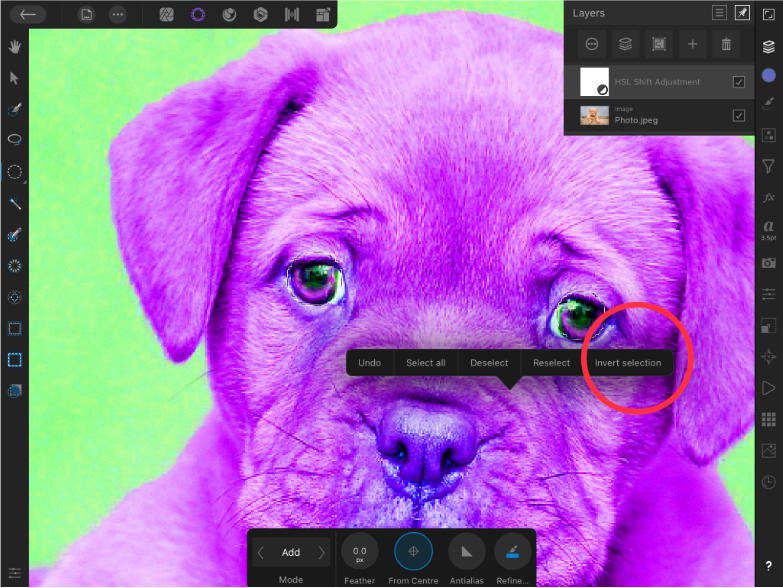
To add another selection to the other eye, simply select the add mode at the bottom of the tool bar & add a new selection.
Long press on the screen and invert selection so we could remove the effect from the subject and keep it only on the eyes.
Step 4
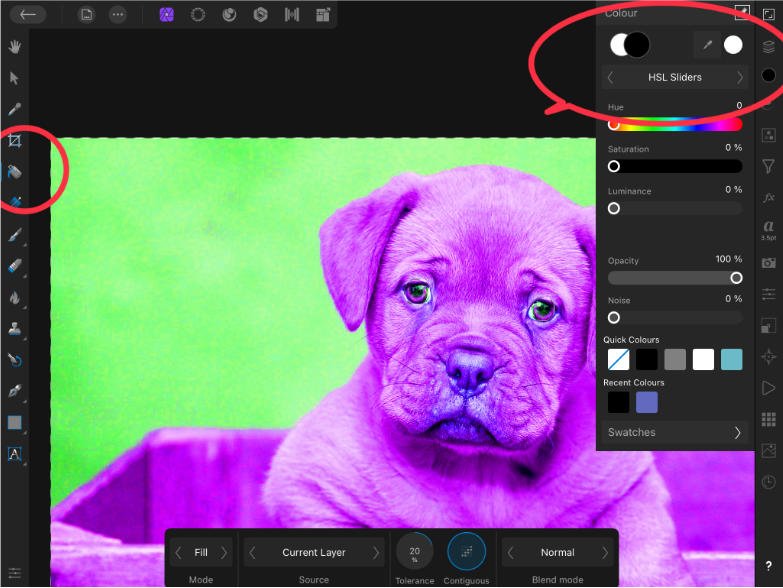
Use fill tool and paint with black on the adjustment layer mask. Remember, black hides & white reveals!
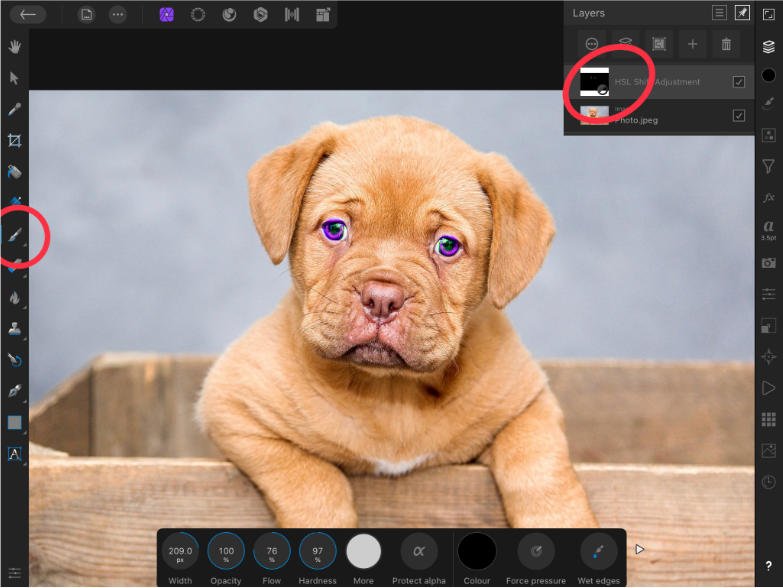
As you can see on the layers panel, the mask is mainly black and only two white dots are visible. This means that the mask is affecting only the eyes.
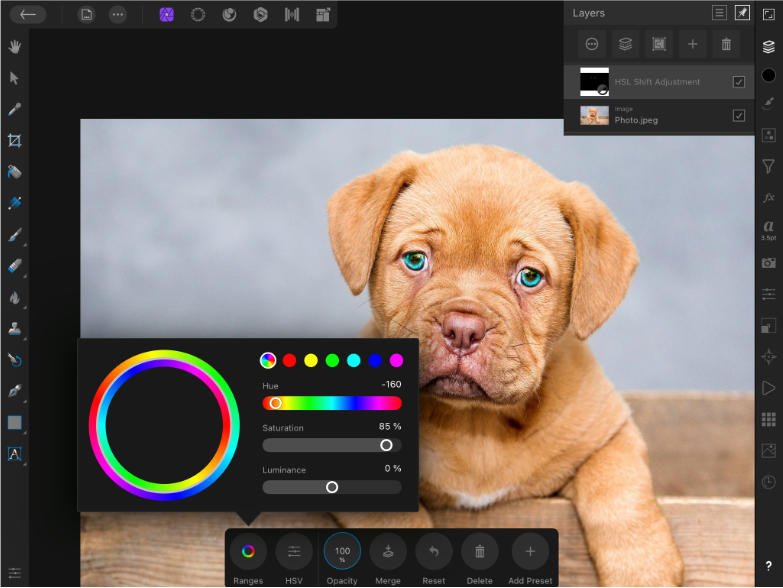
Step 5
You can now play around with different HSL values to come up with different colours. For example, lets say we do not like the colours to be purple, so we did them blue!
You can always go back & clean the mask, reduce opacity, add blending modes etc!
Let’s get more in-dept on what other tools we’ve got available!
Colour Replacement Brush tool in Affinity Photo iPad
The Colour Replacement Brush is a tool in Affinity Photo iPad that allows you to quickly and easily change the colours of an image.
It’s a fantastic tool for selective colour transformations or for colour corrections.
This is how it works! It replaces the colour of the current layer’s pixels with the foreground color chosen in the Colour Studio. The amount of pixels tapped, the colour of the pixels, the area selected and the amount of Tolerance determines how the pixels are affected.
You can adjust these settings in the context toolbar:

- Width— pixel-based size of the brush strokes.
- Opacity—affects the translucency of the brush.
- Flow—the speed of the brush strokes (Higher the percentage, the faster it is).
- Hardness—controls how hard the edges of the brush are. (Higher the percentage, the harder it is).
- More— Opens a dialog with advanced brush settings.
- Colour—allows you to pick the colour of the brush stroke.
- Tolerance—Controls the range of pixels affected when tapped. (Higher the tolerance settings, the more the pixel colour will be distinct from the tapped pixel).
- Continuous—Turned off by default. If it is ticked, the reference colours will continuously change as the cursor moves.
- Contiguous— Selected by default. The neighbouring qualifying pixels are the only pixels that are recoloured under the stroke.
- Force Pressure—Ideal for when using a pressure-sensitive device.
That’s a quick overview on the Colour Replacement Brush.
Recolour Adjustments in Affinity Photo iPad
Recolouring parts of an image can be accomplished by making a selection and pairing it with:
- HSL Adjustment – We’ve discussed and used this one in the examples above.
- Black and White Adjustment
- Recolour Adjustment
How to recolour using a Black and White adjustment
As the name suggests, Black and White adjustment gives you complete control over how each colour is transformed. This is also used to transform an image to monochrome.
Switch to the Selection Persona and select the object you want to recolour using the smart selection Brush.
After creating the selection, go to Adjustments > Black and White adjustment. A dialog box will appear.
You can select any of the available options to recolour your image. You have the opportunity to modify the colors by moving the sliders as per your requirement.

After completing the above steps, don’t forget to check the before and after version of your photo in the Layers panel.
How to recolour using a Recolour Adjustment
This adjustment allows you to change colours and to utilise the entire colour spectrum to create a monochrome image.
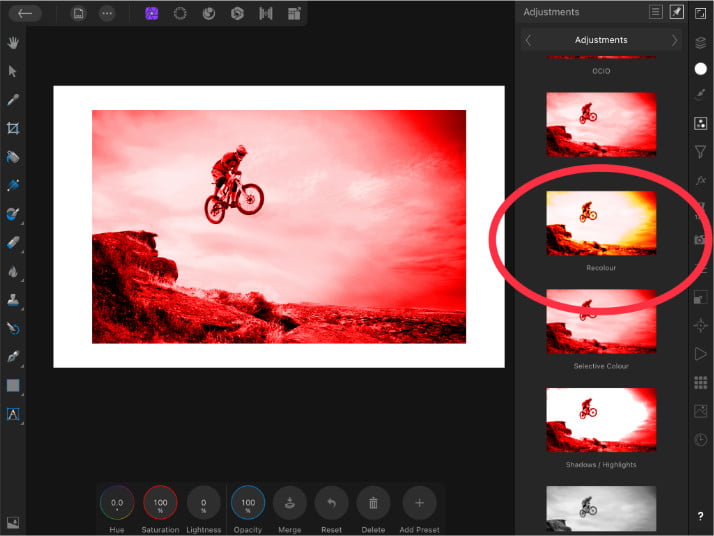
Go to the Adjustments Panel and tap on the Recolour Adjustment. A new layer will be created automatically.
Make sure to modify the colours by moving the Hue, Saturation and Lightness sliders until you are satisfied with the result.
Expert Rating
Summary
This is a technique which might seem difficult, however, in practice, it is not. The main thing being, that you’ll be implementing multiple techniques. For a beginner it might seem daunting, however, it is a great technique which bundles up multiple techniques. Requires a bit of practice for beginners but great for scale.
Conclusion
In this guide, we showed you how to recolour images in Affinity Photo iPad. Furthermore, we also learned how to use the HSL Adjustment, Colour Replacement Brush Tool and how to apply more adjustments in order to change colours.
Thanks for reading & feel free to check out more of our articles!


