
One of the most remarkable aspects of this software is the ability to extend its features using third-party plugins. These plugins integrate with Photopea and offer additional features such as adding glow, generating clouds, and much more.
If you want to expand your editing options with Photopea, consider using the plugins available in photopea.
In this article, we’ll take a closer look at how you can install Photopea plugins and enhance your editing experience.
Where To Find Photopea Plugins?
The Photopea plugins page is easy to find.
Open Photopea and then Go to the windows menu and click on plugins.
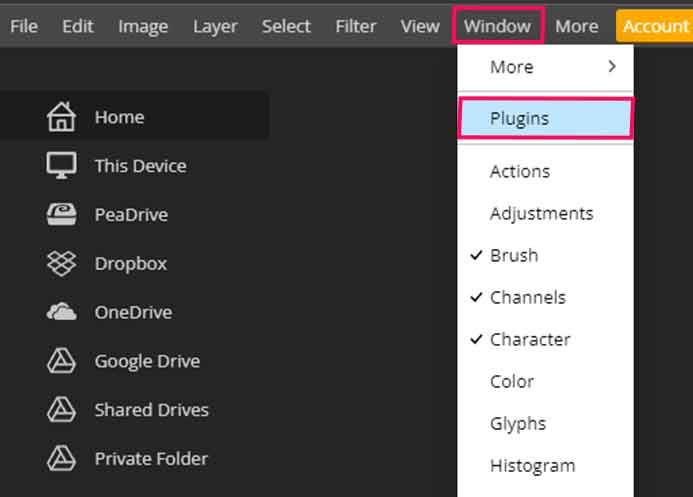
And the plugin windows will pop up, where you can install the photopea plugins.
How To Install Photopea Plugins?
In this section, we will cover everything step by step on how to install the photopea plugins. This way, you won’t have to install them every time you close and reopen photopea.
Step 1: Create An Account
The first step you should follow before moving to the plugin installation is to create an account on photopea.com.
When you create an account, all the changes you make to the photopea interface, including plugin installation, will be saved. You will find the plugins already installed when you log in from another device.
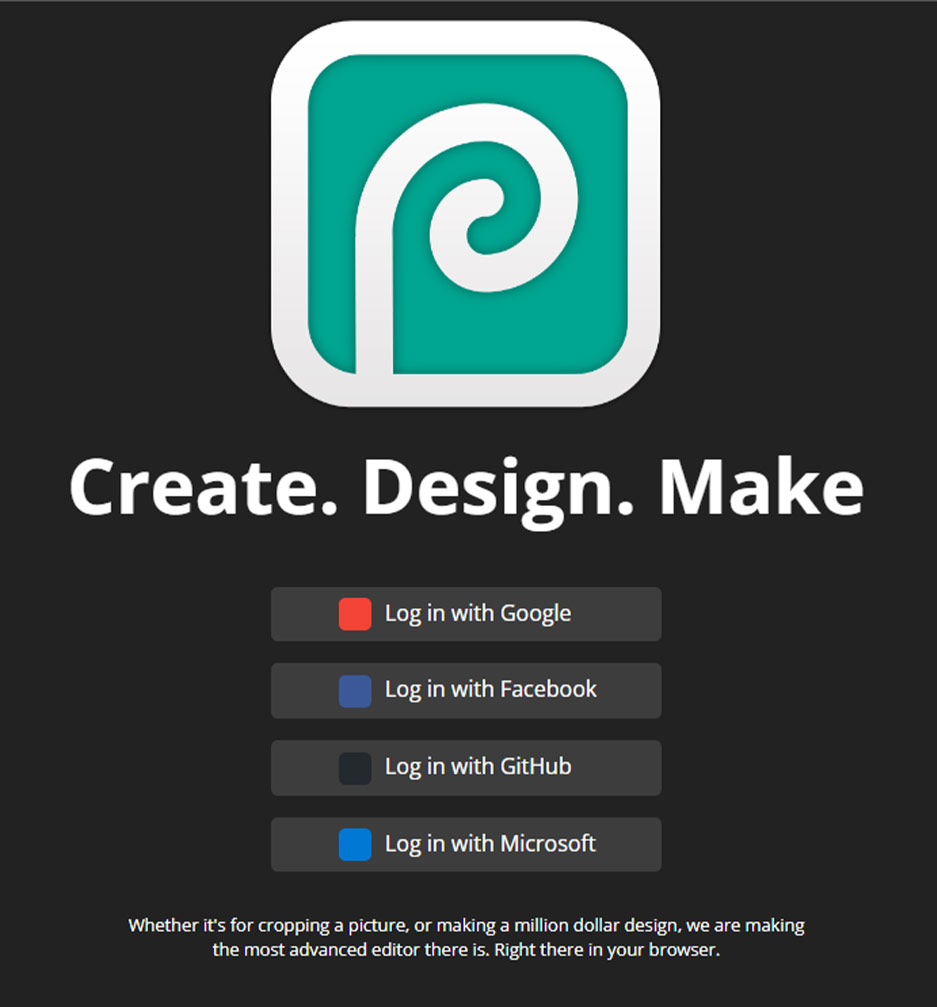
To Create an account, click on the red account button at the end of the menu bar.

A new Dialauge box will open up, click on the red login button, and you will be directed to a new tab.
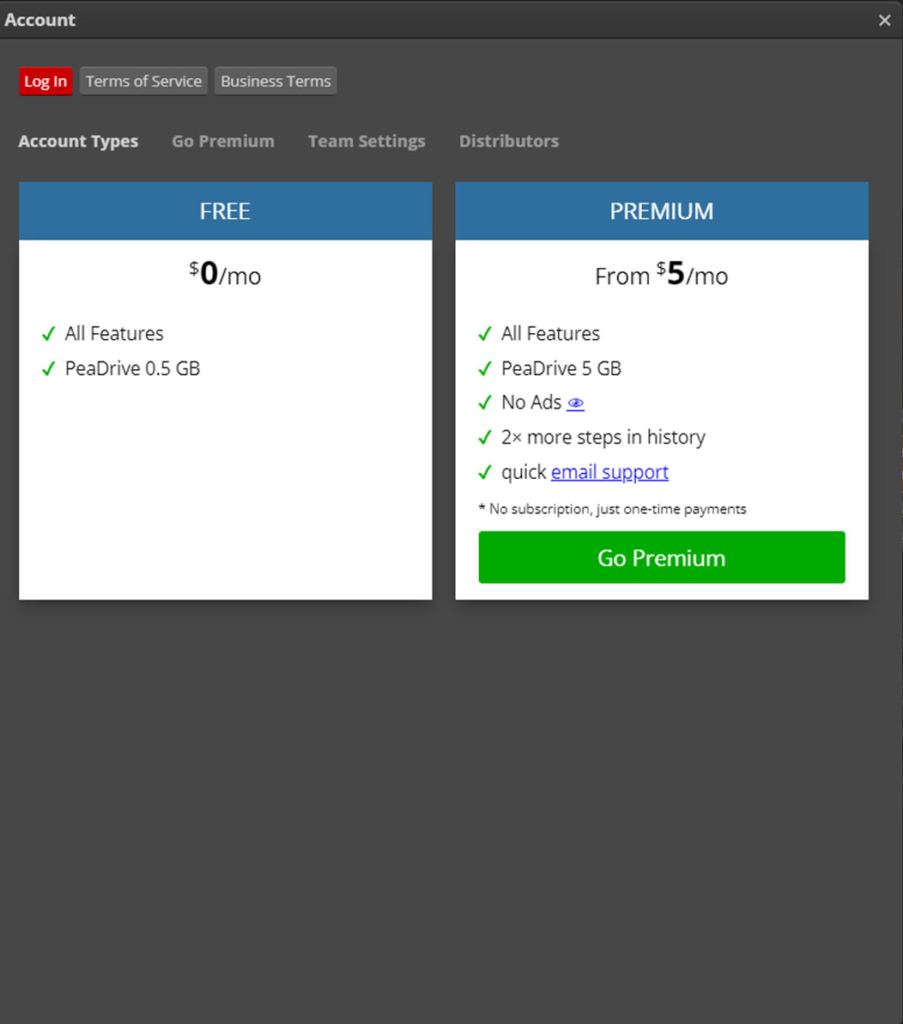
You will get the following 4 options to log in:
- Login with Google
- Log in with Facebook
- Login with GitHub
- Login with Microsoft
Choose your preferred method and log in.
Step 2: Open the Plugin Page
To open the plugin page, go to the window menu and click on the plugin, as described above.
Step 3: Install the Plugin
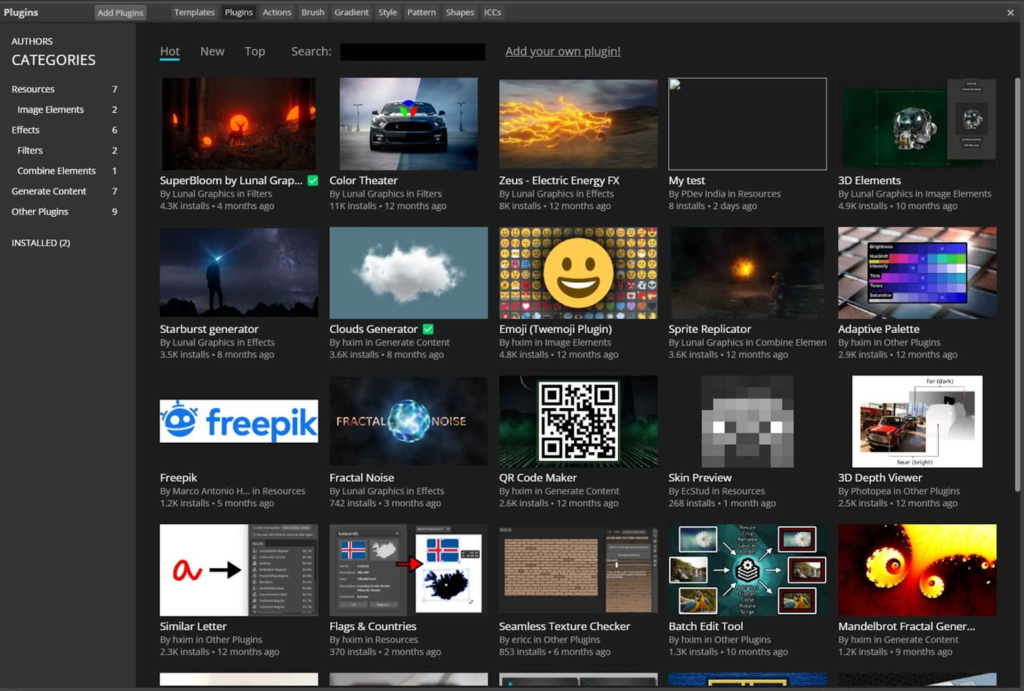
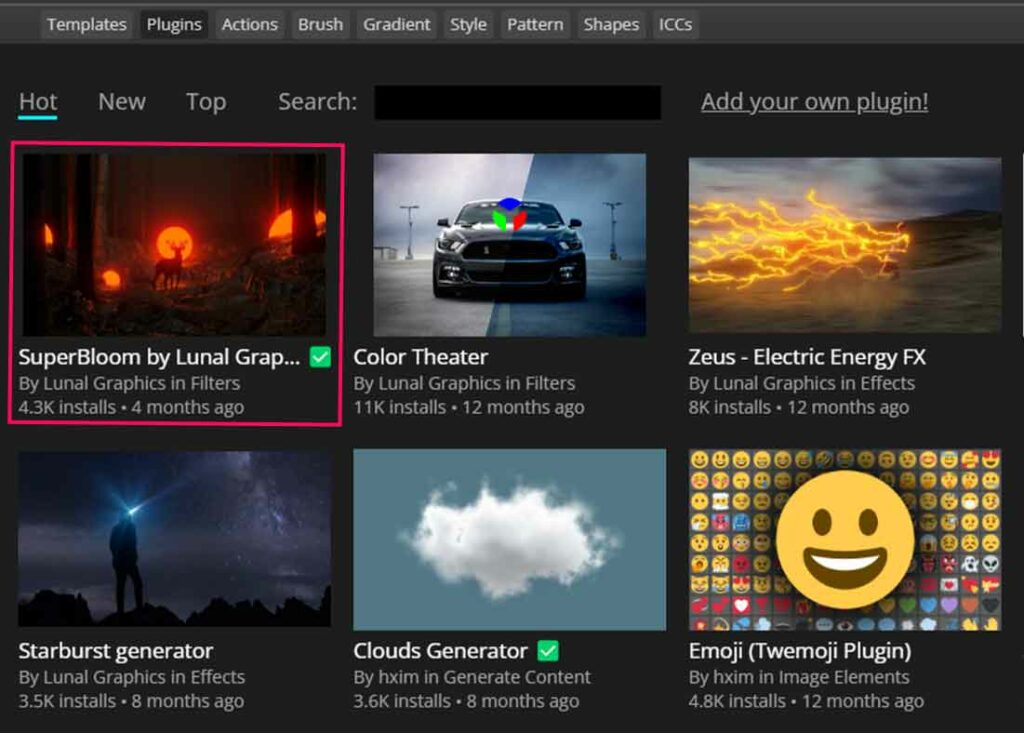
Now it’s time to install the plugins. Explore the plugin page and choose what plugin you want to install.
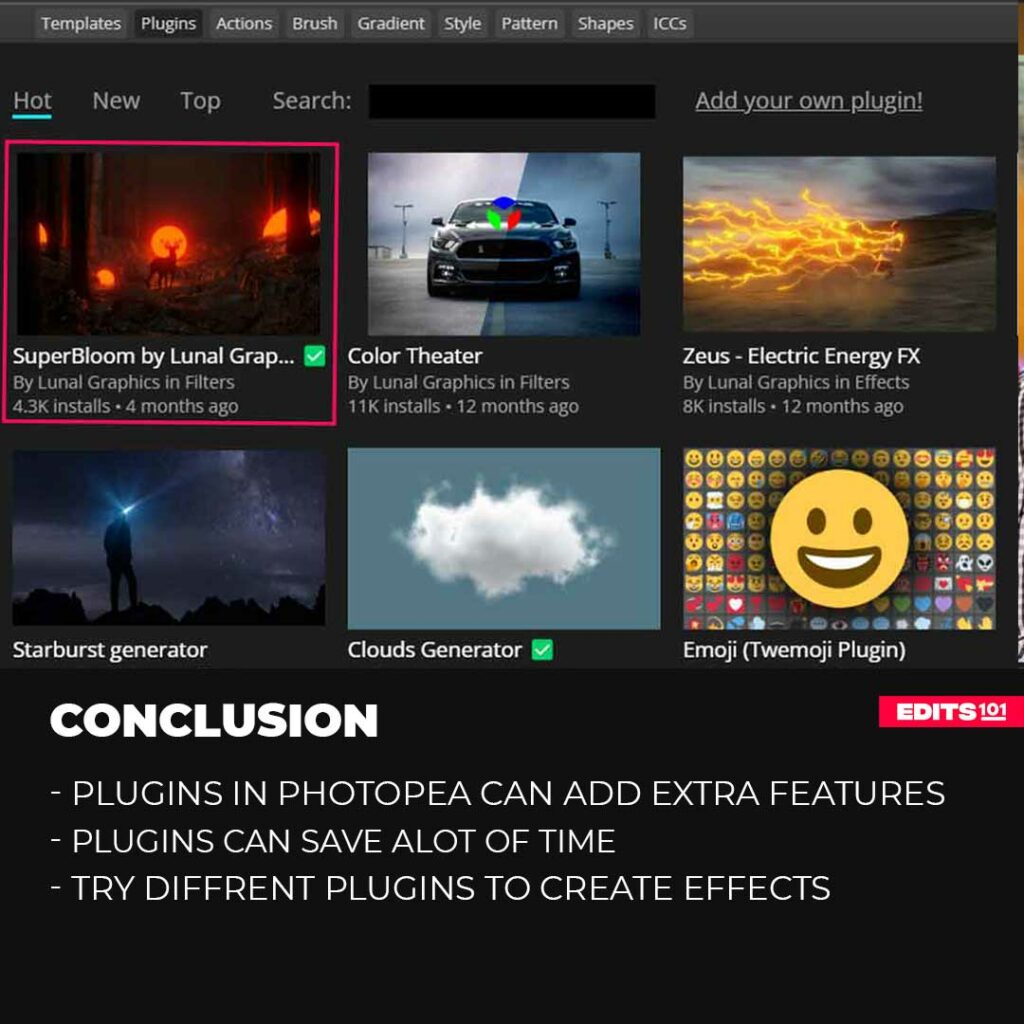
There are only a few of them at the time of writing this article. We will install super bloom, cloud generator, and Color Theater for this article.
Click on the super bloom by Lunal Graphics plugin.
You will see an install option under the number of installs value.
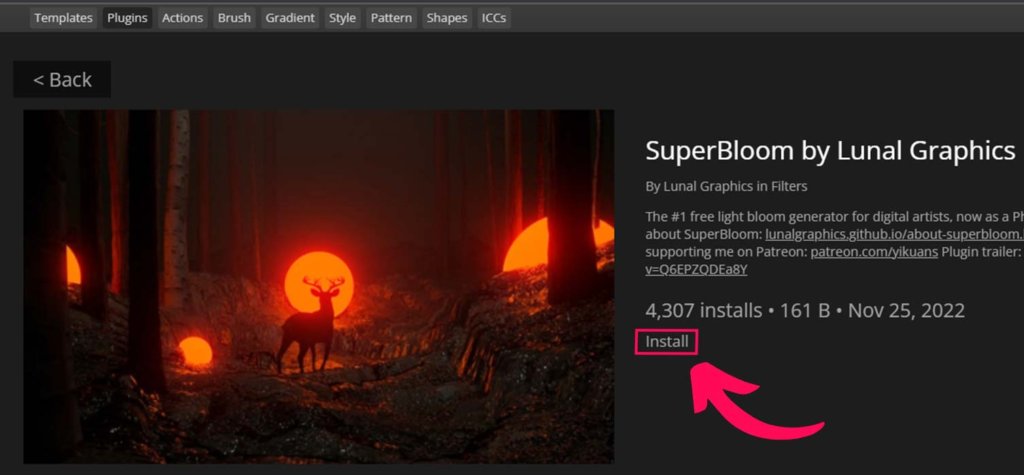
Click on it, and you will get a pop-up saying that the resource added.

That means the plugin is now installed in photopea.
The same goes with the cloud generator and color theater, click on the plugin and then click on install, and it will be added to the photopea.
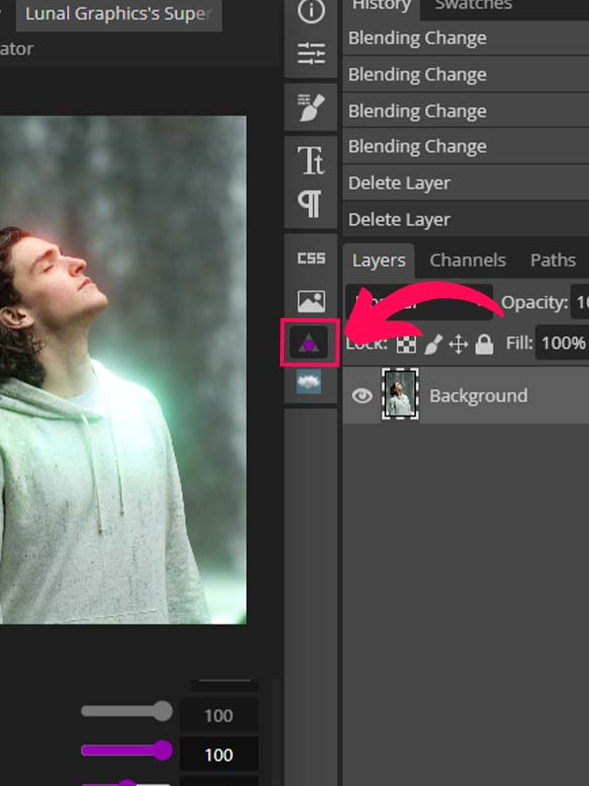
Step 4: Where is the Installed Plugin in Photopea?
The plugins you install will appear on the properties bar on the right side of the screen.
You will see small thumbnails; when you click on the thumbnail, you will get detailed options.
How To Use Photopea Plugins
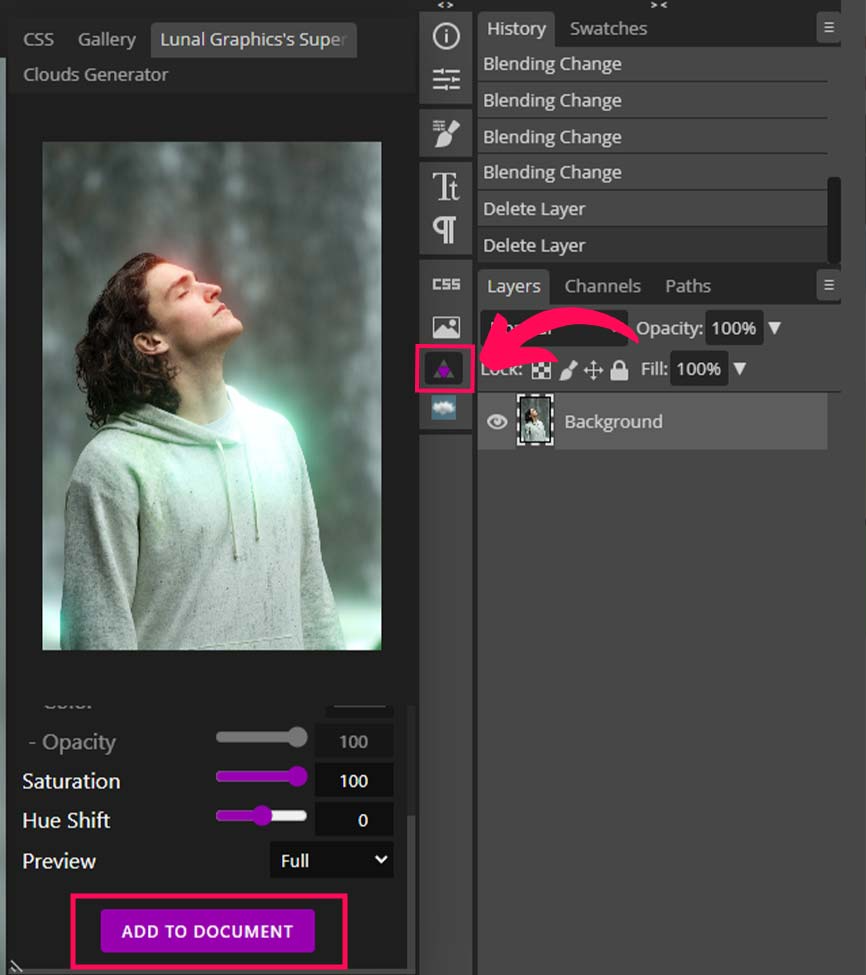
Using photopea plugins is very simple. We will be using super bloom as an example. Select a layer and click on the super bloom plugin’s thumbnail, and it will give you a preview of the glow.
There are a few settings available, adjust them to see what works best for you, as they work differently for different images.
When happy with the settings, click on the “Add To Document” button, and the glow will be added as a separate layer.
Note: The super bloom will apply the glow to every visible layer, so if you dont want to apply the glow to a layer, then hide it before clicking on the super bloom plugin.
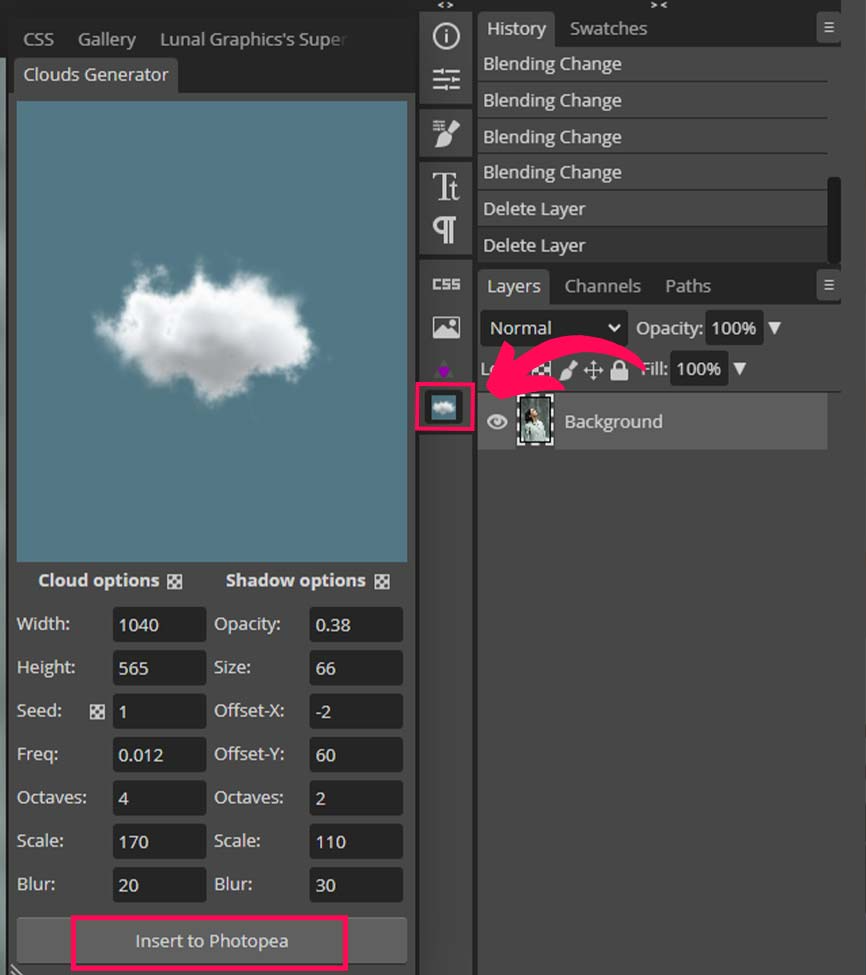
The cloud generator plugin works the same way. Click on the thumbnail and dial in the settings. You will see the changes via the preview tab inside the plugin.
Click on the “Insert to Photopea” button, and the cloud will be added as a png layer.
How to Create Glow in Photopea?
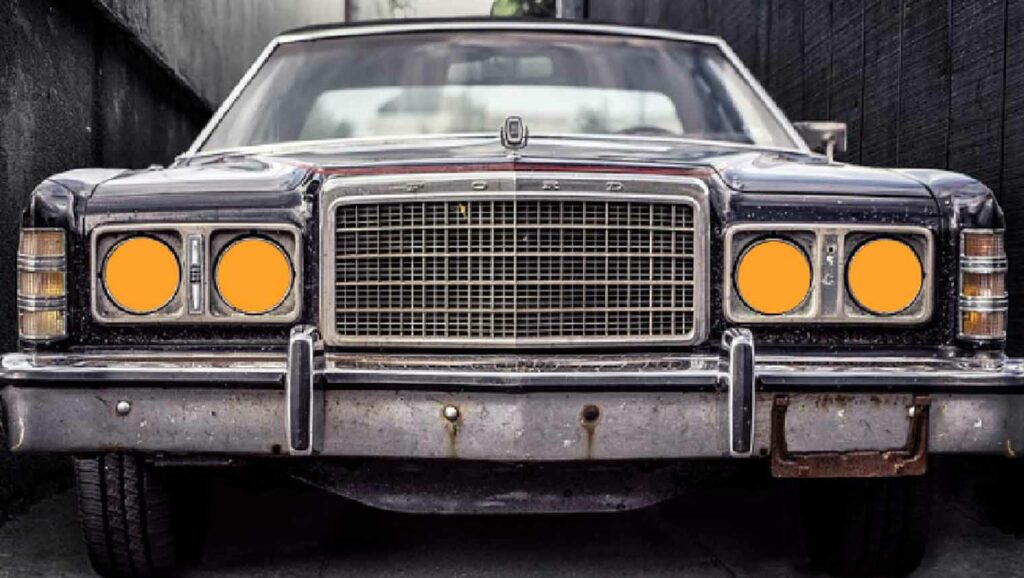
Let’s work on a more practical example and create a super glow in photopea.
We will explain on how to turn on car lights in photopea.

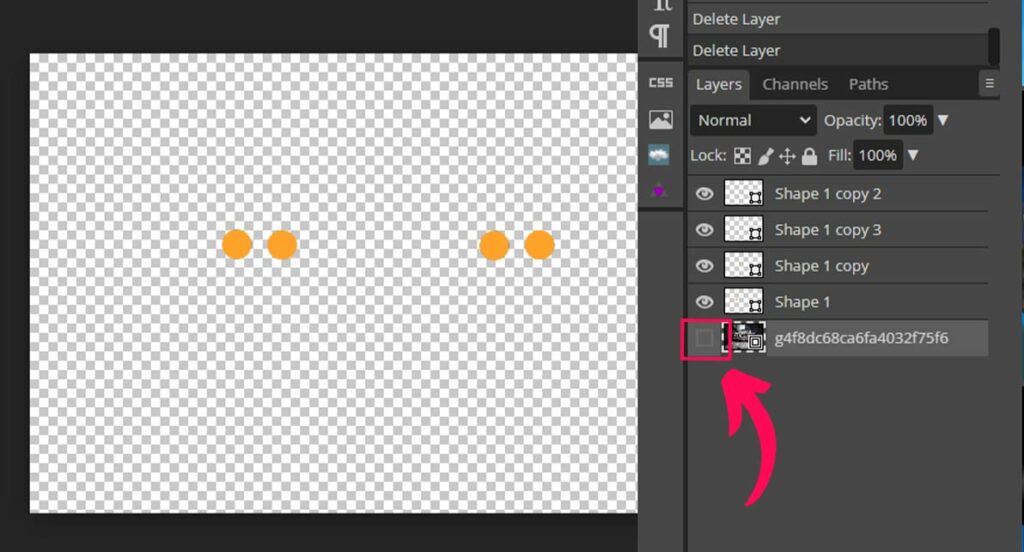
Step 1: Create the Circles
To turn on the lights, we need the same shapes as of lights to turn them on.
So, we will create 4 circles the same size as lights.
You can choose whatever color you like.
Select the ellipse tool from the tools bar or press Shift + U twice.
Draw the circles on the lights.
Step 2: Create the Glow
Hide the car layer and keep the circle layers on to create a glow.
Click on the super bloom plugin.
- Make the Threshold 0 and leave the rest of the settings as is.
- Or you can play with the other settings to see what they do to the glow.
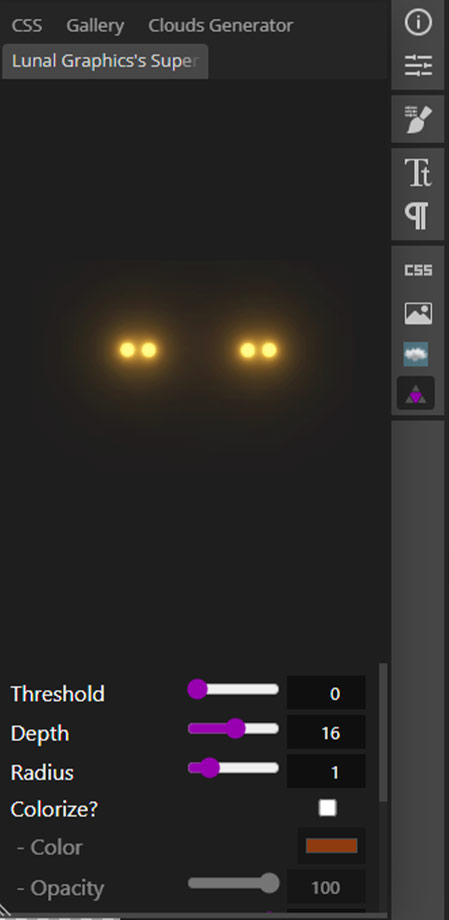
Hue Shift will change the color of the glow. Change this setting if you want a different color for the glow.
- Click on the Add to Document button.
- And turn the car layer back on.
- Hide the circle layers, and you have your glow.
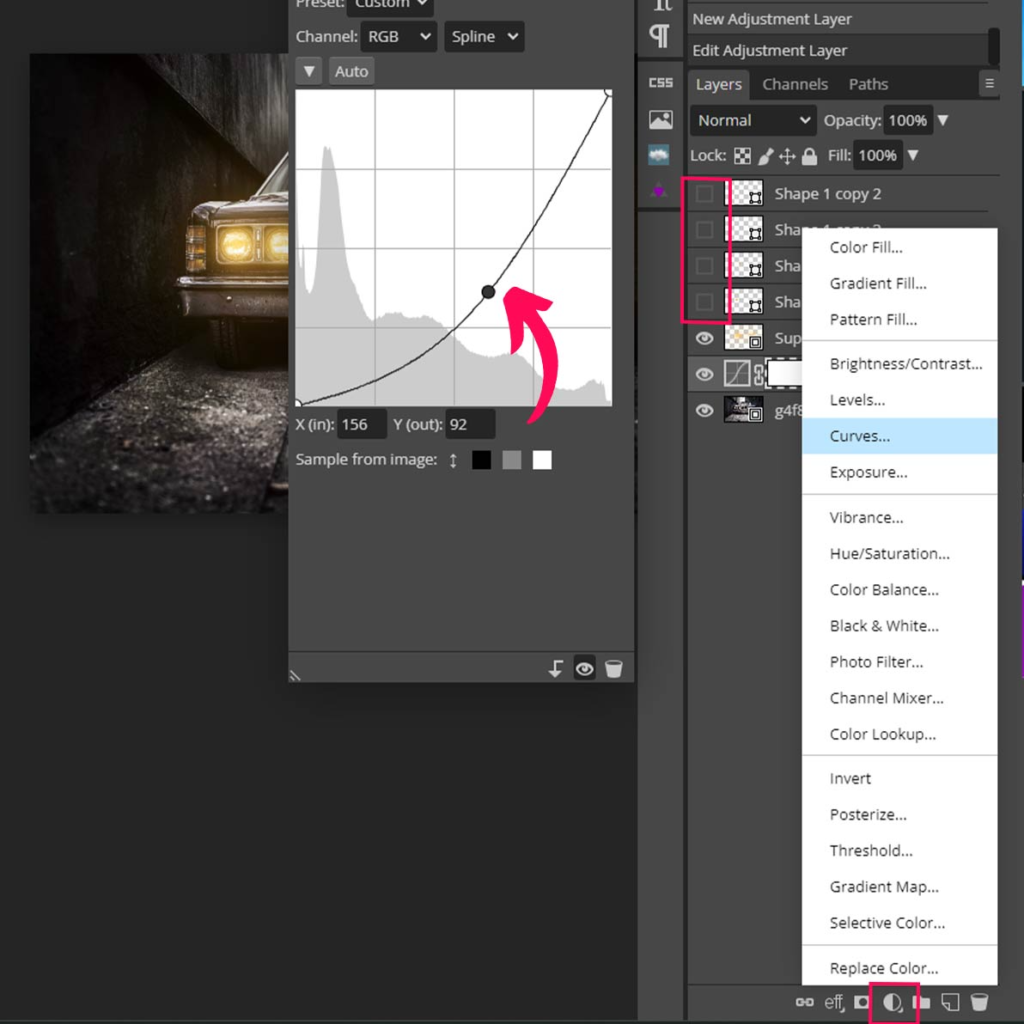
To make it look more realistic, we need to darken the car. To do that, we will create the curves adjustment layer.
To do that, select the car layer first, then go to the adjustment layer button and create a curves adjustment layer.
Drag down the curves from the middle to darken the image.
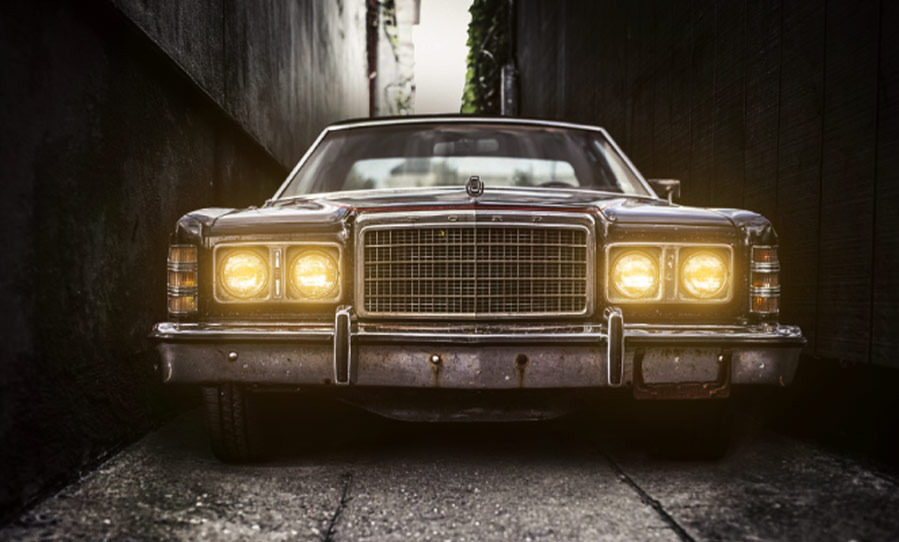
Here’s the final result.
FAQs
Why Use Plugins Inside Photopea?
Increased Functionality: Plugins can significantly expand the functionality of Photopea.
Improved Productivity: With plugins, you can automate repetitive tasks, saving time and improving overall productivity.
Customization: Plugins can be customized to meet your specific needs and requirements.
Access to Unique Tools: Some plugins offer unique tools and features not available in the software. These can help you achieve specific effects or styles that would be difficult to achieve otherwise.
How do I remove Plugins from Photopea?
The uninstallation process is simple, go to the plugin page and click on the plugin you have installed.
You will see the uninstall button instead of install.
Click on uninstall, and the plugin will be removed from the photopea.
Are Photopea Plugins free?
Yes, the Photopea plugins are free to use.
Will Photopea slow down after plugin installation?
No, plugins will not slow down Photopea.
Can I install Photoshop Plugins in Photopea?
Unfortunately, you cannot install Photoshop plugins in Photopea. Photopea does not support the same plugin architecture as Adobe Photoshop. Simply put, the plugins are written in different programming languages and cannot be used interchangeably.
Conclusion
We have covered everything from installing the plugins to how to use them via practical examples. Photopea doesn’t have many plugins, but some are really good, as we have seen with super bloom and cloud generator.
We have created glowing lights for a car using the super bloom plugin. And we darkened the car image to make the lights more realistic.
We recommend using Photopea plugins whenever you can save time, as they will save you a lot of work.
Test different plugins, and you may find something unique.
Thanks for reading & feel free to check out more of our articles!
Expert Rating
Summary
The plugins in Photopea are very few but they do add a little bit of functionality to Photopea.They need almost no practice to master because they are straight forward to use. Use the available plugins to create certain effects easily i.e. glow, clouds.


