

Have you ever wanted to add a touch of creativity to your videos by incorporating captivating text or animation? Look no further, as this step-by-step guide will show you how to do just that in DaVinci Resolve 18.
By the end of this tutorial, you’ll have a solid understanding of how to add titles, text, fusion titles, and sub-titles, create animations with text, and keyframes to your projects.
How do I add text in DaVinci Resolve?
In this tutorial, you will learn to add text easily and edit it using several options. For example, you will learn to add a background and change the properties of the text as well.
Step 01: Importing Media
To do this task,
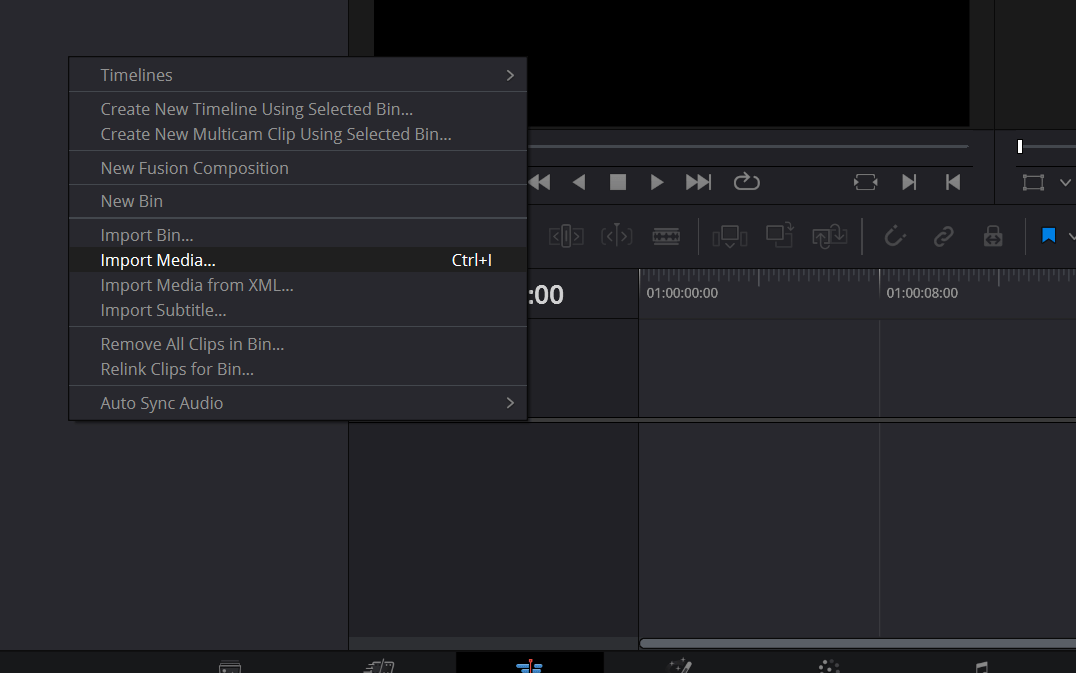
- Open the DaVinci Resolve 18 application.
- Right-click on the Media Pool section.
- Choose the option Import Media as displayed below.
- Alternatively, use the keyboard shortcut Ctrl/Cmd+I to open the media.
Go to the location where the media is placed on your computer or PC. Choose the media and click Open to display it on the DaVinci Resolve 18 application. Now you are set to edit the clip as per your requirement.
Step 02: Go to the Edit page
As you know, there are several pages in DaVinci Resolve specialized for each task. To add text, we will use the Edit Page mainly.
To go to the Edit Page,
- Go to the bottom of the page.
- Click on the Edit Page option (displayed below).
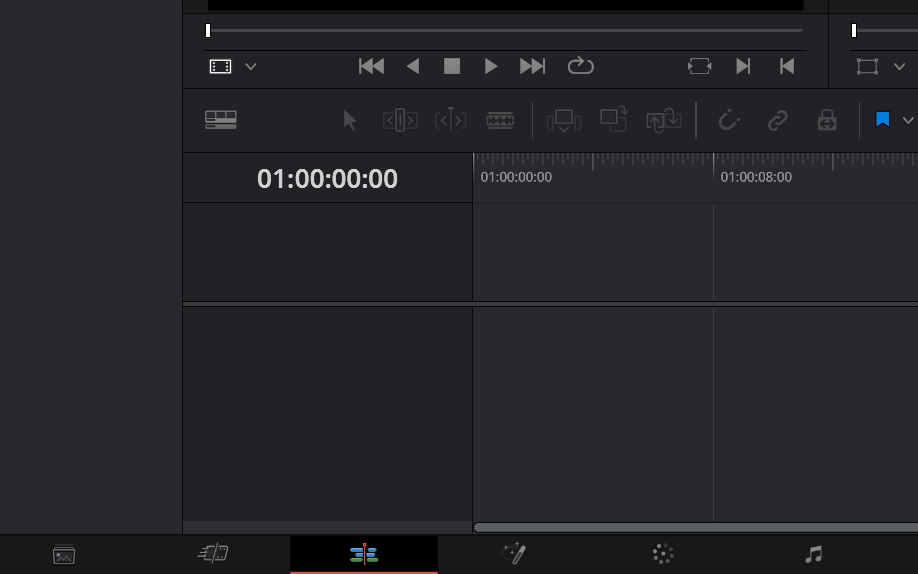
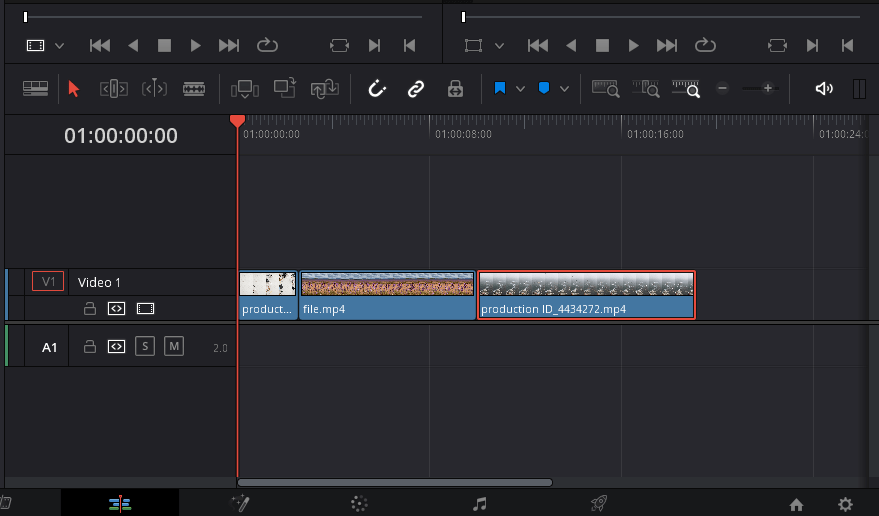
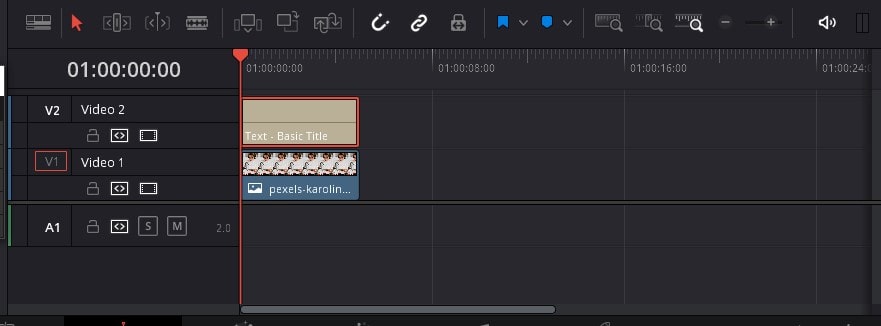
As soon as you click, you will be taken to the Edit Page. Once you are on the Edit Page, make sure to drag your clips to the timeline and set your timeline as well. In the process of adding text, we will use the timeline specifically to perform the tasks. Next, you can begin by adding the text.
Step 03: Adding title, text, and Fusion Titles
Before you add the text, you can hide the Media Pool to make more space . To close the Media Pool,
- Click on the Media Pool icon in the top left corner.
- Then, the Media Pool window disappears.
Method 01: How do I add a title in DaVinci Resolve 18?
Next, to open the title window,
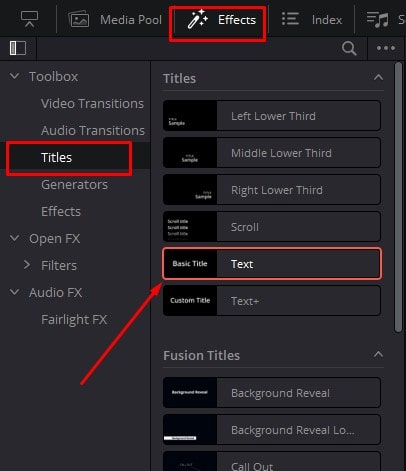
- Go to the Interface Toolbar of the Edit Page.
- Click on the Effects option to drive to the text. The effect window displays a couple of effect options for editing.
- Click on the Titles option to add the text.
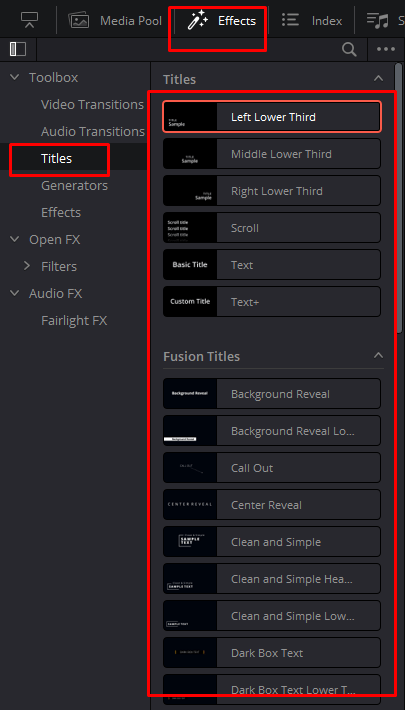
You will see a long list of titles to choose from. As an example, if you choose the Left Lower Third title option, text will be added on the bottom left side of the clip.
To get started to pick the right title,
- Hover over each title option.
- When you hover, you will see a preview of the text’s location and effects such as fading out (if any).
To add a title,
- Click and drag the specific title onto the timeline.
- Once you put it on the timeline, click and drag it to the left, right, up or down depending on which clip you want the text to appear.
- Once you place the title on the timeline, by using the end corners of the title, you can adjust the extent to which the title must display.
For example, if the title goes beyond the duration of the clip,
- You can place the cursor on the end corner.
- Then, a bracket-like option appears. This allow you to drag and shorten or extend the title as per your requirement.
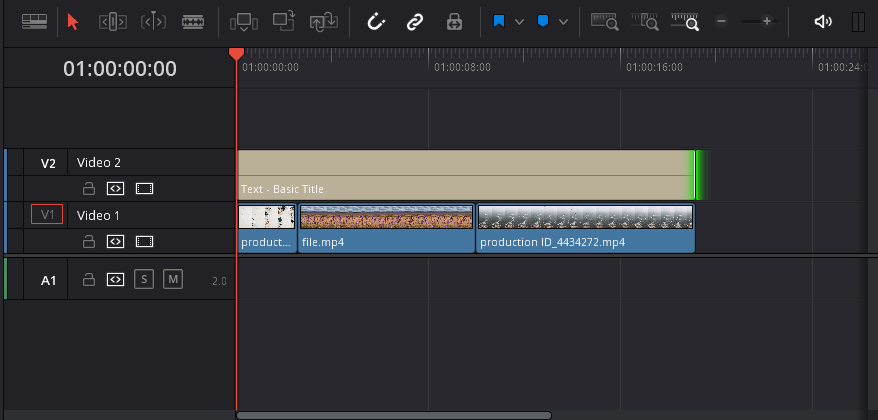
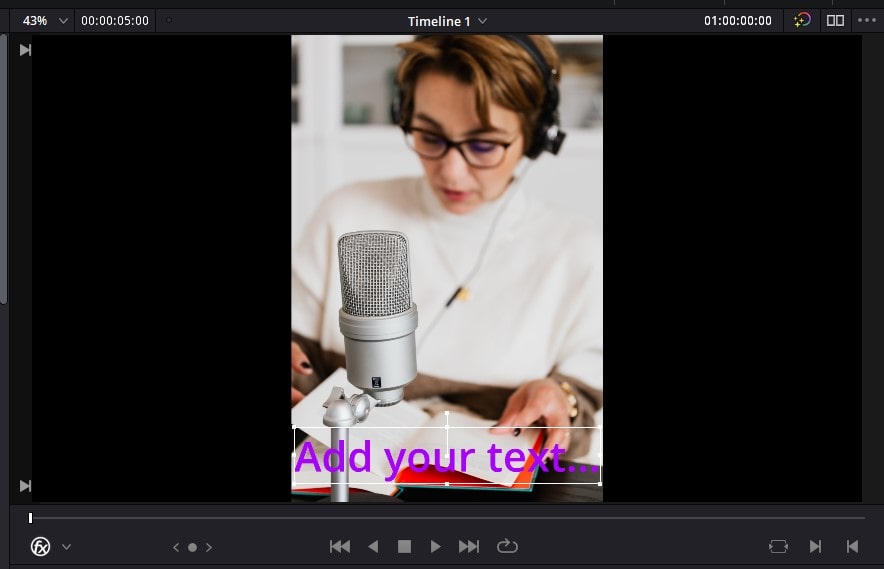
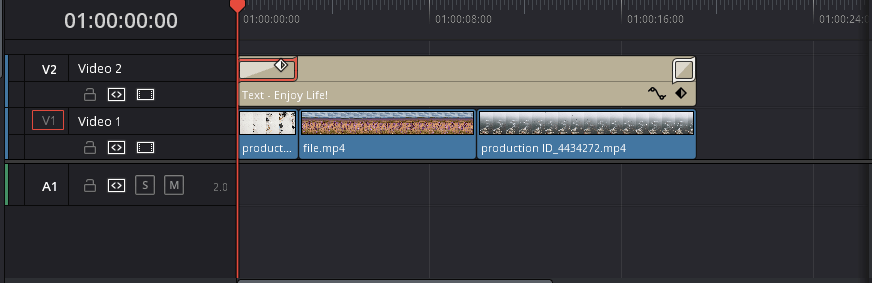
- Once you place the title, it will look just like another clip is placed over a video clip (Check the above image for clarification).
In this tutorial, a basic title is picked to show you a couple of examples. After you place the title, the default text appears. Next, you need to edit the default text.
Method 02: How do I add Text in DaVinci Resolve 18?
To open the list of Titles,
- Go to the top left corner of the Edit Page.
- Click on the Effects option.
- Click on the Titles option on the left side to add the text.
Under the Titles category, you will notice the ‘Text’ option.
- Choose the preferred title.
- Click and drag the text onto the timeline.
- Make sure to adjust the title clip based on the duration you want it to appear on the video clip.
To customize the text as per your requirement,
- Go to the Inspector at the top right corner of the Interface toolbar.
- Among a couple of settings, you can change the text, font colour, position and much more.
If you want to learn to edit texts in depth, jump to Step 05 to learn more!
Method 03: How do I add a Fusion Title in DaVinci Resolve 18?
To add the Fusion title,
- Go to the Interface toolbar of the Edit Page.
- Click on the Effects option.
- Click on the Titles option and scroll until you find the Fusion title category.
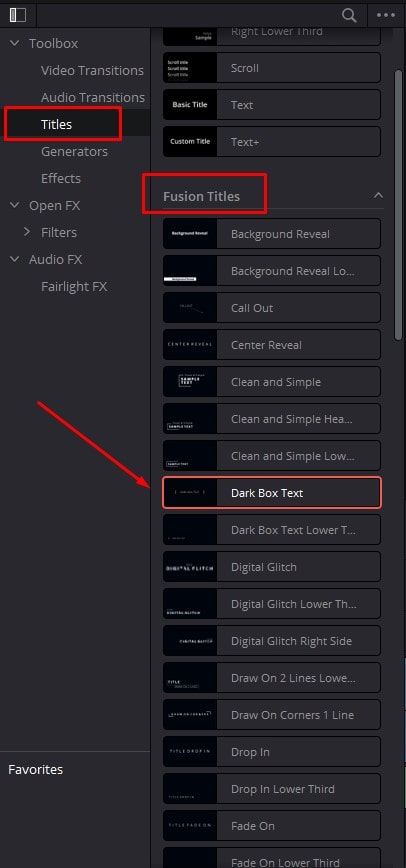
There are plenty of Fusion titles to choose from.
To pick the Fusion titles,
- Hover over each Fusion title option to preview it.
- Once you pick one, it’s time to add it to the timeline and edit it further.
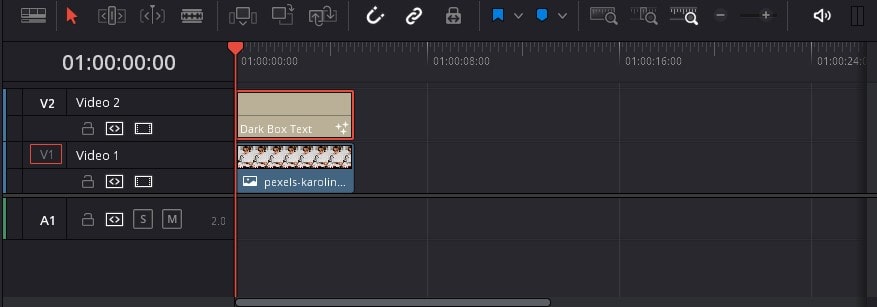
To add a Fusion title,
- Click and drag the specific Fusion title onto the timeline.
- Adjust the length and position of the title.
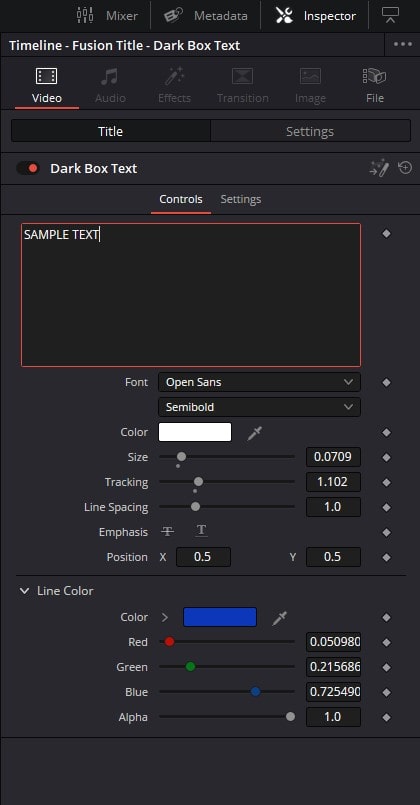
Now, you can edit your Fusion title further using the Inspector. Hop onto the next step to learn how to edit these Fusion titles in depth.
Step 05: How do I add and edit a Title in DaVinci Resolve?
To edit the existing text,
- Click on the title clip on the timeline to select it.
- Open the Inspector by clicking on it from the Interface toolbar.
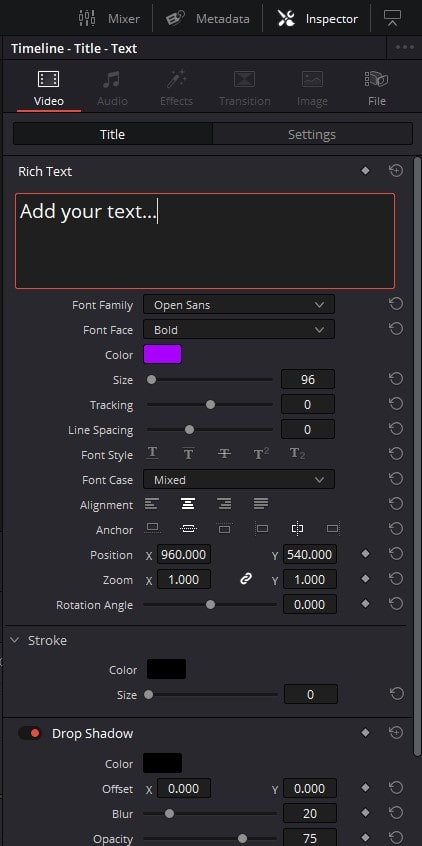
- Once you click on the Inspector, the title properties can be adjusted from the Video button > Title option.
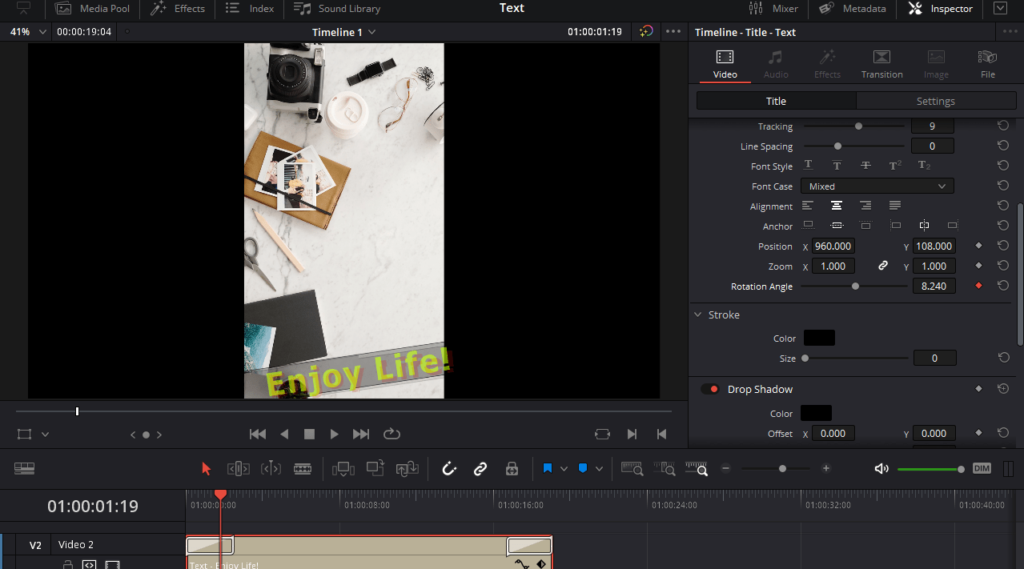
In the text box, you can add the preferred text. From the Inspector, you can change the font type, colour, position, size, tracking, and background and plenty other adjustments to your texts.
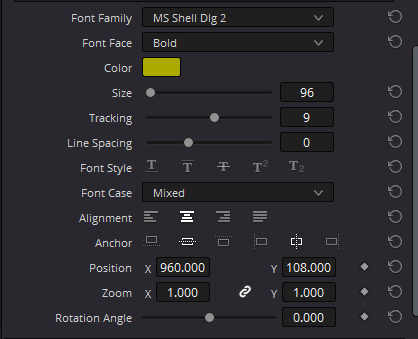
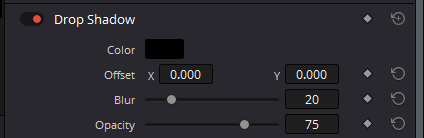
Apart from that, you add effects such as stroke and drop shadow to your text. If you choose the add a Drop shadow, alter the colour, offset or x & y axis, blur rate, and its opacity.
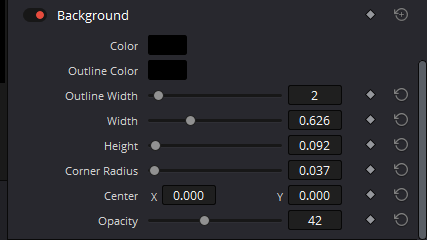
If you choose the add a background, change the colour, outline colour, outline width, width, height, and other settings displayed under the Text > Background option. If you need to delete the text, click on the text placed on the timeline and press the Delete key.
How do I add text animation in DaVinci Resolve?
In this section, we will show you how you can animate text effectively. Whether it is zoom, circle or any other animation, it is possible in DaVinci Resolve 18. In DaVinci, you will find over 15+ text animations to choose from. Apart from that, you will learn what keyframes are and how to add them to make creative animations in a short time.
Step 01: Add the text
To animate a text, first you need to add a text. By following the above set of steps, you can add text. A quick recap to add text (Follow the above tutorial):
- Go to Effects in the Interface toolbar.
- Click on the Title option.
- Click and drag the preferred title onto the timeline and adjust its duration.
- Select the title and open the Inspector.
- Insert the new text and edit it as per your requirements.
Once you add the text, you can follow the below steps to animate the text creatively.
Step 02: Add the animation
To apply the animation,
- Go to Effects.
- Choose Video transitions.
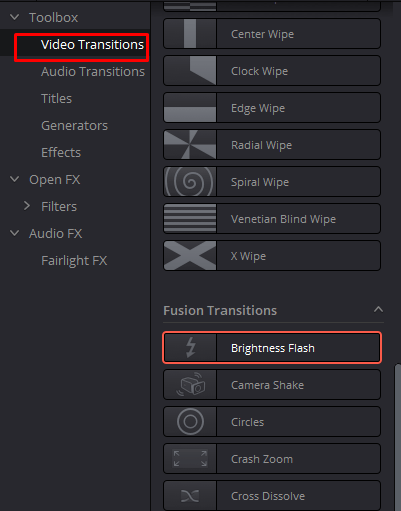
To pick an animation,
- Hover over each animation to test out different animations.
- Then, you will find the right choice.
To add the animation,
- Click and drag the specific animation and place it over the text clip in the timeline.
- Then, you would notice that the animation clip is placed.
- Next, you can adjust the extent of the animation by clicking and dragging the edges.
Step 03: Edit the animation
To edit the animation,
- Click on the animation clip on the timeline
- Go to the Inspector.
- Under the Transition button, you will find several options to adjust the animation.
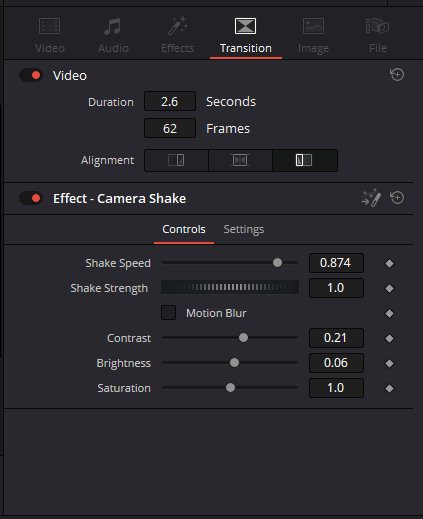
You can also add a motion blur effect to customize the animation as displayed above. If you need to delete the animation, click on the animation in the timeline and press the Delete key.
Add on – Step 04: How to animate using keyframes?
A transition applied to a specific starting and ending point in the timeline is called a Keyframe. For example, you can apply an animation to play from 00:00 to 00:05 only.
To add a keyframe,
- Click and select the text clip from the timeline.
- Move the playhead to the time where you want the animation to end.
- Open the Inspector and choose the video tab.
- Pick the specific animation you wish to add and click on the diamond icon beside it.
- This animation will applied within the duration chosen.
For example, you can change the rotation angle and click on the diamond icon beside it. Once you enable it as a keyframe, the diamond will become red (Note: In the below image, under the rotation angle, the keyframe is enabled: take note of the red diamond).
By following the above method, you can add one or more keyframes. In the below example, 2 keyframes are added, one to the beginning and another to the end of the title clip.
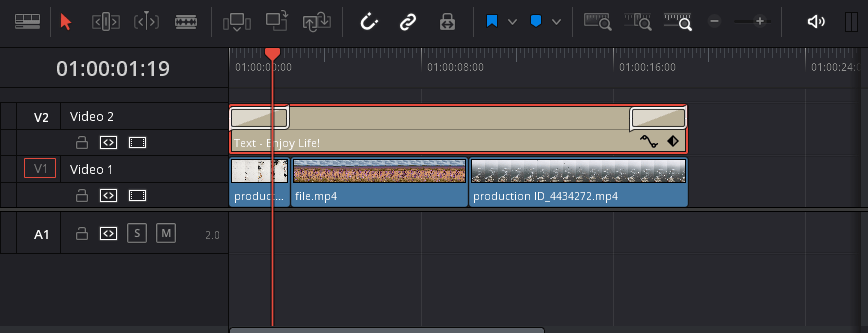
In the timeline, the diamond icon is displayed and if you click on it, it displays the keyframes applied to the clips.
How to Add Subtitles in DaVinci Resolve
In this section, you learn to add subtitles to your videos. Subtitles come in handy if you want to add a translation, additional information, and to create an informative video piece.
Step 01: Setting up the document
To do this task,
- Right-click on the Media Pool.
- Choose the option Import Media as displayed below.
- Alternatively, use the keyboard shortcut Ctrl/Cmd+I to open the media.
Go to the location where the media is placed on your computer or PC. Choose the media and click Open to display it on the DaVinci Resolve 18 application. Now you are set to edit the clip as per your requirement.
Step 02: Create a Subtitle track
You need to be on the Edit Page to add the subtitle track.
To add the subtitle track,
- Go to Effects.
- Go to the Subtitle category.
- Click and drag the chosen Subtitle clip onto the timeline and adjust its duration.
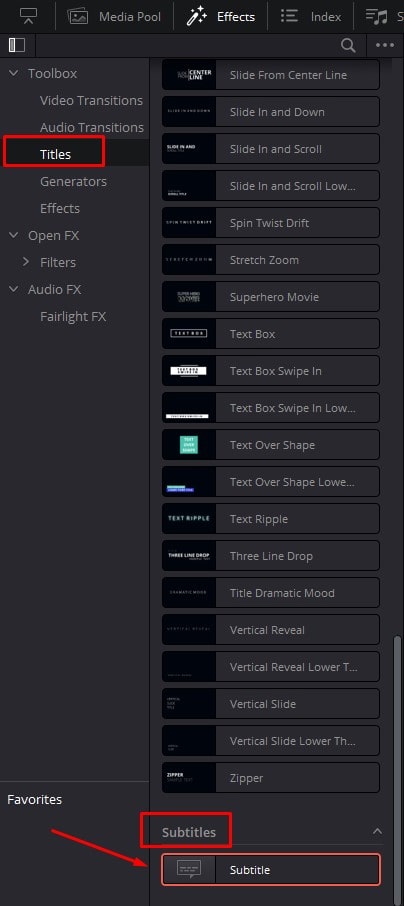
Alternatively, you can follow another method to create the subtitle track,
- Make sure to place the playhead at the duration where you want the subtitle clip to start.
- Under the timeline, right-click on the clip you want to add subtitles to.
- Choose the option ‘Add Subtitle track’.
- The subtitle track will start from where you placed the playhead.
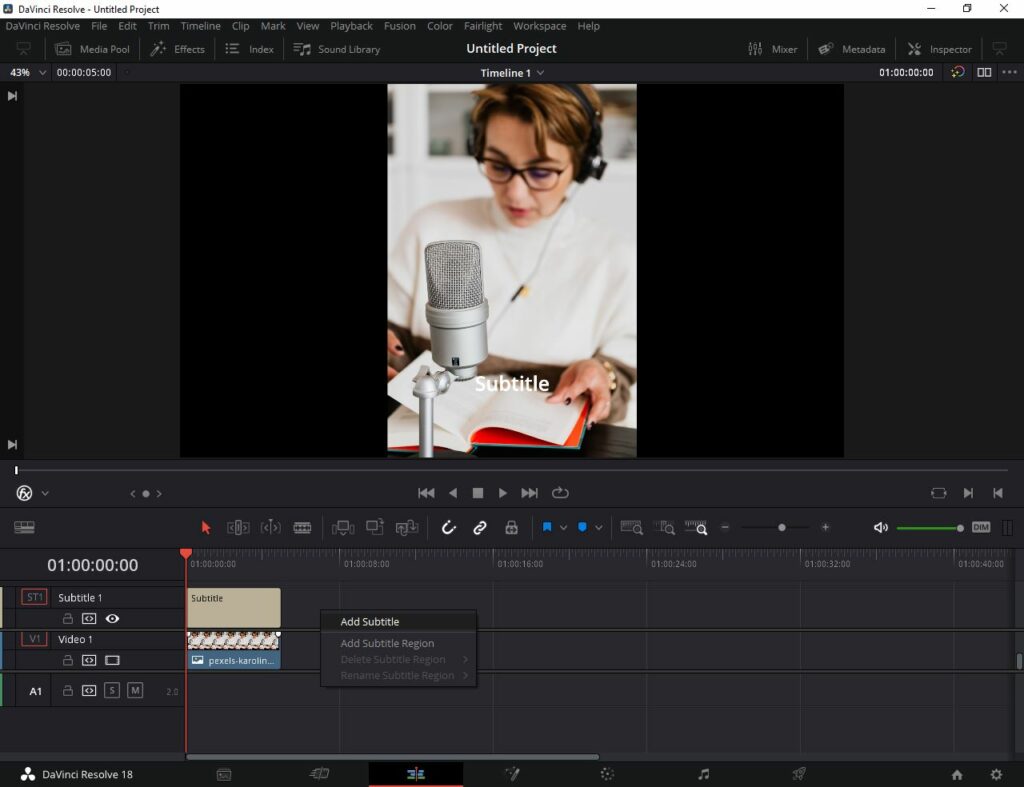
Step 03: Edit the Subtitle
To edit the subtitle track,
- Click to select the subtitle track.
- Go to the Inspector to change the subtitle settings.
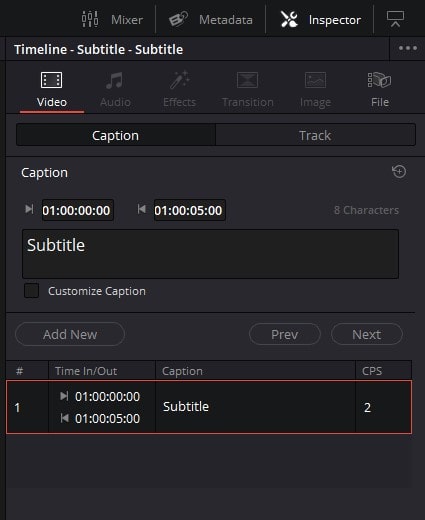
- Add the necessary text to appear under the text box of the sub-title track
- If you want to adjust the duration of the subtitle clip, go to the caption option under the Inspector and change the duration as per your requirement.
Conclusion
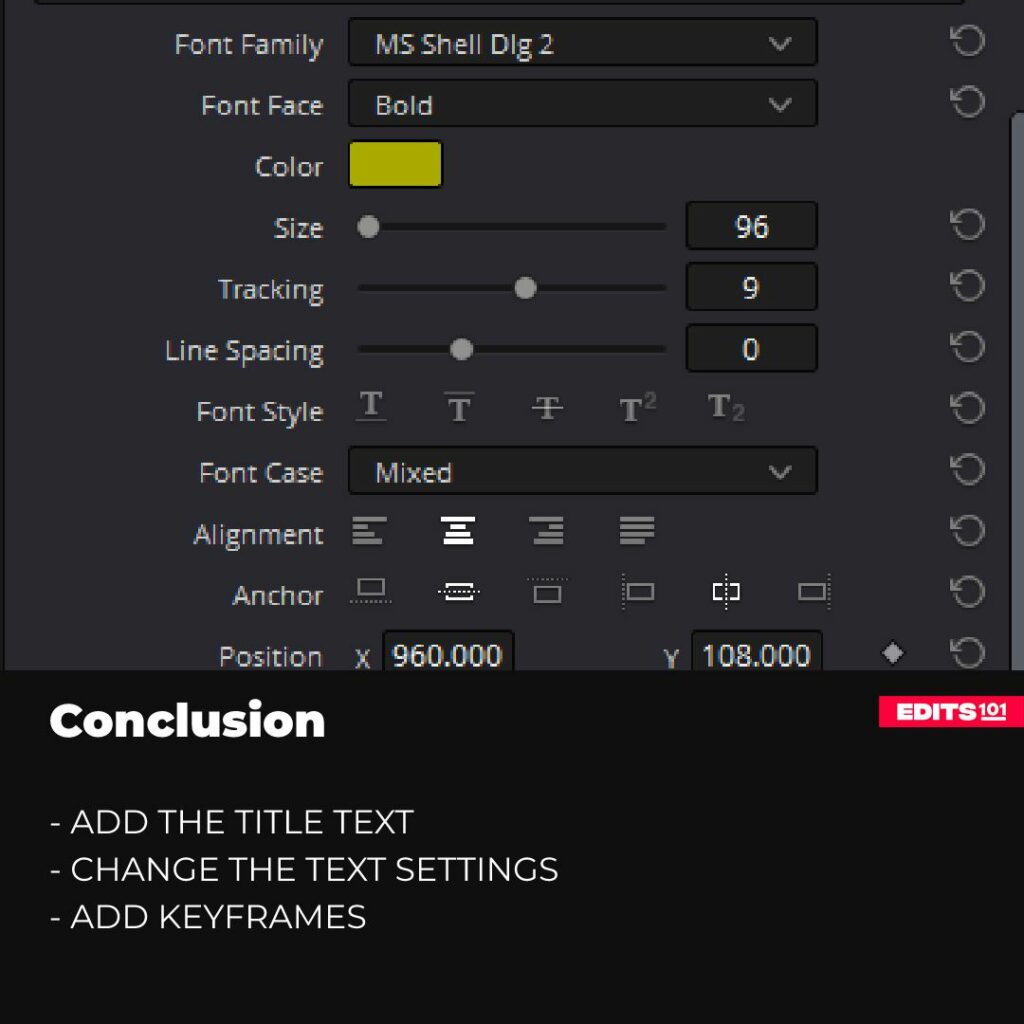
In conclusion, adding text in DaVinci Resolve 18 is an easy process once you understand the basics. By following the step-by-step guide in this article, you’ll be able to add captivating text, titles, fusion titles, subtitles, keyframes, and animations to your projects in no time!
Thanks for reading & feel free to check out more of our articles!
Expert Rating
Summary
In summary, adding text, title, fusion titles and subtitles is an easy task. You need to simply use the specific clip from the Titles category and create animations as well.


