
Facing the challenge of removing a background from a video clip? This could be for various reasons, such as replacing the background with a different image or video, isolating a subject for compositing, or just to make your video look more professional.
In this guide, we will show you how to remove the background from a video consisting of a black or white background, green screen and solid colours in DaVinci Resolve 18, using its advanced features and tools.
How to Remove Black or White Background Davinci Resolve 18
In this tutorial, you will learn how to remove the background consisting of the black or white of the clip using Luma Keyer. Just have to add it and adjust the sliders accordingly to hide the black or white background.
Step 01: Setting up the document
Initially, you need to open a clip or project,
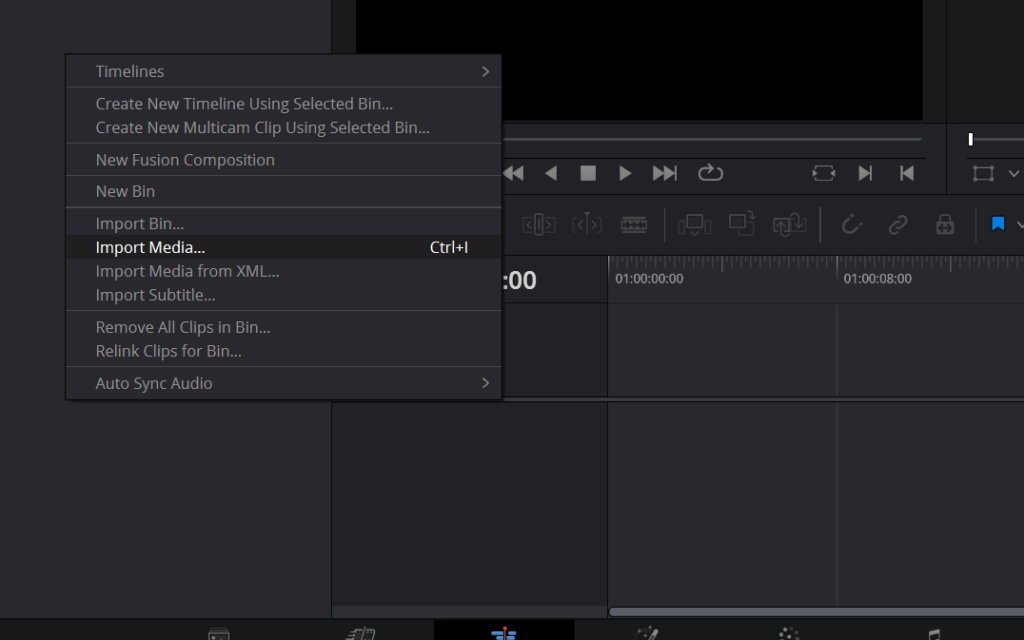
- Open the DaVinci Resolve 18 application.
- Right-click on the Media Pool section.
- Choose the option Import Media as displayed below.
- Alternatively, use the keyboard shortcut Ctrl/Cmd+I to open the media.
Go to the location where your media is stored, select the video clips as necessary and click on Open.
Step 02: Edit page > Set the Timeline
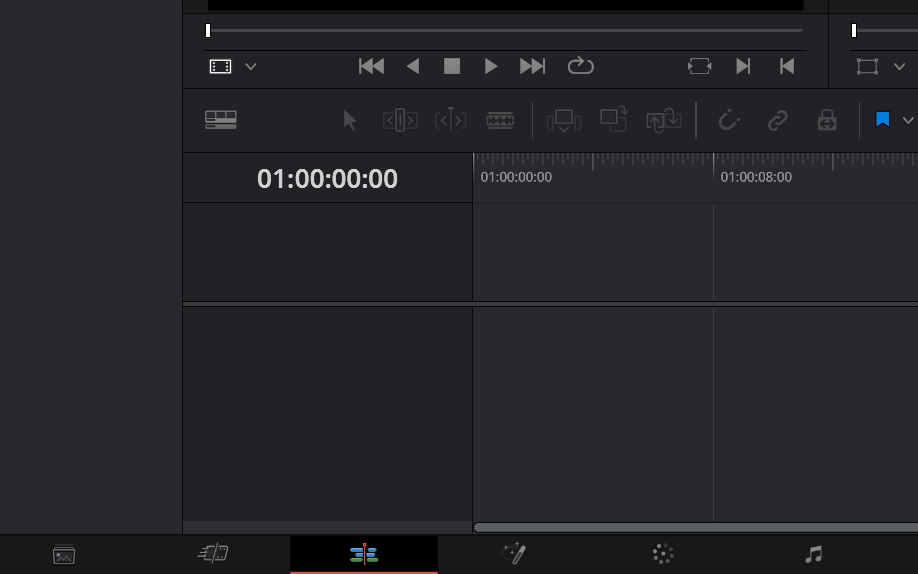
To go to the Edit page,
- Go to the bottom of the canvas.
- Click on the ‘Edit page’ icon.
Next, you should be on the Edit page to change the background of the clip having a white or black background.
Click and drag the video to the timeline and adjust it as required.
Then, click on the clip within the timeline and make sure it is selected.
Step 03: Fusion page > Add the Luma Keyer node
Go to the Fusion page,
- Go to the bottom of the canvas.
- Click on the ‘Fusion page’ icon.
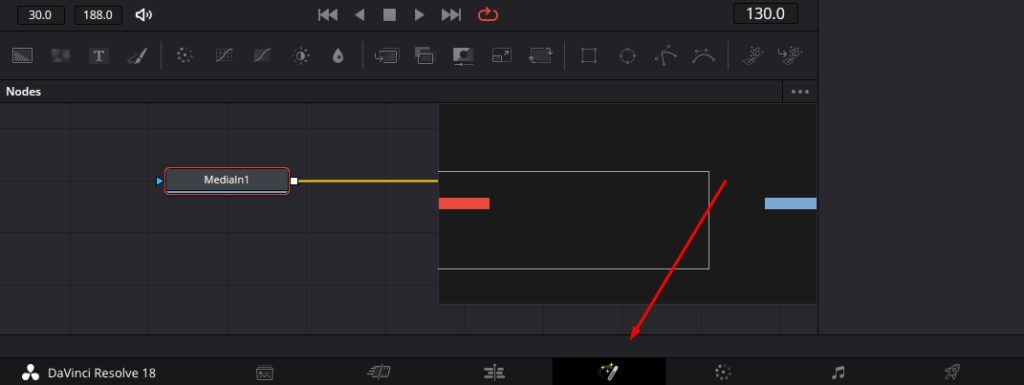
Once you are on the Fusion page, you will notice that the ‘MediaIn’ and the ‘MediaOut’ nodes are connected.
Follow the below steps to set the nodes:
- Select the ‘MediaIn’ node displayed on the timeline
- Press ‘Shift+Spacebar’. This opens a list of tools you can choose from.
- Click and select the Luma Keyer (LKy).

- Click on ‘Add’.
- The Luma Keyer will be added to the nodes.
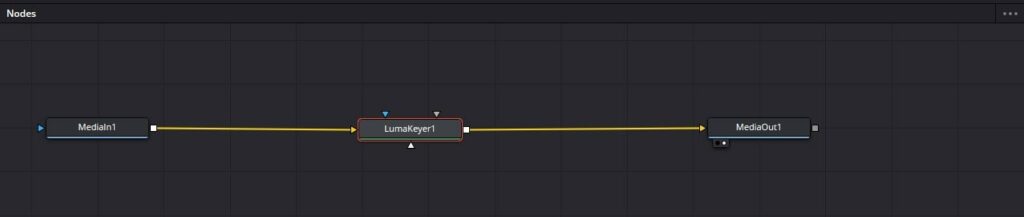
If the Luma Keyer option isn’t added to the nodes automatically, you can do this manually:
- Connect the ‘MediaIn output’ with the ‘Luma Keyer input’.
- Then, connect the ‘Luma Keyer output’ to the ‘MediaOut input’.
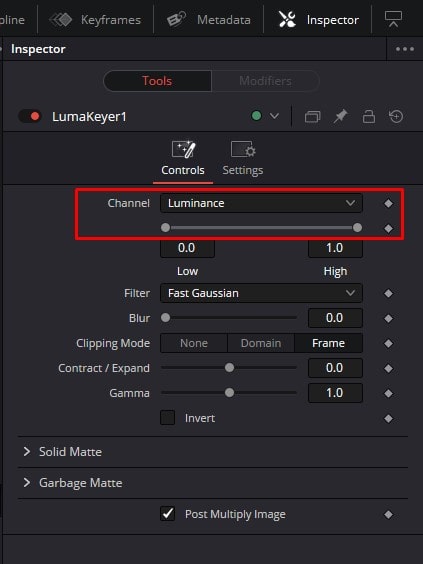
Step 04: Adjust the Luma Keyer settings
To change the settings of the Luma keyer first make sure that it is selected. Then,
- Go to the ‘Inspector’.
- Find the controls of the LumaKeyer.
- Adjust the ‘luminance’ and ‘contrast’ slider as per your requirement to remove the black or white background on the clip.
How to remove background in daVinci resolve 18 with green screen
To remove a green screen in DaVinci Resolve 18, we will use the brush of the Open FX Overlay.
Step 01: Setting up the document
Initially, you need to open a clip or project,
- Open the DaVinci Resolve 18 application.
- Right-click on the Media Pool section.
- Choose the option Import Media as displayed below.
- Alternatively, use the keyboard shortcut Ctrl/Cmd+I to open the media.
Go to the location where the media is placed on your computer or PC. Choose the media and click Open to display it on the DaVinci Resolve 18 application.
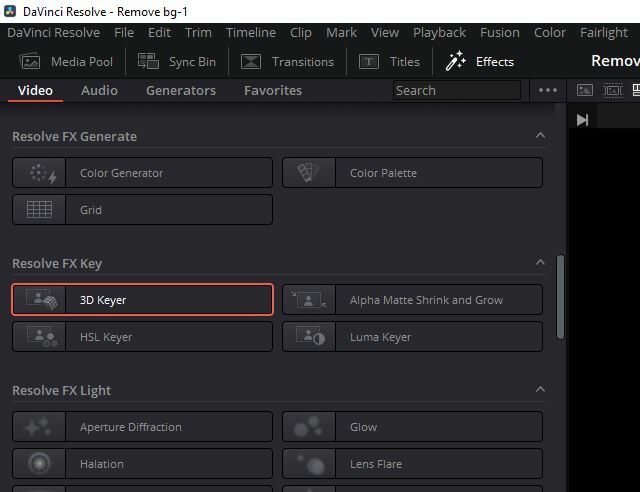
Step 02: Choose the 3D Keyer
Now, you need to remove the green screen background from the clip.
Go to the ‘Effects Library’.
Next, choose the 3D Keyer option:
- Choose the ‘Resolve FX Key’ option.
- Click the ‘3D Keyer’.
- Next, click and drag the ‘3D Keyer’ and place it over the green screen clip in the timeline.
Step 03: Remove the green screen
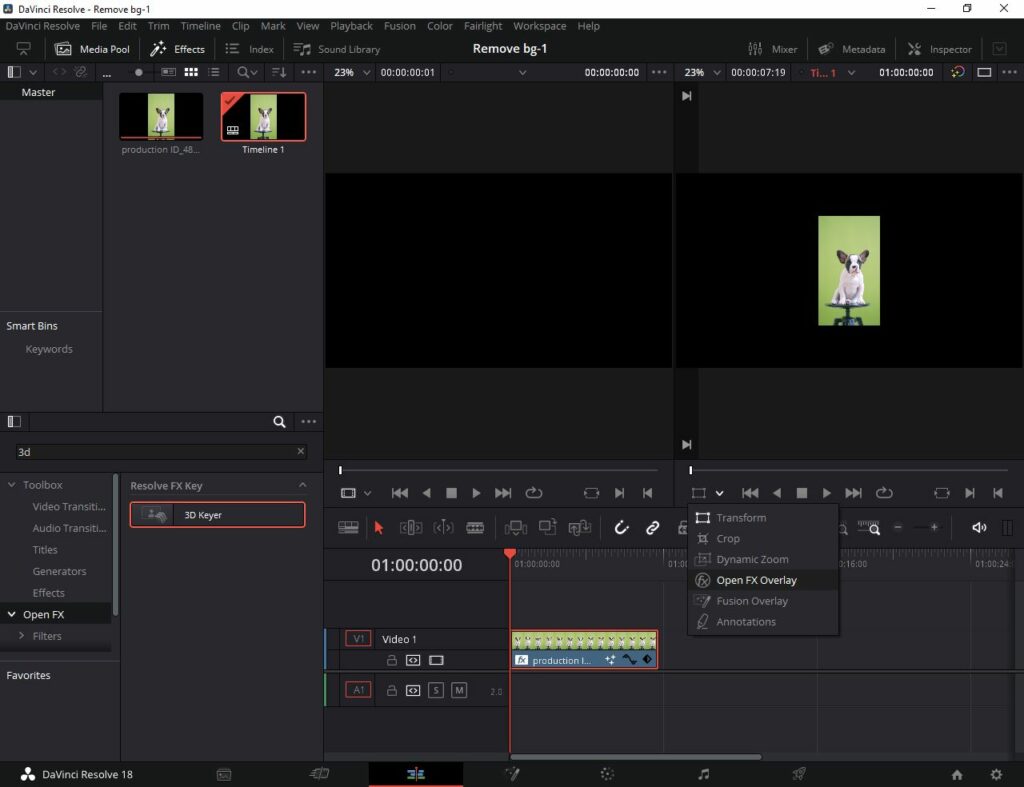
To pick the Open FX Overlay option,
- Click on the green screen clip with the 3D Keyer.
- Go to the Viewer and choose the ‘Open FX Overlay’ option as displayed below.
Next, go to the Inspector and click on the Effects button which includes three tools.
Click n the first tool which is named Pick.
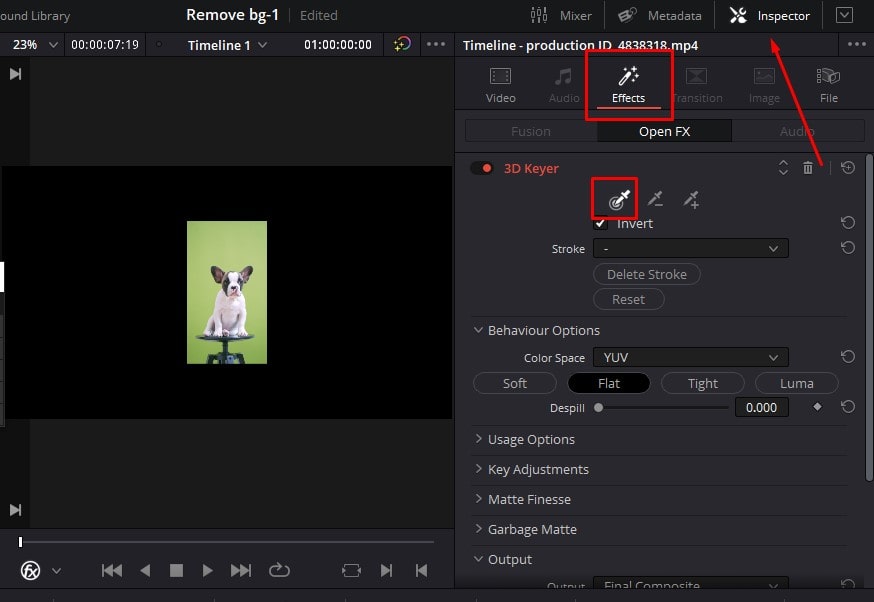
Then, click on the green screen in the Viewer. As soon as you click, you would notice that the green screen disappears.
Step 04: Resize the Content on the clip
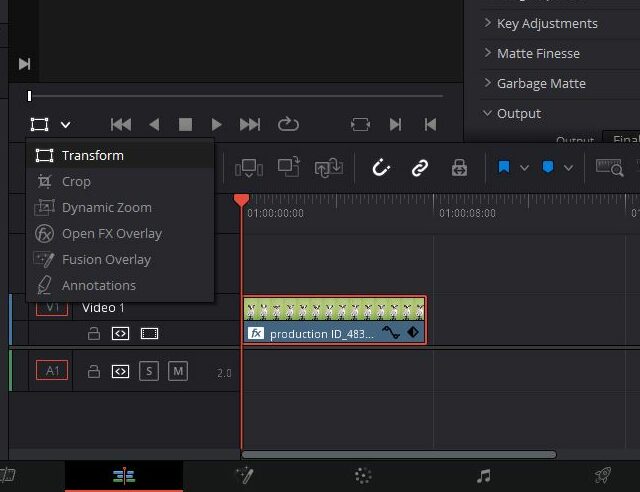
If you want to resize the subject after removing the green screen:
- Go to the Viewer and click on the ‘Open FX’ option to reveal the drop-down menu.
- Next, choose ‘Transform’.
- Adjust the size of the subject using the control handles.
How to Remove a solid Colored Background Using DaVinci Resolve
In this tutorial, we will teach you to remove a solid colored background. To do this, we will use the Color Picker tool.
Step 01: Setting up the document
Initially, you need to open a clip or project,
- Open the DaVinci Resolve 18 application.
- Right-click on the media pool section.
- Choose the option Import Media as displayed below.
- Alternatively, use the keyboard shortcut Ctrl/Cmd+I to open the media.
Drive to the location where the media is placed on your computer or PC. Choose the media and click Open to display it on the DaVinci Resolve 18 application.
Step 02: Edit page > Set the Timeline
To go to the Edit page,
- Go to the bottom of the screen.
- Click on the ‘Edit page’ icon.
Click and drag the video to the timeline and set the timeline as preferred.
Step 03: Color page > Add Alpha Output
Go to the Color page,
- Go to the bottom of the canvas.
- Click on the ‘Color page’ icon.
Next, go to the Node Editor.
In the Node Editor,
- Right-click on the node section.
- Click the option ‘Add Alpha Output’ to add to the nodes.
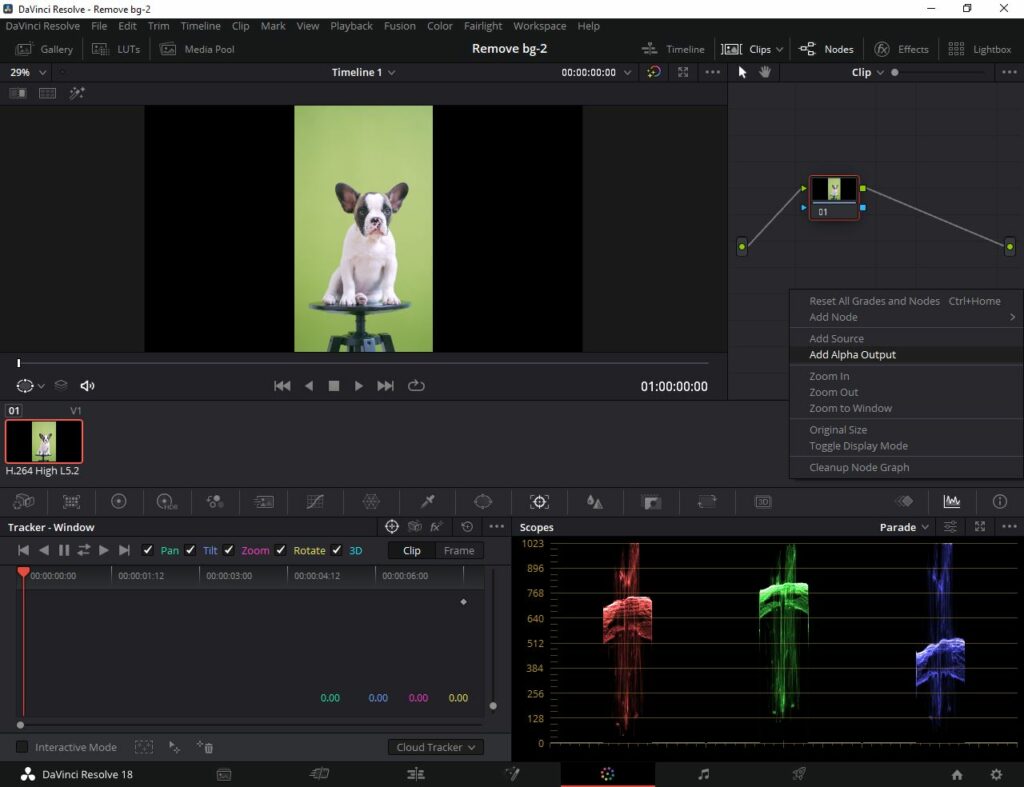
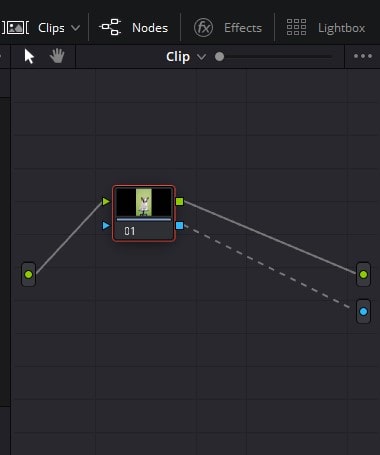
- The blue point indicating the Alpha Channel will be added to the Node Editor.
- Simply, join it with the blue output of the clip.
Step 04: How to use the Color Picker and remove the background
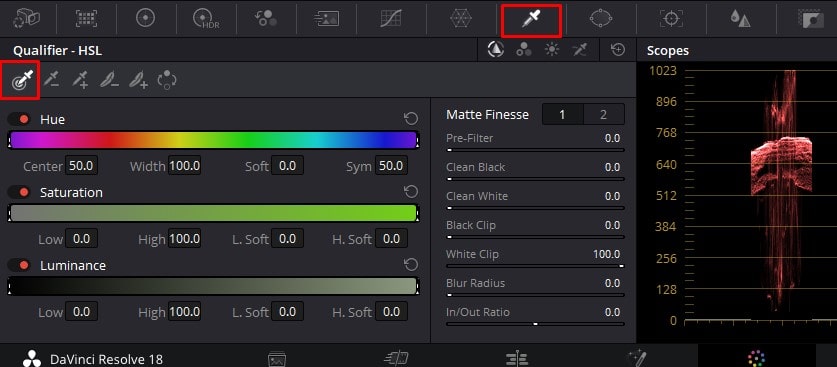
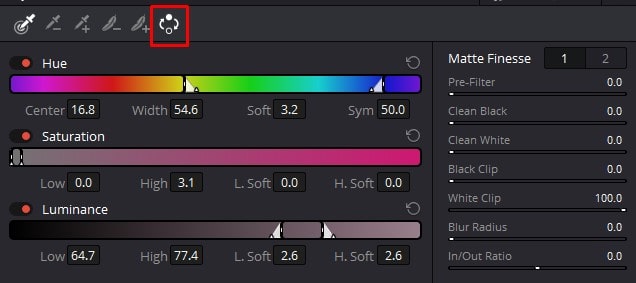
Go to the Centre Palettes and,
- Choose the ‘Qualifier‘ Palette.
- Click on the ‘Color Picker’ (first icon).
- Go to the Viewer and click on the background colour you want to remove.
- Once you click on it, the colour is selected by the Color picker and stored on it.
- Click on ‘Invert’ (last icon) to invert the colour selection.
That’s it! Now you would notice that the solid colored background has been removed. To refill the colours or edit them further, you can use various effects. That’s it for removing solid colored background in DaVinci Resolve 18.
Cut out objects or persons from the background in DaVinci Resolve 18
In this section, you will learn how to cut out an object or a person from the background. The basic steps we will learn include masking, tracking and finally exporting the clips.
Step 01: Importing Media
Initially, you need to open a clip or project,
- Open the DaVinci Resolve 18 application.
- Right-click on the Media Pool section.
- Choose the option Import Media as displayed below.
- Alternatively, use the keyboard shortcut Ctrl/Cmd+I to open the media.
Go to the location where the media is placed on your computer or PC. Choose the media and click Open to display it on the DaVinci Resolve 18 application.
Step 02: Masking
Start by selecting the clip you want to mask from the timeline before proceeding. Next, go to the Color page.
To go to the Color page,
- Go to the bottom of the screen.
- Click on the ‘Color page’ icon.
The colour window offers multiple options in the colour tab. To remove the background from the clip, we use Magic Mask. Note that the Magic mask option is available only in the DaVinci Resolve 18 studio version.
Once you go to the Color page, click on the Magic Mask icon to display its editing features of it.
Under the timeline, you can pick the clip you wish to apply the masking to and use it to remove the background.
If you go to the top right corner of that window, you will notice two options indicated as follows:
- Object mask: Used to mask objects in the clip. But, works well for people also.
- Person mask: Used to mask persons in the clip.
Now, choose the subject you want to mask and change the type of quality to ‘better’ to work faster. Then, choose the Color Picker Add icon (Color picker with a plus icon). This allows you to select the regions you want to apply the mask to.
To apply the masking, click and drag on the regions of the subject to help the tool identify the person in the clip. It helps to automatically detect the person and cut it out from the clip.
If you want to see the mask that is applied, toggle the visibility option to look through it.
Step 03: Tracking
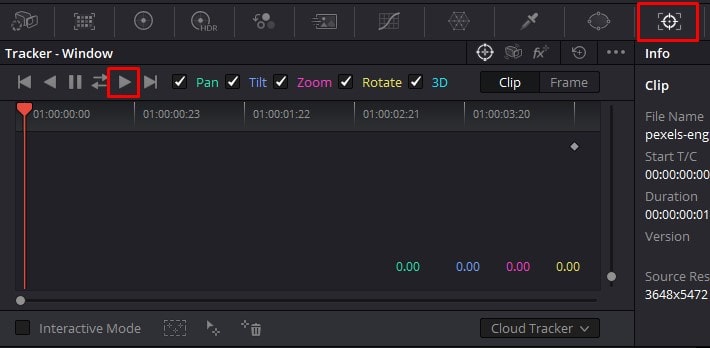
In this section, you will track the mask you created from the above steps. The tracking helps to identify the subject detected throughout the clip.
Click on the track forward button and let the mask track in a forward direction. Next, click on the track backward button and lets the mask track in the backward direction.
While you are tracking, if the tracking doesn’t end up as expected, you can pause the clip in that specific frame. Then, choose the plus or minus Qualifier tool to add or remove a section from the mask.
For example, to remove a section from masking, click on the Qualifier Subtract tool and click and drag from the preview window to remove it. Then, track the clip again.
Step 04: Exporting
In order set the clip apart and export it for other purposes, you need to add the Alpha output.
To add Alpha output,
- Right-click on the Nodes Editor.
- Choose the option ‘Add Alpha output’.
Now, connect the blue node of the Alpha output to the blue output of the clip.
Now that you have set apart the subject and background of the image, you can add another background, title, or do anything as per your requirement.
Conclusion
In conclusion, removing the background from a video clip is an essential skill for any video editor, and DaVinci Resolve 18 provides a powerful set of tools and features to accomplish this task with ease.
By following the step-by-step guide outlined in this article, you can remove the background from your videos, isolate your subjects, and create stunning composites that will take your videos to the next level.
Expert Rating
Summary
In summary, there are various ways to remove backgrounds of black, white, green or solid colors in DaVin ci Resolve 18. Depending on your requirements, follow this tutorial and start removing backgrounds from your clips in no time!


